Skip to content

Tulip Breaking Virus on Spring Bulbs: Signs, Treatment and Prevention

Tulip Breaking Virus on Spring Bulbs: Signs, Treatment and Prevention

Petals that look hand-painted with streaks, feathers or flames of a second color can be striking in a spring tulip bed, and they are often a sign of illness rather than a rare variety. The cause is a virus carried from plant to plant by aphids.

Tulip Breaking Virus: What You See

The clearest sign shows up at bloom time in spring, when the petals of a tulip that should be one solid color turn patterned.

  • Petals carry bars, stripes, streaks, feathering or flame-like patterns in a color that differs from the base shade.
  • On lighter flowers the pattern is quieter, appearing as irregular streaks or fine feathering rather than bold flames.
  • The pattern often comes up in a tulip that bloomed a plain color the year before.
  • Plants look smaller and weaker than their neighbors, even though the flower itself looks spectacular.
  • Bulbs dug from affected plants are smaller too, because the infection drains vigor from the plant and bulb alike.

Forced tulips in pots can show the same signs, so a gift bouquet or indoor pot is worth a close look.

Tulip Breaking Virus or Something Else?

Not every striped tulip is infected. Some tulips are bred with patterned petals, and a few other troubles mark petals and leaves in ways that can fool you at a glance.

The question is always whether the pattern follows the petal in streaks and feathers, and whether the plant is weaker as well.

Looks like How to tell them apart
A tulip variety bred with striped or flamed petals The pattern was there from the first spring and looks the same each year, and the plant keeps its size. Virus patterns appear on a plant that bloomed plain before, and the plant slowly shrinks.
Fungal spotting or weather damage on petals Spots, blotches or browning mark the petal and often the leaves too, while virus streaks run in clean feathers or flames through the petal color.

Faded or bleached petals after a hot, bright spell can also look odd, but the whole flower fades evenly and the leaves stay normal.

What Causes Tulip Breaking Virus, and Where It Is Worst

A virus causes the color break, and aphids move it. Several viruses affect tulips, and many species of aphids can spread them, feeding on an infected plant and then moving on to a healthy one. The aphids that matter most to the trade work in the tulip production fields of Europe, which is one reason bulbs can arrive already infected.

The virus also survives the winter inside infected bulbs. Pulling the foliage and clearing the bed does not remove it, because it lives in the bulb underground and shows up again when the plant blooms.

No region or soil type changes this. Anywhere tulips grow and aphids feed, from a Gulf Coast bed to an Upper Midwest border, the risk follows the aphids and the bulbs you bring in.

White and yellow tulips deserve extra attention. In Washington, those cultivars do not show obvious symptoms, so they can carry the virus quietly and raise the chance it reaches other tulips nearby.

How to Treat Tulip Breaking Virus

Treatment here means managing the plants, not curing them, since the virus stays in the bulb.

  1. Mark suspect plants while they are in bloom, using a stake or tag, so that you can find them again after the petals fall and the foliage blends in.
  2. Check white and yellow tulips closely as well, because in Washington they do not show obvious symptoms, and a clean-looking flower in a bed with infected neighbors is not proof of health.
  3. Dig up the marked plants with the bulb once the ground allows, so that the infected bulb is no longer there for aphids to feed from.
  4. Bag the plants and bulbs for the trash rather than the compost pile, so that nothing infected stays near your other bulbs.
  5. Wash your trowel and pruners after handling infected plants, so that sap does not travel on your tools to healthy tulips.
  6. Ask your state extension service which aphid control options are approved where you live, since that depends on local rules.

Leave the foliage of healthy tulips alone until it turns yellow on its own, because the leaves are still feeding the bulb for next year.

How to Prevent Tulip Breaking Virus Coming Back

Prevention follows the season, from the first aphids on new growth to the bulbs you buy in fall.

  • In early spring, look over new shoots and leaves regularly for aphids, since they are the link between an infected tulip and a healthy one.
  • When the tulips bloom, walk the bed and tag any flower with streaks or flames, because this is the stage when the signs are easiest to see.
  • After bloom, remove the tagged plants and leave healthy foliage in place until it yellows, so that the good bulbs refill for the following year.
  • In fall, plant only firm, healthy bulbs from a source you trust, and set aside any that look off before they go into the ground.
  • Whenever you finish working among infected plants, clean your tools before moving to healthy beds.

Planting new bulbs apart from older ones that had trouble gives you an easy way to see where any problem starts.

Where This Comes From

Your state extension service can confirm what applies in your area, including which aphid controls are approved where you garden.

Common Questions

Can You Buy Tulip Bulbs with Broken Color?

Trade in broken bulbs is restricted to prevent widespread outbreaks, so a reputable supplier will not sell them as healthy stock. A tulip that looks striped in the catalog is a bred variety, not an infected plant.

Who Figured Out What Causes the Color Break?

For a long time a virus was presumed to be responsible, but nobody knew what made a flower break, only that it ended up weakened. Dorothy Cayley found that transferring infected tissue from broken bulbs to healthy ones while they were dormant passed the virus along. The next year she showed that aphids were the carrier.

Can Potted Forced Tulips Have It Too?

Yes. Forced tulips can show the same streaks and flames, and like most years several plants in a batch have shown signs. If a potted tulip looks patterned, keep it away from your garden beds, and do not plant it outside.
Root Rot on Spring Bulbs: Signs, Treatment and Prevention

Root Rot on Spring Bulbs: Signs, Treatment and Prevention

A tulip or daffodil shoot that never breaks the soil in spring, or one that pokes up and then flops, often has a rotted base underground. Root rot on spring bulbs is a soil fungus problem that starts where the roots meet the bulb. Knowing what it looks like and what feeds it keeps one bad patch from becoming a bed of failures.

Root Rot: What You See

Most of the damage happens out of sight, so the clues are what the plants fail to do and what a dug-up bulb looks like.

  • The base of the bulb, the flat plate where roots emerge, is where the fungus usually attacks, so a dug bulb that is decayed there points straight to root rot.
  • Shoots fail to emerge in spring, leaving gaps in a planting where bulbs went in the fall.
  • Shoots emerge, then wilt soon after, as if they were short of water in damp soil.
  • Plants stay leafy but fail to flower, which suggests the roots cannot feed the bud.
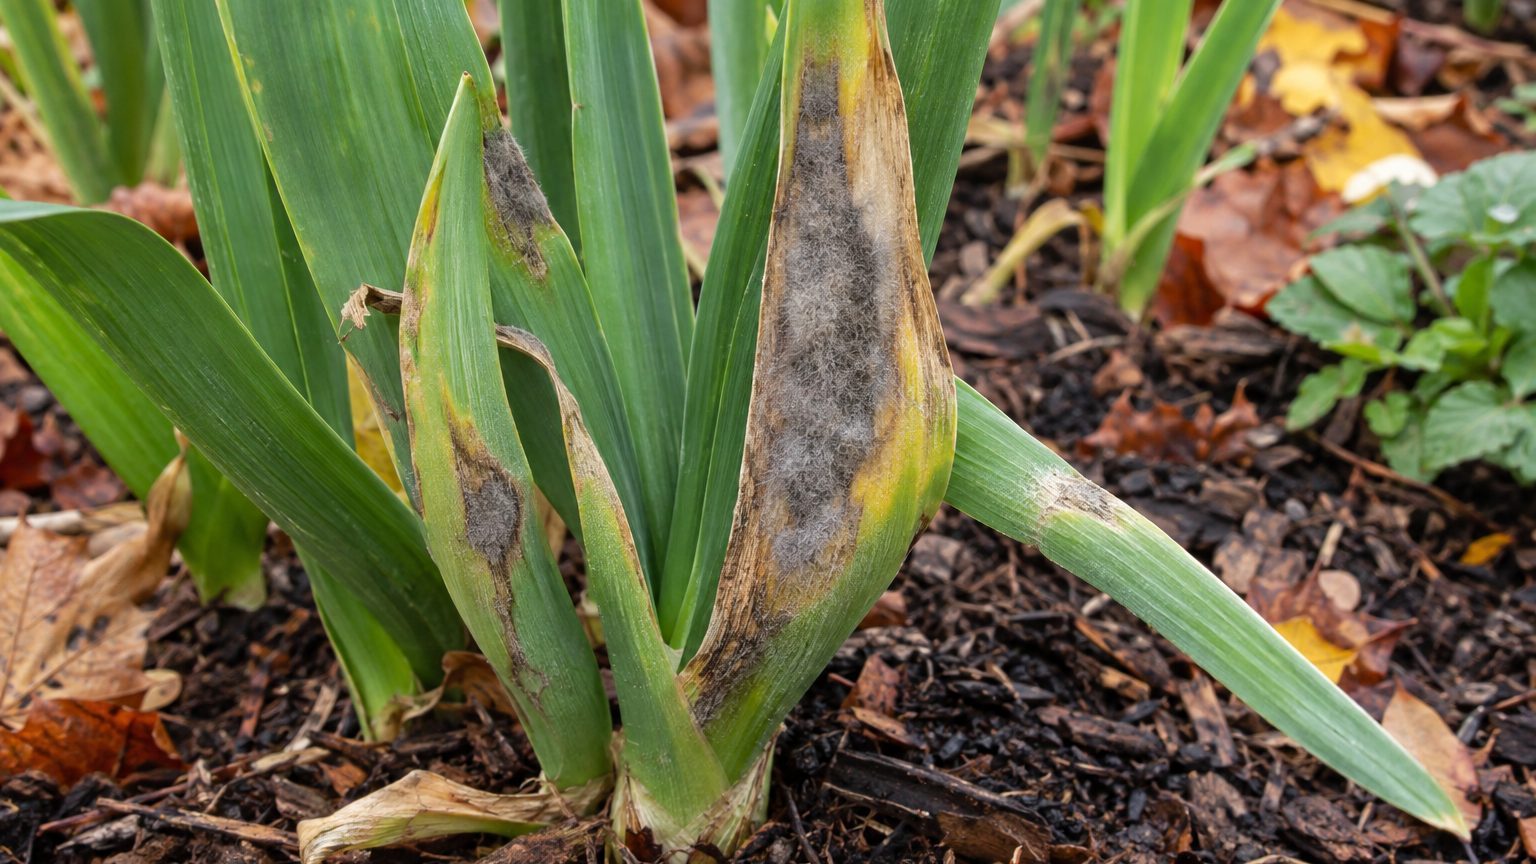
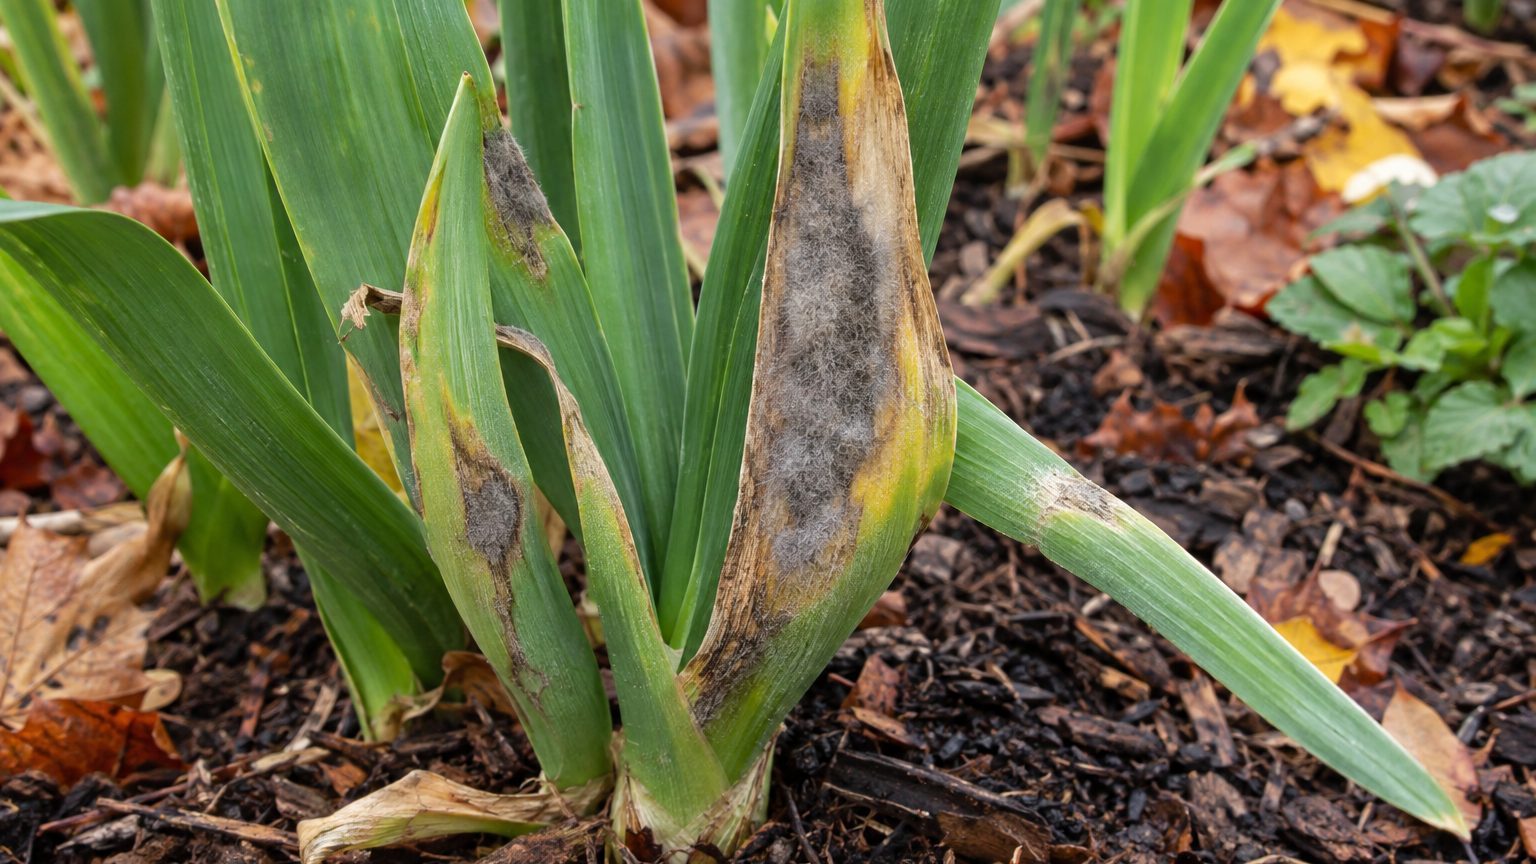
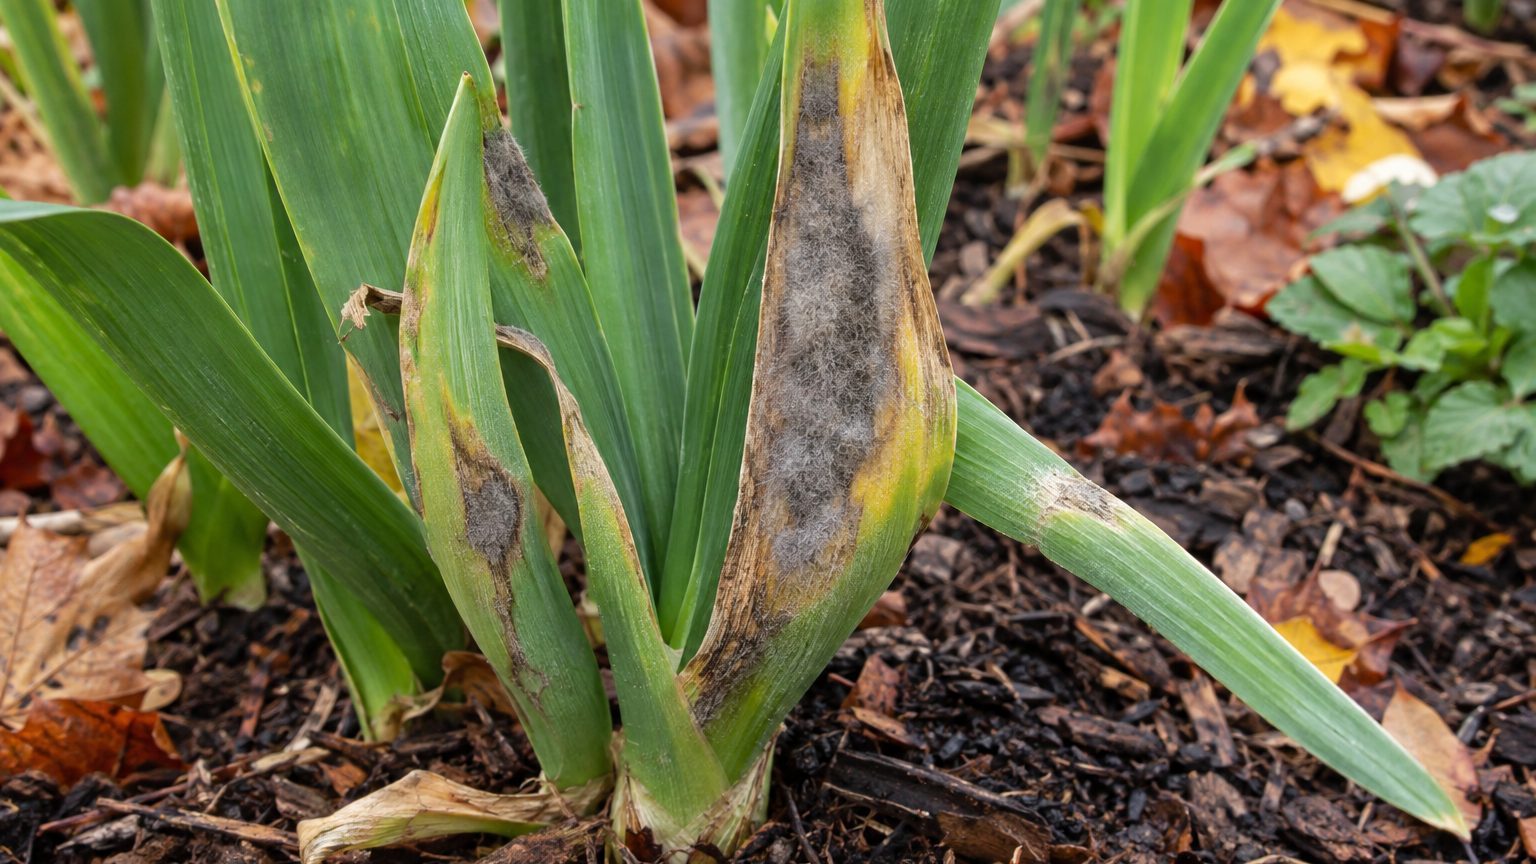
  • Bulbs and roots that have turned grayish, dried and shriveled, sometimes with felty masses between the scales and rot working from the top down, point to a related bulb rot.
  • Shoots that die in late winter before they ever show are another sign of rot below ground.

Digging up one doubtful plant and looking at its base tells you far more than the foliage can.

Root Rot or Something Else?

Bulb plants fail for several reasons, and two other rots can look a lot like root rot from above. Each has its own starting point, so look at where the decay begins and what the weather and handling were like.

Checking both clues together keeps you from pulling healthy bulbs or ignoring a real problem.

Looks like How to tell them apart
Brown lesions and decay on leaves, stems or flowers Gray mold begins on dead or fading tissue such as spent petals, then moves into healthy parts, and crowded plantings with poor airflow make it worse.
Soft, collapsing bulb tissue Soft-rot bacteria get in through wounds from digging, planting or hail, and rain, waterlogged soil and warm weather favor them.

Gray bulb rot, which comes from a different fungus, can resemble root rot as well. Its felty masses between the scales and its top-down decay set it apart from a rot that begins at the base.

What Causes Root Rot, and Where It Is Worst

On narcissus, basal rot comes from the fungus Fusarium oxysporum f. sp. narcissi. It survives in the soil as microscopic spores called chlamydospores, waiting for a host. In Oregon, the fungus becomes active in early spring or early summer, once soil temperatures rise about 55 degrees Fahrenheit.

Wounds give it an easy way in, including injuries made when bulbs are harvested. Fusarium and similar fungi also overwinter on diseased plant tissue left from the year before, which is why Connecticut gardeners are told to keep beds clean.

Wet soil is the common thread, because these fungi thrive where water stands or floods, so a low corner, a bed at the bottom of a slope or heavy ground that stays soggy is where trouble tends to show up.

How to Treat Root Rot

Once a bulb is infected there is no saving it, so the work is removing it and protecting what is left.

  1. Pull up any plant that fails to emerge, wilts soon after emerging or does not flower, because in Connecticut the advice is to remove it rather than wait, and a rotting bulb keeps feeding the fungus.
  2. Bag the bulb with its roots and put it in the trash, since a diseased plant left in the garden sheds spores into the bed.
  3. Clear leftover plant debris from the spot, so the fungus has less diseased tissue to survive the winter on.
  4. Fix drainage where water stands, because soggy soil is where the fungus thrives and flooded beds invite it back.
  5. Work gently around nearby bulbs, so you do not nick them with a trowel and give the fungus a wound to enter.

For anything beyond cleanup, such as a treatment for the soil or the bulbs, ask your state’s extension service what is approved where you live. Labels and rules vary, and a local office can tell you what fits your bed.

How to Prevent Root Rot Coming Back

Prevention follows the bulb year, because the fungus is tied to wet soil, wounds and leftover debris.

  • In early spring, check beds after rain and break up any spot where water stands, since soggy soil is what these fungi like.
  • In early summer, when the leaves have turned yellow and you lift or divide bulbs, choose dry weather and handle them gently, because wounds made at harvest are a way in for the fungus.
  • In fall, plant into well-drained ground and avoid bruising bulbs as they go in, so the base stays intact.
  • In late fall, clean up fallen plant debris and leave diseased tissue out of the compost bin, since home bins rarely get hot enough to kill the pathogens.

Where This Comes From

The details here come from university extension and government pages, including advice written for Oregon and Connecticut. Your state’s extension service can confirm what applies where you live, including which treatments are approved locally.

Common Questions

Can You Compost Bulbs That Have Rotted?

No. Home compost bins rarely reach the temperatures needed to kill pathogens, so diseased tissue can carry the fungus into the next bed. Bag it and throw it away.

Does Planting Bulbs Close Together Cause Disease?

Crowding can. Many people plant bulbs close together like eggs in a carton, but that cuts airflow and, over time, leaves bulbs treated as perennials more open to tulip fire and gray mold. Give each bulb enough room for air to move.

How Should You Store Bulbs to Avoid Rot?

Keep storage conditions dry, since high humidity favors soft rot, and handle bulbs gently so they are not wounded when dug, packed or stored. Dig during dry weather.

Leaf Spot on Spring Bulbs: Signs, Treatment and Prevention

Leaf Spot on Spring Bulbs: Signs, Treatment and Prevention

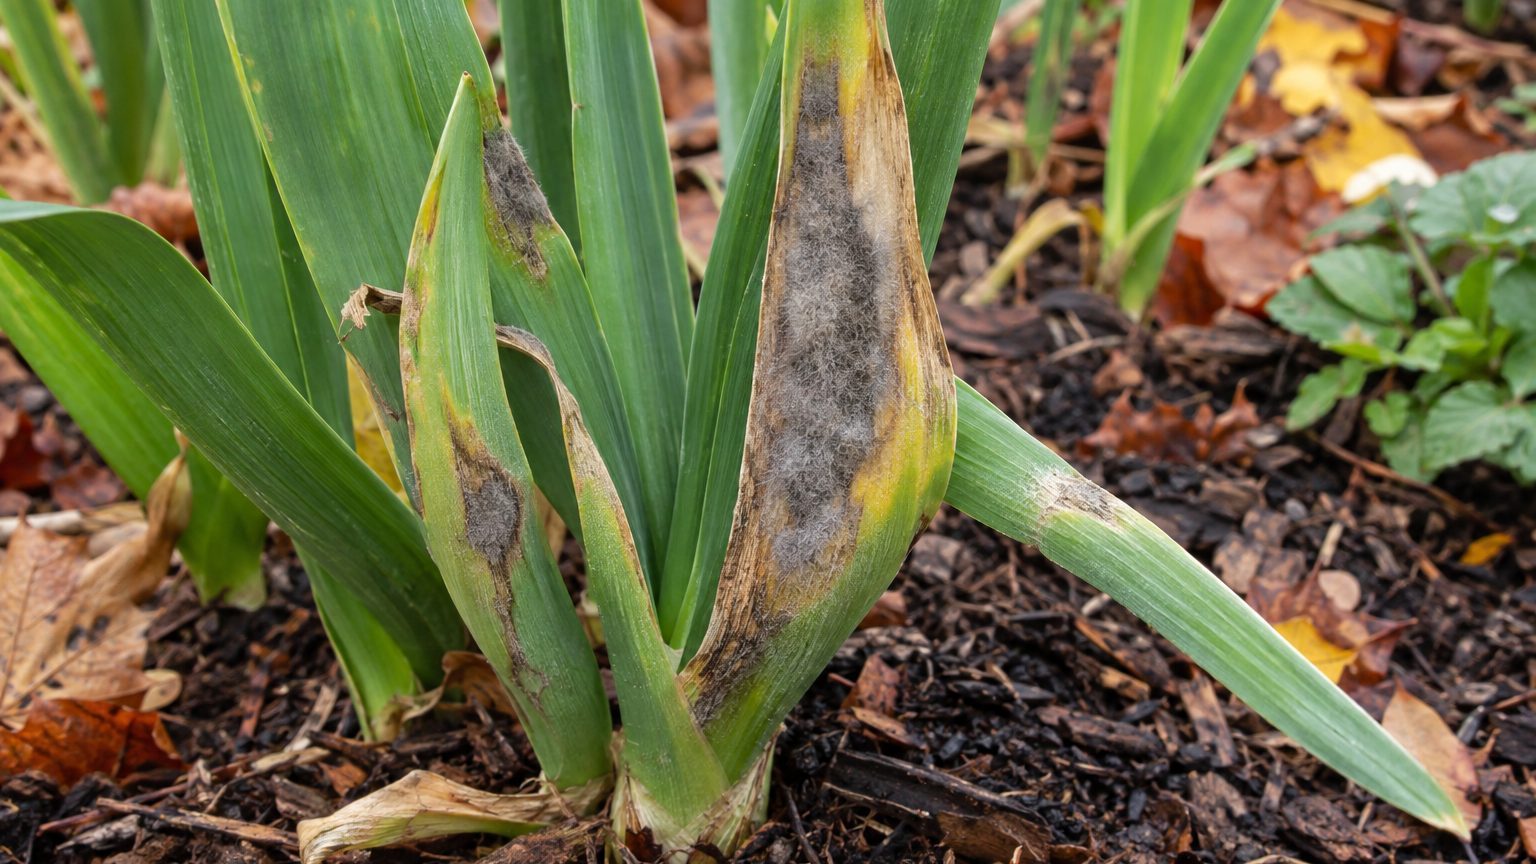
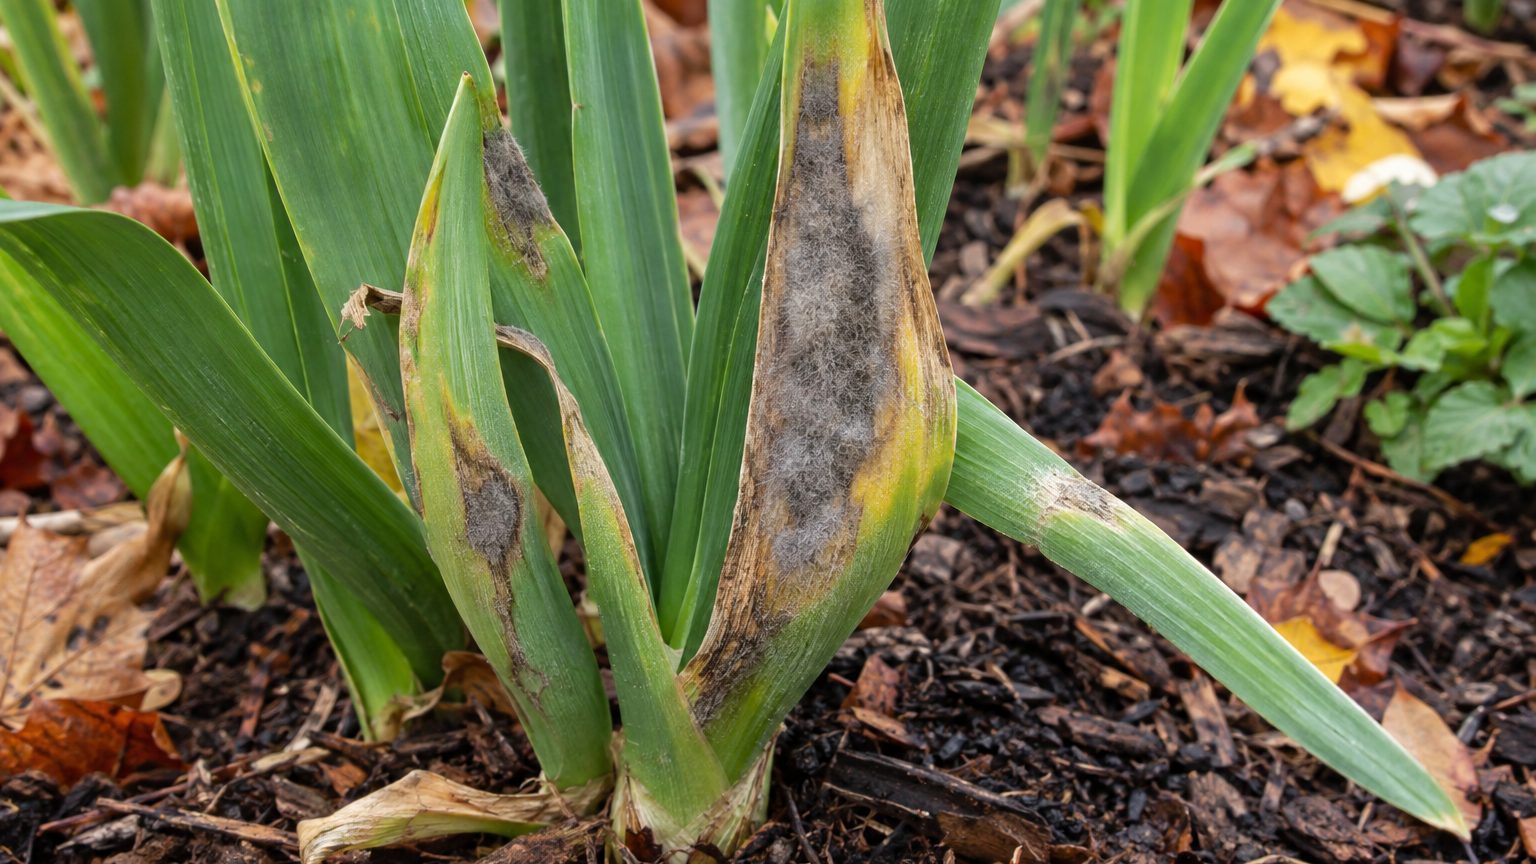
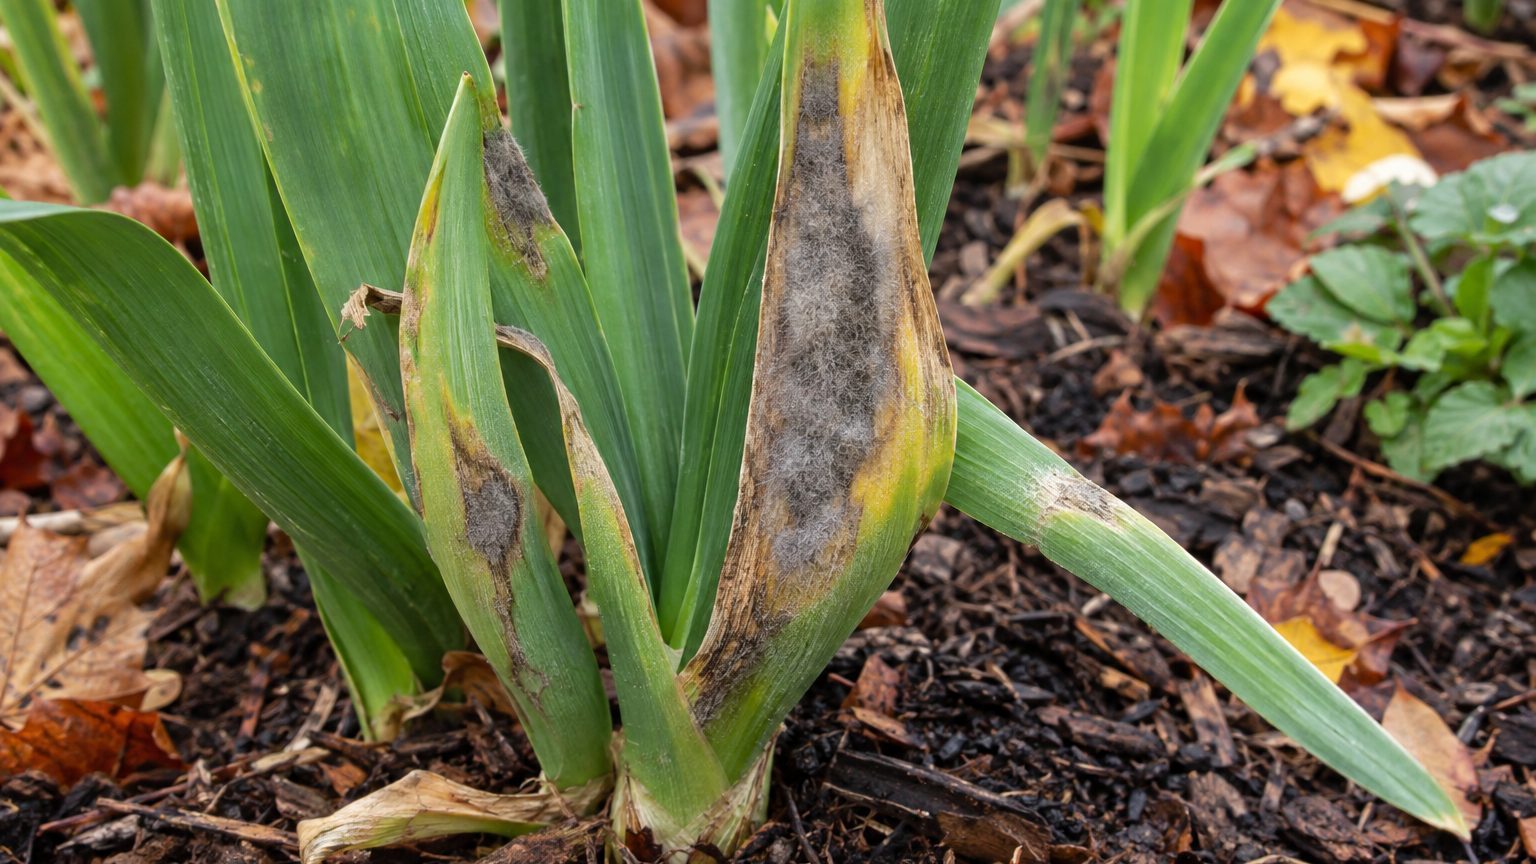
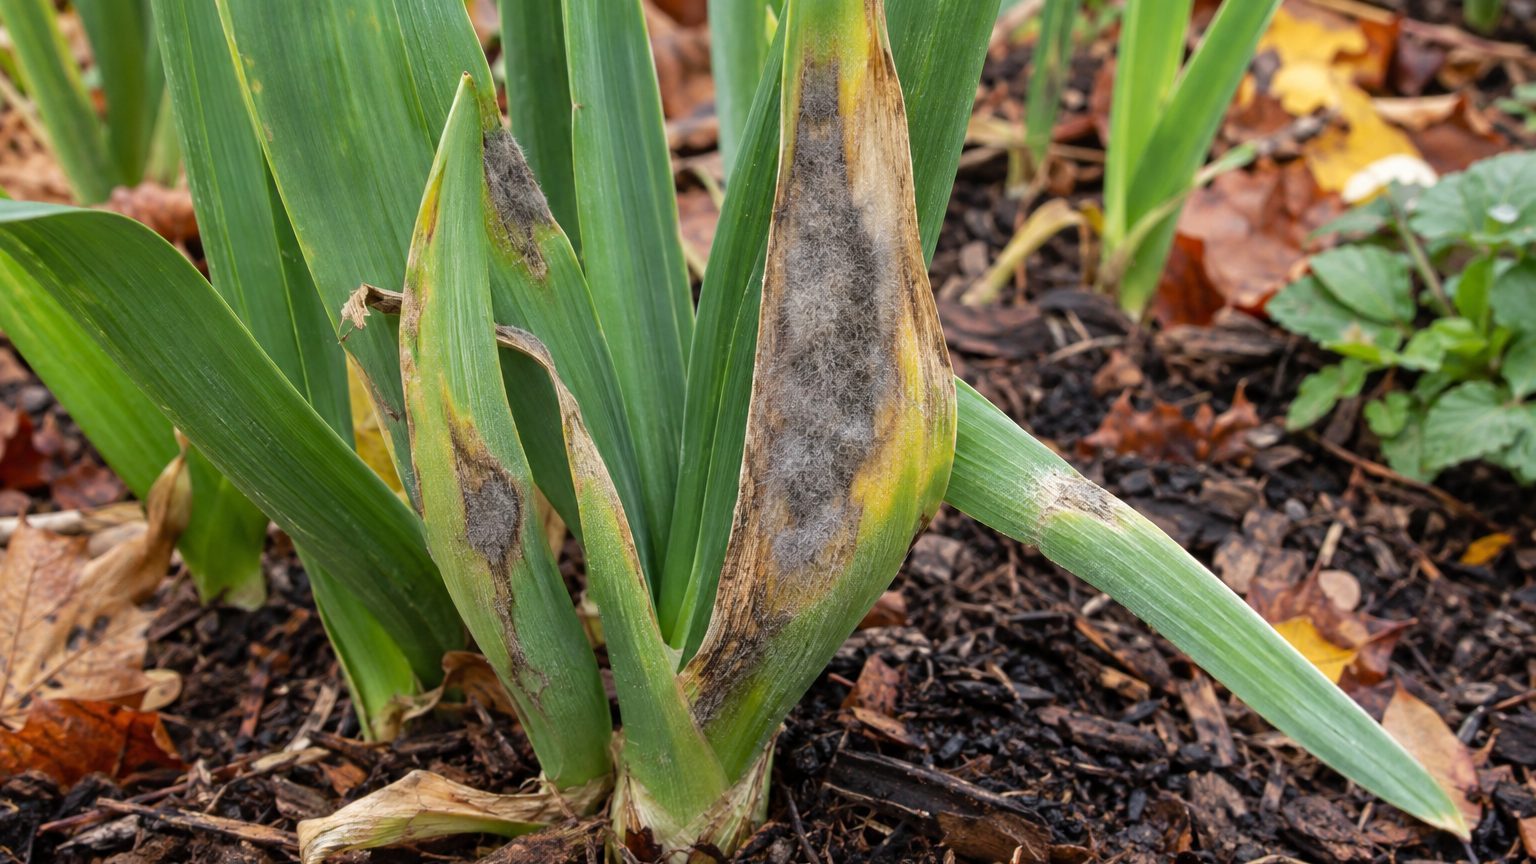
Spring bulb leaves that should look clean and green sometimes turn up with angular brown blotches, usually as the foliage fills out in the garden bed. That pattern points to leaf spot, a disease you can slow down by cleaning up affected foliage and keeping water off the leaves. Tulips, iris and their neighbors can all be hit, though the cause differs from plant to plant.

Leaf Spot: What You See

The clearest signs show up on the leaves themselves, and the shape of the spot tells you the most.

  • The spots are usually angular, and the leaf veins stop them at the edges, so they look boxy rather than round.
  • Young spots look water-soaked, then turn yellow, brown or black as they age.
  • On iris, the first spots are small and tan with water-soaked margins, and they sit near the leaf tips.
  • Spots can grow into large blotches, and the affected leaves wither and die.
  • Where infection is heavy, leaves, stems and flowers may collapse.

Check the leaf edges and the veins first, because that boxy outline is what separates leaf spot from most look-alikes.

Leaf Spot or Something Else?

Several bulb problems leave brown marks on leaves, and a spot alone does not settle the question. Pair the look of the mark with where it sits on the plant and what the weather has been doing.

Two problems are easy to mistake for leaf spot, and they call for different handling.

Looks like How to tell them apart
Botrytis blight (tulip fire) Leaf spots are small, oval and slightly sunken with a dark margin, and flowers carry light-colored oval spots. In humid weather a brown-gray mold covers the spots.
Bacterial soft rot The damage is a soft, watery decay in the bulb, crown or fleshy stem rather than a boxy spot on a leaf. The rot is below or at the base of the plant, not scattered across the blades.

Frost or hail damage on tulips is worth a second look, since in Iowa the Botrytis fungus commonly attacks tulips that have been hurt that way. Spots that spread across whole leaves in damp weather also fit that blight more than the angular, vein-bound pattern.

What Causes Leaf Spot, and Where It Is Worst

Leaf spot on bulbs comes from fungi or bacteria, depending on the plant. On iris in Virginia, a fungus called Cladosporium iridis is behind the common iris leaf spot, which gardeners there also know as Heterosporium leaf spot. It overwinters on dead iris leaves and sends spores to young foliage in spring.

Water does the moving. Rain or irrigation splashes spores from old debris onto healthy leaf tissue through the growing season, and bacteria also depend on splashing water to spread and to set up the wet film they need to infect a leaf.

No region is spared on the strength of its climate alone, so a bed that stays wet will invite trouble anywhere. In California, bacteria in this group can also ride in on infected cuttings and other propagative material, and some may be carried in seed and irrigation water, which makes the source of new plants matter as much as the weather.

How to Treat Leaf Spot

Treatment is mostly cleanup, done in an order that keeps spores from reaching healthy foliage.

  1. Cut off the leaves or plant parts that show spots, so that the disease has less tissue to spread from. Leave healthy green leaves in place until they yellow on their own, because they are still feeding the bulb.
  2. Remove and destroy plants whose foliage is diseased throughout, so that they stop shedding spores into the bed.
  3. Bag the trimmings and dispose of them away from the garden rather than dropping them on the soil, because spores overwinter on dead leaves and return to young growth.
  4. Clear fallen leaves and old debris from around the clump, so that rain has nothing to splash from.
  5. Ask your state’s extension service which fungicides or bactericides, if any, are approved where you live, since labels and rules differ from state to state.

Cutting infected material away is the control the evidence points to, and it works best when done as soon as spots appear.

How to Prevent Leaf Spot Coming Back

Prevention follows the year, because the disease lives on last season’s leaves and moves with water.

  • In early spring, as new leaves emerge, rake out last year’s dead iris foliage, since that is where spores wait to reach young leaves.
  • Through the growing season, water at the base of the plants so the leaves stay dry, because splashing water carries spores and bacteria from leaf to leaf.
  • After the foliage has turned yellow and died back, clear it away and discard it, so the fungus has no dead leaves to overwinter on.
  • In fall, when you plant or divide, start with clean, healthy bulbs and divisions, since bacteria can travel on infected propagative material.

Keep an eye on any clump that was spotted the year before, as it is the likeliest to show symptoms again.

Where This Comes From

The details here come from university extension and government plant disease pages written for gardeners in states such as Virginia, Iowa and California. Confirm timing, product approvals and local conditions with your own state’s extension service.

Common Questions

Does Leaf Spot Hurt the Bulb Underground?

It can, indirectly. When leaves die early, the bulb lacks the nourishment those leaves would have sent down, so the plant starts the next season weaker.

Should You Cut Back All the Leaves When You See Spots?

No. Cut only the parts that are affected and keep healthy green foliage until it turns yellow, since it feeds the bulb for next year.

Do Spots on the Flowers Mean Leaf Spot?

Not by themselves. Brown to tan flecks on flowers often go with Botrytis blight, so look at the leaf spots as well, noting whether they are small sunken ovals with dark margins or angular marks stopped by veins.

Gray Mold on Spring Bulbs: Signs, Treatment and Prevention

Gray Mold on Spring Bulbs: Signs, Treatment and Prevention

Gray, fuzzy patches on fading tulip petals or on the leaves of spring bulbs usually mean Botrytis has moved in, especially after a stretch of cool, wet weather. The fungus lives on dead and weak plant tissue first, then spreads to healthy parts. Knowing what it looks like and where it hides helps you act before the disease spreads.

Gray Mold: What You See

Gray Mold on Spring Bulbs: Signs, Treatment and Prevention

The disease looks different on each plant part, and its gray, fuzzy coating is a useful clue.

  • A gray, fuzzy coating covers aging flower blossoms, and under moist, humid conditions a thin grayish webbing of mycelium may be visible.
  • Infection usually begins as brown to gray circular spots that turn fuzzy once the fungus produces gray masses of spores.
  • On tulips, large light tan patches and malformations appear on the leaves, often sunken, yellow to light tan, and ringed by a water-soaked area.
  • Petal spots look white on colored petals and brown on white petals.
  • Bulbs and corms can rot after infection, and in garlic a gray, fuzzy mold develops between the scales.

Touch an infected plant and a cloud of spores may puff out, so handle affected tissue gently.

Gray Mold or Something Else?

Several problems leave spots or soft tissue on bulb plants. The difference usually lies in the surface of the spot and where on the plant it sits.

Gray mold also goes by another name on tulips, which sometimes causes confusion about whether two diseases are at work.

Looks like How to tell them apart
Tulip fire Spots on tulip leaves and flowers, often with dark borders that look like a burn, and sunken tan patches ringed by water-soaked tissue. This is the same Botrytis disease, so gray fuzz appears in damp, overcast weather.
Gray mold on garlic Water-soaked, yellowing tissue at the neck around harvest, then gray fuzzy mold between the scales and small black structures near the neck.

In Illinois, the disease commonly follows frost or hail injury, so a damaged plant is a likely entry point.

What Causes Gray Mold, and Where It Is Worst

The cause is a fungus, Botrytis cinerea, along with its many strains. It feeds on dead or declining tissue such as fading petals, old leaves and plant debris, then becomes more aggressive and invades healthy parts, causing brown lesions and decay.

Moisture drives infection: the wetter the plant, the more likely gray mold shows up. In Washington, cool and damp spring or summer conditions favor the disease. Poor airflow adds to its survival and growth, so crowded plantings, excessive weeds and badly chosen spots all help it along.

In Illinois, losses can be heavy during cool, wet spring weather. In Illinois, uncontrolled tulip fire can cause an almost complete loss of flowers and greatly reduce bulb yields. Misty weather or rapidly rising humidity can also trigger spore release.

How to Treat Gray Mold

Treatment starts with removing the fungus’s food supply and helping the planting dry out.

  1. Pick off diseased leaves and petals while they are dry, so that you do not spread spores on wet tissue.
  2. Bag the debris and remove it from the garden, because the fungus can overwinter in plant debris.
  3. Leave healthy green leaves in place until they turn yellow, since they feed the bulb for next year.
  4. Thin crowded plants and pull weeds around them, so that air can move and the foliage dries faster.
  5. Dig tulips that look crowded and check the bulbs, discarding any that are soft or rotting.

Avoid working among the plants when they are wet, and handle infected tissue gently to keep spore clouds down.

How to Prevent Gray Mold Coming Back

Prevention starts with dry cleanup and better airflow around the plants.

  • Clear old debris and weeds from the bed so air can move freely around the plants.
  • During bloom, remove fading flowers and petals once they dry, since the fungus colonizes dead tissue first.
  • Clean away diseased leaves and petals once they are dry, because the fungus can overwinter on plant debris.
  • Dig tulips when they appear crowded, especially where disease has been a problem, and replant them with room between bulbs.
  • Plant bulbs with more space than the egg-carton look, since close planting makes tulips susceptible to tulip fire over time when treated as perennials.

Choose a spot with open air movement, since sheltered, stagnant corners stay damp longer.

Where This Comes From

Gray mold begins on dead or declining tissue and can then invade healthy plant parts.

Common Questions

Can Gray Mold Spread from Tulips to Other Plants?

Botrytis fungi cause disease on many different host plants, and spores can drift when infected plants are disturbed. Keeping diseased debris out of the garden limits the spread.

Is Gray Mold the Same as Tulip Fire?

On tulips the disease is usually called tulip fire because of the burn-like spots on leaves and flowers. It is caused by the same Botrytis fungus.

Can an Infected Bulb Be Saved?

Bulbs and corms can rot once infected, so soft or decayed ones are best discarded. Firm, healthy bulbs can be replanted with more space around them.

Fusarium Basal Rot on Spring Bulbs: Signs, Treatment and Prevention

Fusarium Basal Rot on Spring Bulbs: Signs, Treatment and Prevention

Fusarium basal rot is a fungal disease that rots a bulb from its base. You can recognize it by checking the leaves and the base of a lifted bulb, then reduce the risk through careful soil management.

Fusarium Basal Rot: What You See

Above ground the clues are subtle, and the real evidence turns up when you lift a bulb and look at its base.

  • Red or brown discoloration starts at the basal plate, the flat base of the bulb where the roots attach, and a bulb cut vertically shows that brown color inside the base.
  • White mold grows on the roots and on the bottom of the bulb.
  • Leaves turn yellow and then die back, often ahead of the normal fading.
  • In later stages the basal plate becomes pitted and dry-rotted.
  • Bulbs can keep rotting in storage.

Daffodil is among the garden plants this fungus is known to attack, so a clump that fades early deserves a closer look at the base of its bulbs.

Fusarium Basal Rot or Something Else?

Yellow leaves alone prove nothing, because many problems begin that way. Other Fusarium diseases can look similar, and checking the stem and the base of the bulb helps separate them.

Looks like How to tell them apart
Fusarium wilt on garden flowers Foliage yellows, wilts and turns brown, with older leaves going first. Cutting into the stem shows brown conducting tissue, and in California a cross-section of the basal stem may show brown rings.
Basal rot on onion and garlic Leaves curl, yellow and die back, much like on a bulb. The rot is found on Allium crops, with red-brown discoloration along the edge where roots meet the basal plate.

On a spring bulb, a red or brown base together with white mold on the roots matches the signs of Fusarium basal rot. Wilt shows its damage in the stem, while the bulb disease shows it at the bottom of the bulb.

What Causes Fusarium Basal Rot, and Where It Is Worst

The cause is a fungus, Fusarium oxysporum f. sp. narcissi, which lives in the soil as microscopic spores called chlamydospores. These spores can sit in the ground for long periods with no host plant at all, so a bed that once held infected bulbs stays a risk after the bulbs are gone.

Warmth wakes the fungus. In Oregon, it becomes active in early spring or early summer once the soil climbs above about 55 degrees Fahrenheit. Warmer soil speeds it along, and when the temperature moves from 77 °F to 84 °F the spores multiply and can infect.

The fungus enters through wounds on the roots or the basal plate, which is why damage during harvest or digging matters. It is usually introduced through infected seed or soil. As the bulb rots, water and nutrients can no longer reach the leaves, and the foliage declines. Infested soil can remain a risk after infected bulbs are gone.

How to Treat Fusarium Basal Rot

A bulb that is already rotting cannot be restored, so the work is to find affected bulbs early and protect the healthy ones.

  1. Dig up bulbs from a clump that yellows early, using a fork well away from the plant, so the base is not nicked and the fungus gets no new entry point.
  2. Cut a suspect bulb open from top to bottom, because brown discoloration spreading from the base is more informative than the leaves alone.
  3. Discard soft, pitted or discolored bulbs in the trash rather than the compost pile, since the spores survive in the soil for long periods.
  4. Handle firm bulbs gently, because wounds give the fungus an entry point and rotting can continue in storage.
  5. Replant sound bulbs promptly in fertile, well-drained soil that has not held diseased bulbs, since soggy or infested ground gives the fungus an advantage.

Leave leaves on healthy plants alone until they turn yellow on their own, as they are still feeding the bulb. Check local guidance before using a fungicide.

How to Prevent Fusarium Basal Rot Coming Back

Prevention follows the bulb through growth, lifting, storage and planting.

  • In Oregon, watch clumps in early spring or early summer as the soil warms and the fungus becomes active.
  • When the leaves have yellowed naturally and you lift or divide bulbs, work slowly with a fork, since cuts and bruises at the base are the way in.
  • After lifting, sort bulbs and throw out any with a brown base, so that rot does not carry on in storage.
  • At fall planting, choose firm, clean bulbs and set them in fertile, well-drained soil that has no history of wilt.
  • When a clump has been lost to rot, plant something else in that spot, as the spores can wait in the soil without a host.

Buy clean bulbs and keep infected material out of the soil.

Where This Comes From

Check local guidance to confirm which treatments are approved where you live.

Common Questions

Does White Mold on a Bulb Always Mean Fusarium?

Not by itself. White growth on the roots and bottom of the bulb points to this disease when the bulb also shows a red or brown base once cut open. If the signs do not appear together, other decay could be responsible; seek local help with identification.

What Happens Inside the Plant as the Bulb Rots?

The rot at the base blocks the movement of water and nutrients up to the leaves. That is why foliage yellows and dies back as the rot blocks water and nutrients at the base.

Which Other Garden Plants Can Be Hit by Fusarium Rot?

Fusarium oxysporum is known to attack herbaceous ornamentals such as aster, carnation, chrysanthemum, cyclamen, daffodil, dahlia, freesia and gladiolus. Onion and garlic have their own form of basal rot, so keep an eye on them too.

Bulb Rot on Spring Bulbs: Signs, Treatment and Prevention

Bulb Rot on Spring Bulbs: Signs, Treatment and Prevention

A tulip bulb that never sends up a shoot, or a stalk that flops over at the base in spring, often points to rot underground. The cause is usually a fungus, a bacterium or a nematode working on a bulb that sits in wet soil. Knowing the signs lets you act before it spreads through the bed.

Bulb Rot: What You See

Most of the damage happens out of sight, so the first clues are usually on the plant above ground or on the bulb once you lift it.

  • A bulb that rots in the ground produces no stem at all when the infection starts early, because the rot moves up from the roots through the base of the bulb.
  • A stalk that rises and then collapses with a rotted base (shanking) never opens a flower.
  • Small yellow flecks show on the outer surface of the bulb, then turn sunken.
  • Those spots run together as the bulb rots, and a foul odor comes with it.
  • Discolored patches and a soft, spongy decay can spread through the bulb when nematodes or bacteria are the cause.

In the worst cases the whole bulb is colonized and rots where it was planted, leaving only a mushy shell when you dig it up.

Bulb Rot or Something Else?

A weak or odd-looking plant does not always mean rot. Some problems affect only the leaves and flowers while the bulb stays firm, so a quick look at the bulb itself sorts things out.

Check the pattern on the plant, then check the bulb. A firm, healthy bulb with a streaked flower points away from rot.

Looks like How to tell them apart
Virus (flower break or mosaic) White streaks break up the petal color and the foliage shows yellow mottling, while the bulb itself is not soft or foul smelling.
Bulb that failed to grow No stem appears, but a bulb dug from wet, heavy soil that is soft with a foul odor is rot, not a planting failure.

Bulbs injured before planting can look sound from the outside, so a cut or bruise on a soft bulb also points toward rot rather than a leaf problem.

What Causes Bulb Rot, and Where It Is Worst

Several fungi, nematodes and bacteria can attack tulip and daffodil bulbs. Diseases named in this group include basal rot, black slime, blue mold and crown rot. Moist conditions favor infection, and water is what lets bacteria enter and spread.

Bulbs planted in heavy, continually wet soil are the most exposed to Phytophthora, whose spores are drawn to the bulb as soon as it makes roots. Soil fungi also get in more easily through injured bulbs, so nicks from digging or handling matter.

Wet ground is the common thread. In Western Oregon’s wet climate, raised beds or berms improve drainage and reduce rot risk. In drier regions, a bed that gets regular water, such as one beside a lawn that is sprinkled often, needs well-drained soil for the same reason.

How to Treat Bulb Rot

Once a bulb is rotting, it cannot be saved, so the work is about removing it and protecting the neighbors.

  1. Dig up any bulb that is soft, sunken or foul smelling, so that the decay does not reach healthy bulbs nearby.
  2. Destroy the infected bulbs rather than composting them, because the pathogens can carry on and build up in the soil.
  3. Dig carefully around the rest, since wounds give soil fungi an easy way in.
  4. Check the soil for pooling and improve drainage before replanting, since infection is favored by moist conditions.
  5. Control insect and mite pests in the bed, which also helps limit the damage to bulbs.

For any fungicide or other treatment, ask your state’s cooperative extension office, since they know what is approved where you live.

How to Prevent Bulb Rot Coming Back

Prevention follows the year, from choosing the planting spot to handling bulbs gently.

  • Before fall planting, choose a spot in full sun with well-drained soil, and skip any area where water pools during winter.
  • At planting time, handle bulbs gently and avoid unnecessary injury, because soil-borne fungi invade damaged bulbs more easily.
  • In fall, where the bed holds moisture, build a raised bed or berm so the roots stay out of standing water.
  • Through winter and wet spells, keep an eye on the bed for puddles, since bulbs in continually wet soil are the most susceptible.
  • Whenever you replant a bed, rotate the flower beds so the soil pathogens do not build up to high levels.

Where This Comes From

Your state’s cooperative extension service can confirm which problems and treatments apply in your area.

Common Questions

How Common Is Bulb Rot in Tulips?

It is a highly damaging disease of tulips worldwide. In storage and in the field together, it accounts for 20–30% loss of bulbs in a tulip garden every year.

Can Rot Show Up Before Bulbs Are Planted?

Yes. Rot occurs in both field and storage conditions, so check bulbs before planting and discard any that are soft.

Does Bulb Rot Affect Onions and Garlic Too?

It does. Multiple bacterial pathogens can cause bulb rot in onion and garlic, with symptoms that can appear anytime between bulbing and harvest or even during storage.

Blue Mold on Spring Bulbs: Signs, Treatment and Prevention

Blue Mold on Spring Bulbs: Signs, Treatment and Prevention

Spring bulbs that come up yellow and stunted, or a bulb that feels soft with a blue-green dusty patch when you dig it, point to blue mold, a rot caused by Penicillium fungi. It rides in on damaged or diseased bulbs rather than living in your garden soil.

Blue Mold: What You See

The signs show up on the bulb itself and, sometimes, in the leaves above it.

  • Masses of blue or blue-gray fuzzy growth sit at the base or along the sides of the bulb once the disease is advanced.
  • The fleshy scales look tan or gray when you cut into an infected area.
  • Plants in the ground may come up yellowed and stunted, often with a decaying clove or bulb underneath.
  • In advanced stages, the bulb can collapse into a watery rot, usually because bacteria or yeasts move in behind the fungus.
  • Bruised or cut spots on the bulb are where the mold tends to start.

Check bulbs when you handle them for planting in fall, and look again if shoots in spring look weak. A bulb with a colored fuzz on it is already compromised, so do not plant it hoping it will recover.

Blue Mold or Something Else?

Yellow, stunted growth has many causes, and soft bulbs are not always moldy. A single clue is not enough, so pair what you see with where it sits and what the cut bulb looks like.

Looks like How to tell them apart
Watery, collapsing bulb Bacterial or yeast rot can follow blue mold, so cut the bulb open and look at the base and sides for blue or blue-gray growth, and check for tan or gray scales.
Yellow, stunted shoots in the bed Dig one up: blue mold comes with a decaying clove below, while a healthy bulb with weak leaves points to another problem.

Dust-like growth on old leaves or plant litter is a different matter. Penicillium fungi are common on dead plant debris, so mold on dead tissue alone does not mean your bulbs are infected.

What Causes Blue Mold, and Where It Is Worst

Many species of Penicillium can cause blue mold. They live on plant debris and aging plant tissue, then move into bulbs through wounds, bruises, or uncured neck tissue. In onions and garlic, that is the usual entry route, and the same wound-driven pattern shows up in lily bulbs in storage.

The usual cause of trouble in the garden is diseased planting stock. The fungus does not survive long in soil, so a bed rarely stays contaminated on its own. Spores from one bad bulb can spread to healthy bulbs and cloves during handling, especially when bulbs are cracked apart for planting, and any wound gives them a way in.

The facts here do not point to a particular region, so treat blue mold as a risk anywhere bulbs are stored, handled, and planted. In Maine, yellowed and stunted plants with a decaying clove are the field symptoms described. In California, the watery rot of advanced stages is described.

How to Treat Blue Mold

Once a bulb is moldy, the job is to remove it and protect the healthy ones around it.

  1. Dig up any yellowed, stunted plant and check the bulb, so that you confirm blue or blue-gray growth and tan or gray scales before deciding.
  2. Remove infected bulbs and throw them in the trash, not the compost, so that spores do not spread to the rest of the garden.
  3. Handle remaining bulbs gently and set aside any with cuts or bruises, since wounds are how the fungus gets in.
  4. Clean your hands and tools after touching a moldy bulb, so that spores do not travel to healthy ones.
  5. Replant only firm, clean bulbs as soon as the ground can be dug, so that they settle in instead of sitting in storage.

The fungus does not last long in soil, so a bed where bulbs were lost can usually be replanted with healthy stock. For any fungicide, ask your state’s cooperative extension service what is approved where you live.

How to Prevent Blue Mold Coming Back

Most prevention comes down to buying clean bulbs and keeping them undamaged.

  • When you buy bulbs in late summer or early fall, pick firm ones with no soft spots, cuts, or colored fuzz.
  • Before planting in fall, look over each bulb and discard any that are bruised or show blue-gray growth.
  • While you plant, handle bulbs and cloves carefully and avoid cracking or nicking them, because wounds are entry points for spores.
  • If you store bulbs before planting, keep them somewhere dry and airy, and check them regularly for mold.
  • In spring, leave the foliage until it turns yellow so the bulb feeds for next year, and remove only the plants that are weak and rotting below ground.

Careful handling does more good than anything you apply, since the wound is what lets the fungus in.

Where This Comes From

These notes draw on university extension and government plant disease pages. Your state’s cooperative extension service can confirm a diagnosis and tell you which treatments are approved where you live.

Common Questions

Can You Plant a Bulb That Has a Little Blue Mold on It?

No. Blue or blue-gray growth means the bulb is infected, and its spores can spread to healthy bulbs nearby. Cut it open if you are unsure, then discard it if you see tan or gray scales.

Will Blue Mold Stay in the Soil After You Pull a Bad Bulb?

Not for long. The fungus does not survive long in soil, so infected planting stock is the usual cause of trouble. Removing the bad bulb and replanting with clean ones is a sound approach.

Is Mold on Old Leaves a Sign Your Bulbs Are Sick?

Not by itself. Penicillium fungi are common on plant debris and aging tissue. Look at the bulb below for blue growth at the base or sides before worrying.

Triumph Tulip: Bloom Time, Height, Zones and Care

Triumph Tulip: Bloom Time, Height, Zones and Care

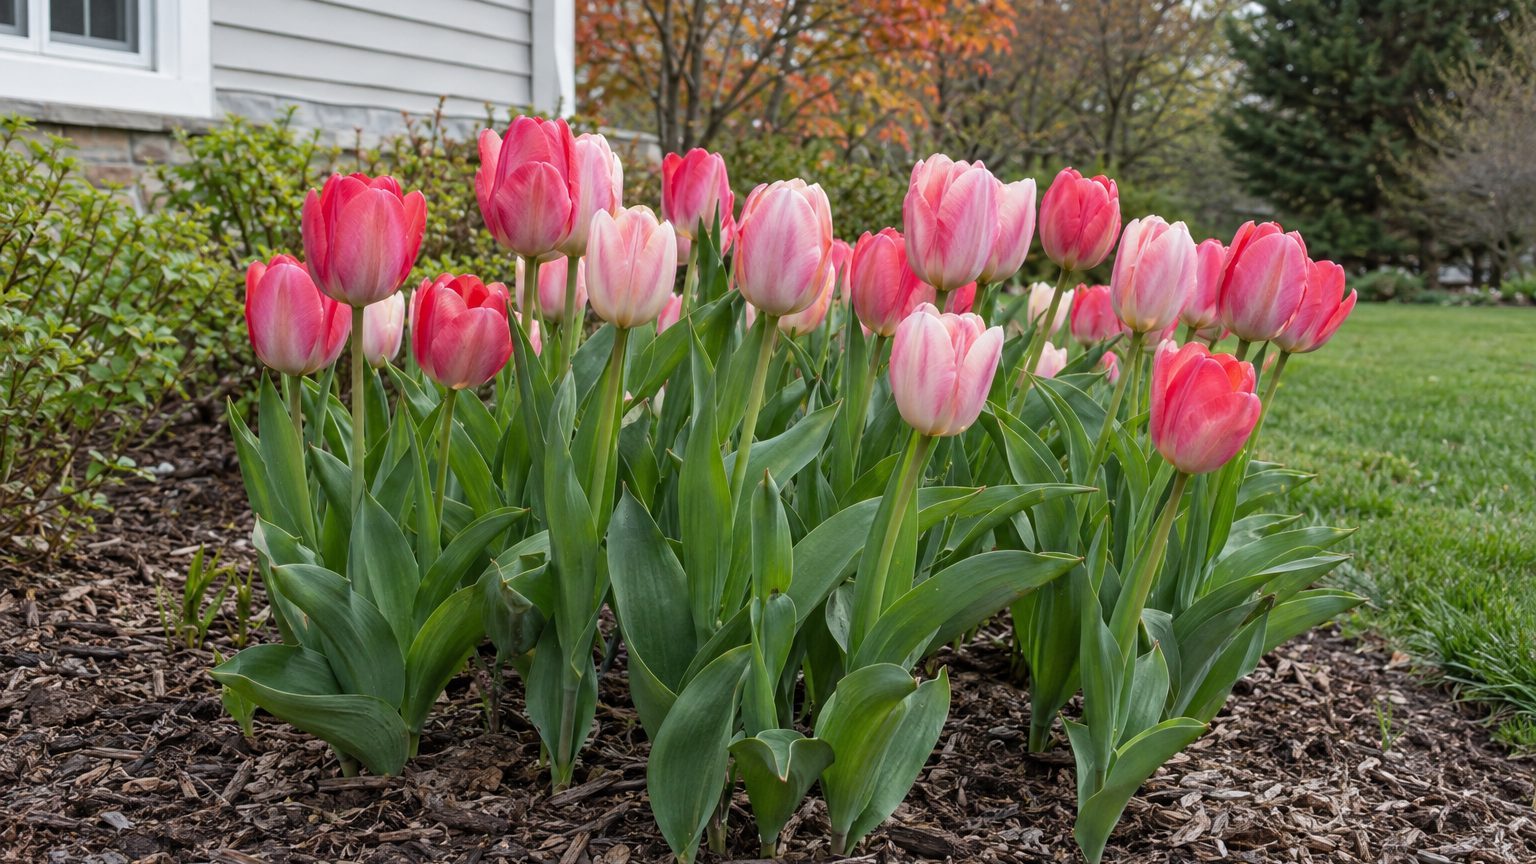
A row of tulips on strong, medium-length stems, each topped with a cup-shaped bloom, is what a Triumph tulip delivers in spring. The bulbs go in the ground in fall and ask little of you until then.

What Is the Triumph Tulip?

Triumph tulips belong to Division 3, a group that makes cup-shaped flowers on strong, medium-length stems. The sturdy stems matter in a front bed, because blooms stay upright instead of leaning over in spring wind and rain.

Plants average 10 to 16 inches tall, which puts them in the middle of a border, taller than a dwarf bulb and shorter than the tall stems of a cut-flower tulip.

Division 3 is one of the largest tulip groups and offers the widest range of flower colors. That makes it easy to find a shade that suits your house, and to plant a block of one color for a bold effect.

Where Does the Triumph Tulip Grow Best?

Hardiness zones for this tulip are best read from the tag on the bulb package, then matched to the planting months on your state page. Winter cold is what the bulb needs most, so a zone that gives a real winter is where it settles in.

Give it a spot that gets full sun in spring and soil that drains well. Bulbs sitting in water through the cold months tend to rot, so a raised bed or a gentle slope helps if your soil stays wet.

Tulips planted under deciduous trees often do fine, since the branches are bare when the flowers need light. A bed against a south or west wall warms early and can bring flowers on sooner.

How to Plant and Care for the Triumph Tulip Through the Year

Fall Planting

Plant once the soil has cooled below about 60°F. That gives roots time to form before the ground freezes, yet keeps the bulbs from sprouting in fall. Set each bulb pointed end up, and plant in clumps rather than single file so the color reads from the street.

Winter

Winter does the work for you. Cold sets the bulb up to flower, and a layer of mulch over the bed evens out thawing and freezing. Nothing else is needed until shoots appear.

Spring Bloom

Flowers open on stems that stay upright, and they make good cut flowers for a vase. If you cut stems, leave some foliage on the plant. Once petals fade, pinch off only the spent flowers.

After Bloom

Leave the leaves on the plant until they turn brown, because they feed the bulb for next year. Do not cut or tie them while they are green. Tuck annuals or perennials in front of the tulips to hide the fading foliage.

Summer

Once the foliage has browned and come away easily, the bed can be tidied. The bulb rests underground, so choose neighbors that do not need heavy summer watering, and avoid digging in the spot where the bulbs sleep.

Triumph Tulip Weak Points: Animals, Diseases and Staying Power

Triumph tulips are short-term perennials. Most cultivars bloom for only a few years, so plan to refresh the planting rather than count on a permanent display.

Animals are the other weak point. Voles, squirrels, rabbits and deer all eat tulips, so a bed in open view of wildlife may lose bulbs before it ever flowers.

Issue How the Triumph Tulip handles it
Voles, squirrels, rabbits and deer Eaten by all of them, unlike daffodils, which are left alone
Return year after year Short-term perennial, blooming only a few years in most cultivars
Forcing in pots Excellent for forcing

Forcing is where this tulip pays off even when the garden bed fades. Potted bulbs can be chilled and brought to bloom indoors, which suits a gardener who wants flowers inside before spring arrives outside.

Is the Triumph Tulip Right for Your Yard?

It suits a yard with sun, well-drained soil and a real winter, and it rewards anyone who wants bold color on mid-height stems. It suits less well a yard with heavy animal pressure, or a gardener who wants a bulb that returns without effort.

  • If you want flowers for a vase or an indoor display, pot some bulbs for forcing and plant the rest in a sunny bed.
  • If deer, voles or squirrels visit often, plant daffodils alongside, since daffodils are left alone and last longer as perennials.
  • Before you buy bulbs, open your state page to see which planting months fit your yard.

Common Questions

Can You Plant a Triumph Tulip Bulb That Is Still in the Bag?

Yes. A bulb left in the bag does better planted late than stored over winter, so plant it as long as the ground can be dug.

How Long Do Triumph Tulips Need Cold to Flower?

Most spring-flowering bulbs need about 12 to 16 weeks of cold. Where winters are too mild to give it, tulips are chilled in the refrigerator before planting.

Do Triumph Tulips Need the Same Chilling as Alliums?

Yes. According to Iowa State University Extension, alliums need the cold of winter to bloom, and tulips depend on winter cold, so a mild-winter yard calls for pre-chilled bulbs.

Tete-a-Tete Daffodil: Bloom Time, Height, Zones and Care

Tete-a-Tete Daffodil: Bloom Time, Height, Zones and Care

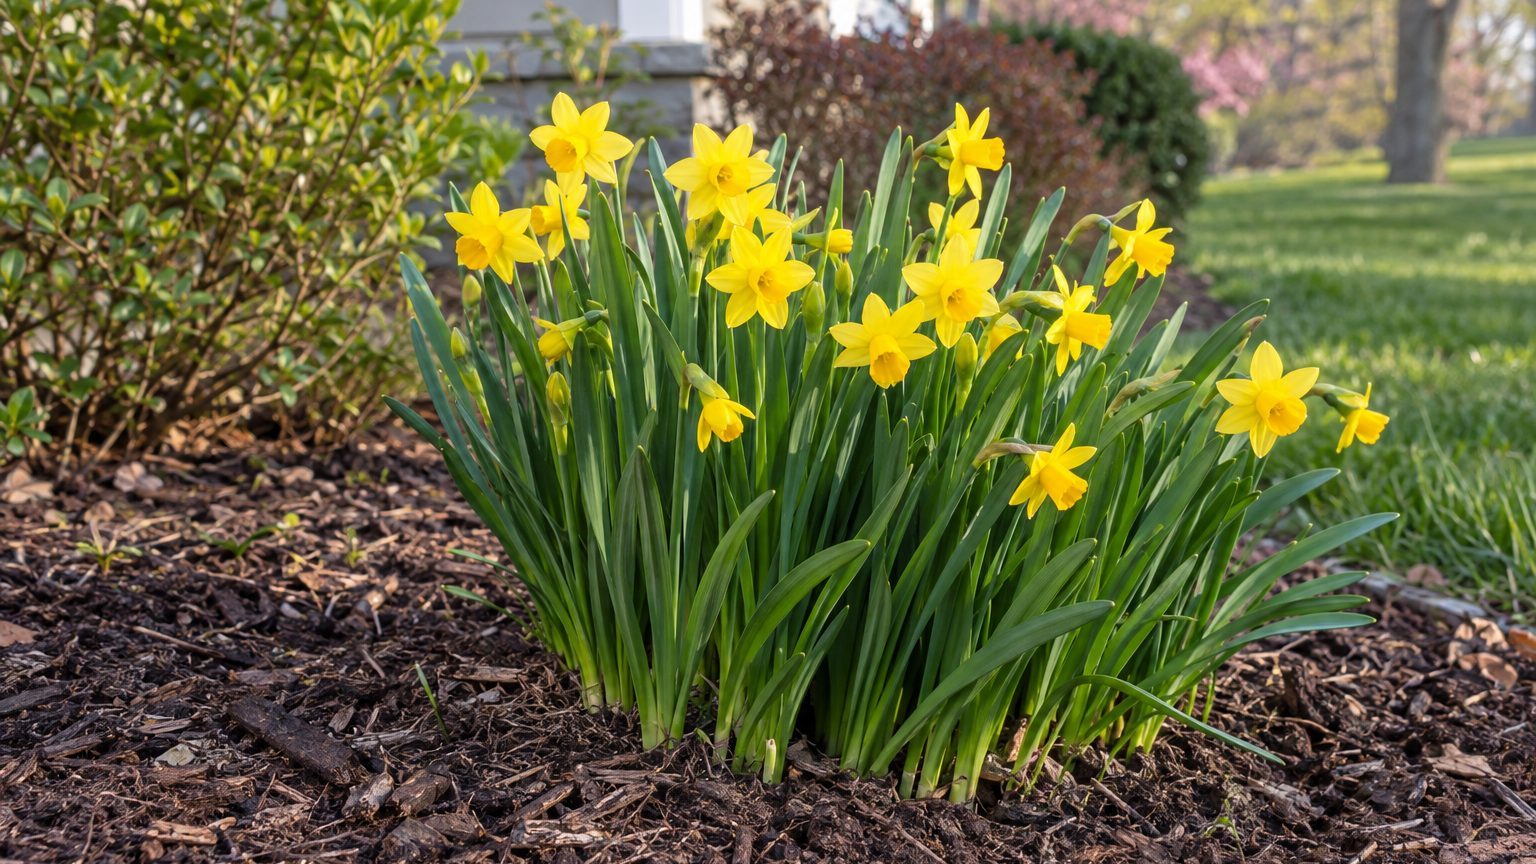
Little gold daffodils on six-inch stems open while the garden still looks mostly brown, and that early color is what draws people to Tete-a-Tete. It is a miniature, reliable bulb that suits front beds, borders and pots.

What Is the Tete-a-Tete Daffodil?

Tete-a-Tete is a dwarf daffodil that stands only about six inches tall. Each stem carries 1 to 3 flowers with yellow petals and a yellow-orange corona. Its low height makes it easy to see at the front of a bed.

A daffodil society places it in Division 12, a miscellaneous class for selections that do not fit the other groups. Its foliage is tidy and only about eight inches long.

In most years, Tete-a-Tete is the first daffodil to bloom, appearing about the first of March. Timing shifts with the local climate, so a cold spring holds the flowers back and a mild one brings them sooner.

Where Does the Tete-a-Tete Daffodil Grow Best?

In Iowa, Tete-a-Tete is hardy throughout the state, which covers USDA hardiness zones 4 and 5. That confirms the bulb is hardy throughout Iowa.

It is easy to grow in full sun or part shade.

Outside Iowa, check your state page before planting. The plant tag or bulb package will also confirm how a particular lot is rated.

How to Plant and Care for the Tete-a-Tete Daffodil Through the Year

Fall Planting

Plant once the soil has cooled below about 60°F. That gives the roots time to form before the ground freezes, yet keeps the bulbs from sprouting in the fall. Set the bulbs where their low flowers will be easy to see. The package lists the planting depth.

Winter

Winter is the quiet stretch. The bulbs sit underground, and the cold is part of what prepares them to flower. Leave the bed alone, and mark the spot so spring digging or fall planting nearby does not slice into the clump.

Spring Bloom

The small gold flowers open early in the season. The stems are short and sturdy. Plant them where you will notice them from a window or walkway, since they are easy to miss from a distance.

After the Bloom

Remove only the faded flowers and leave the leaves until they turn brown. Let other spring plantings grow up around the fading foliage so it is hidden without being cut.

Summer

By summer the foliage has died back and the bulbs rest below ground. This is a quiet time to think about crowding, since Tete-a-Tete multiplies freely and should be divided every 5 to 10 years.

Tete-a-Tete Daffodil Weak Points: Animals, Diseases and Staying Power

Tete-a-Tete has few weak points in the garden. Animals that raid other bulbs generally pass daffodils by, and the clump grows denser each year rather than fading.

The one thing to manage is its own success. A bulb that multiplies this freely eventually needs more room.

Issue How the Tete-a-Tete Daffodil handles it
Voles, squirrels, rabbits and deer Left alone, unlike tulips and crocus
Returning each year Branches freely and makes new bulbs each season
Flowering over time Keeps flowering freely year after year
Crowded clumps Divide every 5 to 10 years

That makes it a sensible bulb for beds where deer or rabbits have already cleaned out the tulips. Dividing a thick clump also gives you free bulbs to plant elsewhere in the yard.

Is the Tete-a-Tete Daffodil Right for Your Yard?

It suits gardeners who want small, early gold color in a sunny or partly shaded spot and who like a bulb that returns without replanting. It is less suited to anyone wanting tall flowers for cutting or a bold show seen from the street.

  • Choose it for the front edge of a bed, along a path or in a container, where six inches of height is an advantage.
  • Skip it where you want height and large blooms, and pair it with taller bulbs instead.
  • Look up your state page for planting months before you buy, then set the bulbs in the ground when the soil has cooled.

Common Questions

Can You Plant Tete-a-Tete Bulbs That Are Still in the Bag Late in the Season?

Yes. A bulb still in the bag is better planted late than stored over the winter, so plant as long as the ground can be dug.

Do Daffodils Last Longer than Tulips?

Generally yes. Tulips are often short-lived in the garden, while daffodils last longer and are the more reliable perennial bulb.

Does Tete-a-Tete Need Winter Cold to Flower?

Most spring bulbs need about 12 to 16 weeks of cold to flower. Check your state page before planting Tete-a-Tete in a mild-winter area.

Star of Persia Allium: Bloom Time, Height, Zones and Care

Star of Persia Allium: Bloom Time, Height, Zones and Care

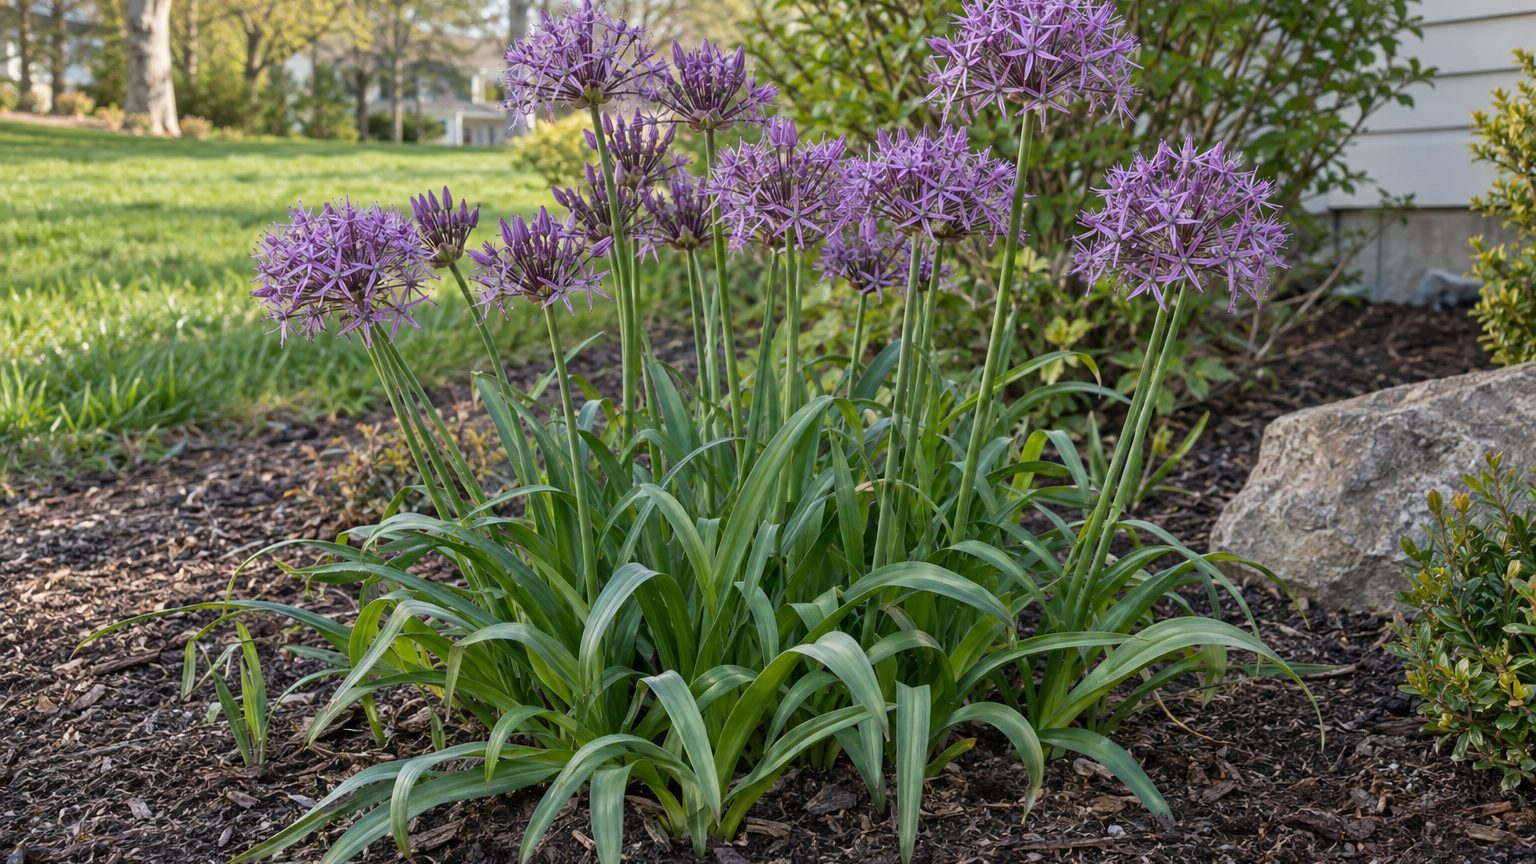
Those big silvery-lavender globes that float above the garden in late spring belong to Star of Persia allium, an ornamental onion planted as a bulb in fall. It grows 1-2 feet tall, blooms in late spring to early summer, and is hardy in USDA zones 4a through 8b.

What Is the Star of Persia Allium?

Star of Persia is an ornamental onion, a spring-flowering bulb grown for its flower head rather than for the kitchen. The plant reaches 1-2 feet tall and forms dense clumps over time, so a few bulbs become a solid patch.

The flowers are pale lavender, packed into a large cluster at the top of a bare stem. That cluster is 8-12 inches wide, the largest of all the ornamental onions.

The strap-like, leathery leaves come up first in early spring and begin to wither as the flower stems rise in late spring. The blooms last well enough to be cut for fresh arrangements or dried for the vase.

Where Does the Star of Persia Allium Grow Best?

Star of Persia is hardy in USDA zones 4a, 4b, 5a, 5b, 6a, 6b, 7a, 7b, 8a and 8b. Check your zone on the USDA map, then look at your state page for the months that suit your own yard.

Light matters less than drainage. The bulbs do well in full sun to partial shade, which makes them easy to tuck into beds that are bright for part of the day.

Well-drained soil is the real requirement. Bulb rot can occur in wet soils, so a spot where water lingers after rain is the wrong place for them. According to Iowa State University Extension, alliums also need the cold of winter to bloom.

How to Plant and Care for the Star of Persia Allium Through the Year

Fall

Plant the bulbs in fall for spring blooms, once the soil has cooled below about 60°F. That timing lets roots form before the ground freezes without pushing leaves up too early.

Set each bulb 5 inches deep and space them 12 inches apart. The spacing looks generous at first, but it gives the clumps room to thicken. A bulb still in the bag goes in as soon as the ground can be dug.

Winter

Winter asks very little of you. The bulbs rest underground, and well-drained soil is what carries them through, since wet ground is where rot begins. Leave the bed alone and resist the urge to water it.

Spring Bloom

The leathery leaves appear first in early spring, then start to wither just as the flower stems climb in late spring. Seeing ragged leaves at bloom time is normal for this plant, not a sign of trouble.

The flower heads open from late spring to early summer. Cut a few for a vase, or let them dry on the stem and bring them indoors.

After Bloom

Once the flowers fade, remove only the spent blooms. Leave the leaves on the plant until they turn brown, because they feed the bulb for next year’s flowers.

Since the foliage thins out early, plant it among leafier perennials that will fill the gap it leaves behind.

Summer

Summer is the quiet season for Star of Persia. The plant tolerates drought, so you can skip the extra watering and keep the soil on the dry side. Wet soil is the greater risk, particularly where sprinklers soak the bed.

Star of Persia Allium Weak Points: Animals, Diseases and Staying Power

Star of Persia has few troubles. It is normally not susceptible to animals, which sets it apart from tulips and crocus, favorites of voles, squirrels, rabbits and deer.

Disease is rarely a worry, with no significant problems listed beyond rot in soggy ground. Bulb mites are the one insect to watch for. Over the years the plant forms dense clumps, which is a sign it settles in where drainage is good.

Issue How the Star of Persia Allium handles it
Animals Normally not susceptible
Drought Particularly resistant
Wet soil Bulb rot can occur
Insects Bulb mites are a common problem
Staying power Forms dense clumps over time

Drainage decides most outcomes here. Fix a wet bed before planting, and the bulbs should keep coming back and thickening year after year, unlike tulips, which are often short-lived.

Is the Star of Persia Allium Right for Your Yard?

It suits a sunny or partly shaded bed with soil that drains well, and anyone who wants a big, airy globe at the end of the spring bulb season. It is a poor fit for low spots that stay wet.

  • Plant it in fall among perennials that will cover the fading leaves, and expect the lavender globes in late spring to early summer.
  • Skip it for soggy beds, or raise the soil first so bulb rot has no chance to start.
  • Open your state page to find the planting months for your yard, then set the bulbs 5 inches deep.

Common Questions

Can You Use Star of Persia Allium as a Cut or Dried Flower?

Yes. The large lavender clusters work in fresh arrangements, and they dry well when left to age on the stem or hung indoors.

Do Deer and Rabbits Eat Star of Persia Allium?

Normally not. The plant is not susceptible to animals, so it can fill a bed where tulips would be nibbled.

Does Star of Persia Allium Need a Cold Period in Warm Zones?

Yes. Alliums need the cold of winter to bloom, so there is no pre-chilling step in zones up to 8b.

The almanac, state by state. Every date on this site comes from a state’s own frost facts and its extension service’s calendar — and says where it comes from.