Skip to content

Rabbits on Spring Bulbs: How to Spot Them and Get Rid of Them

Rabbits on Spring Bulbs: How to Spot Them and Get Rid of Them

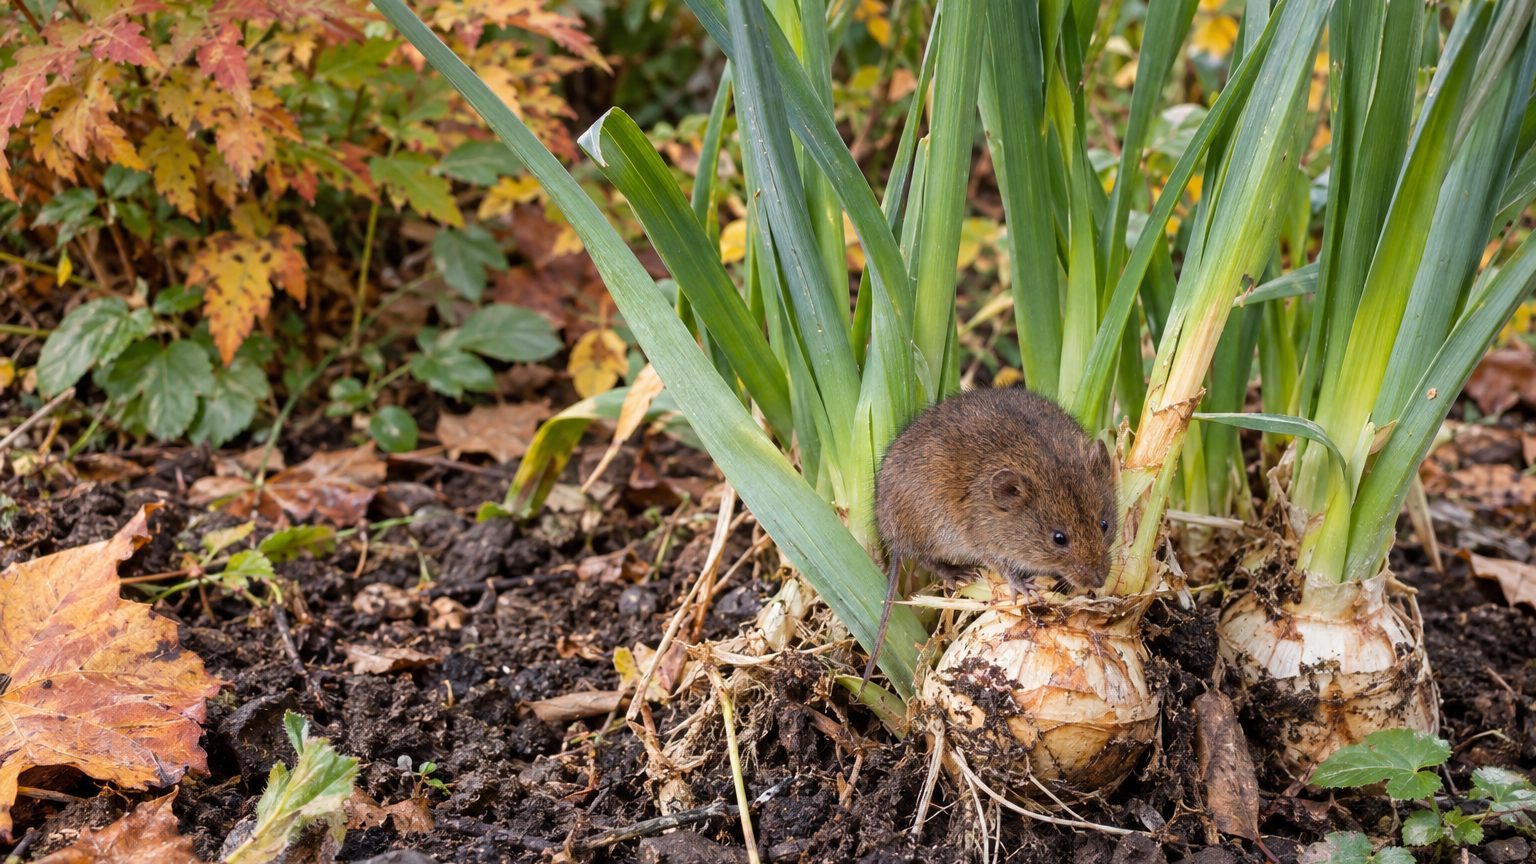
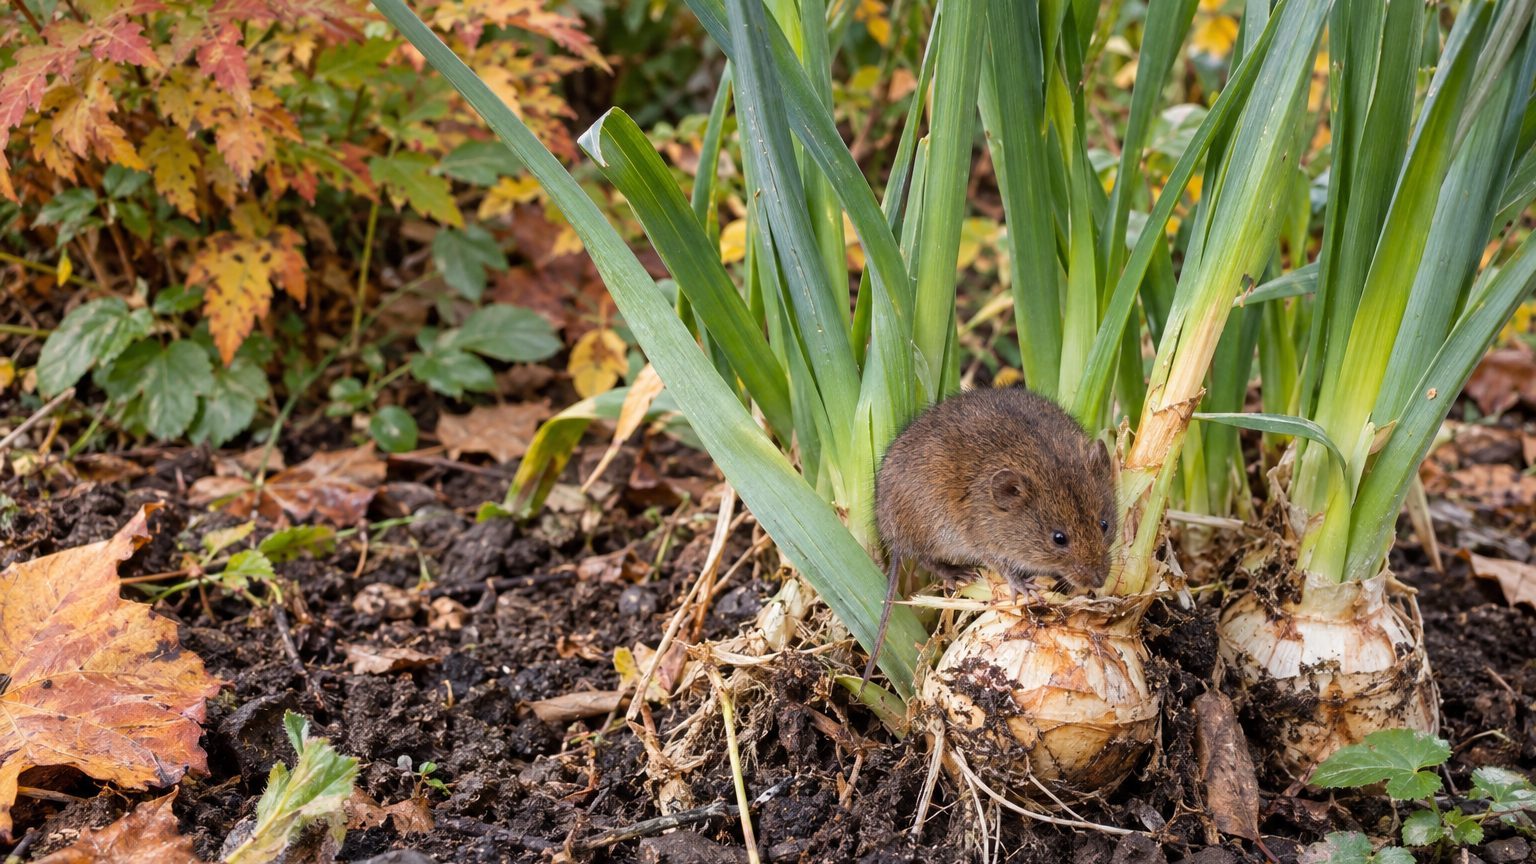
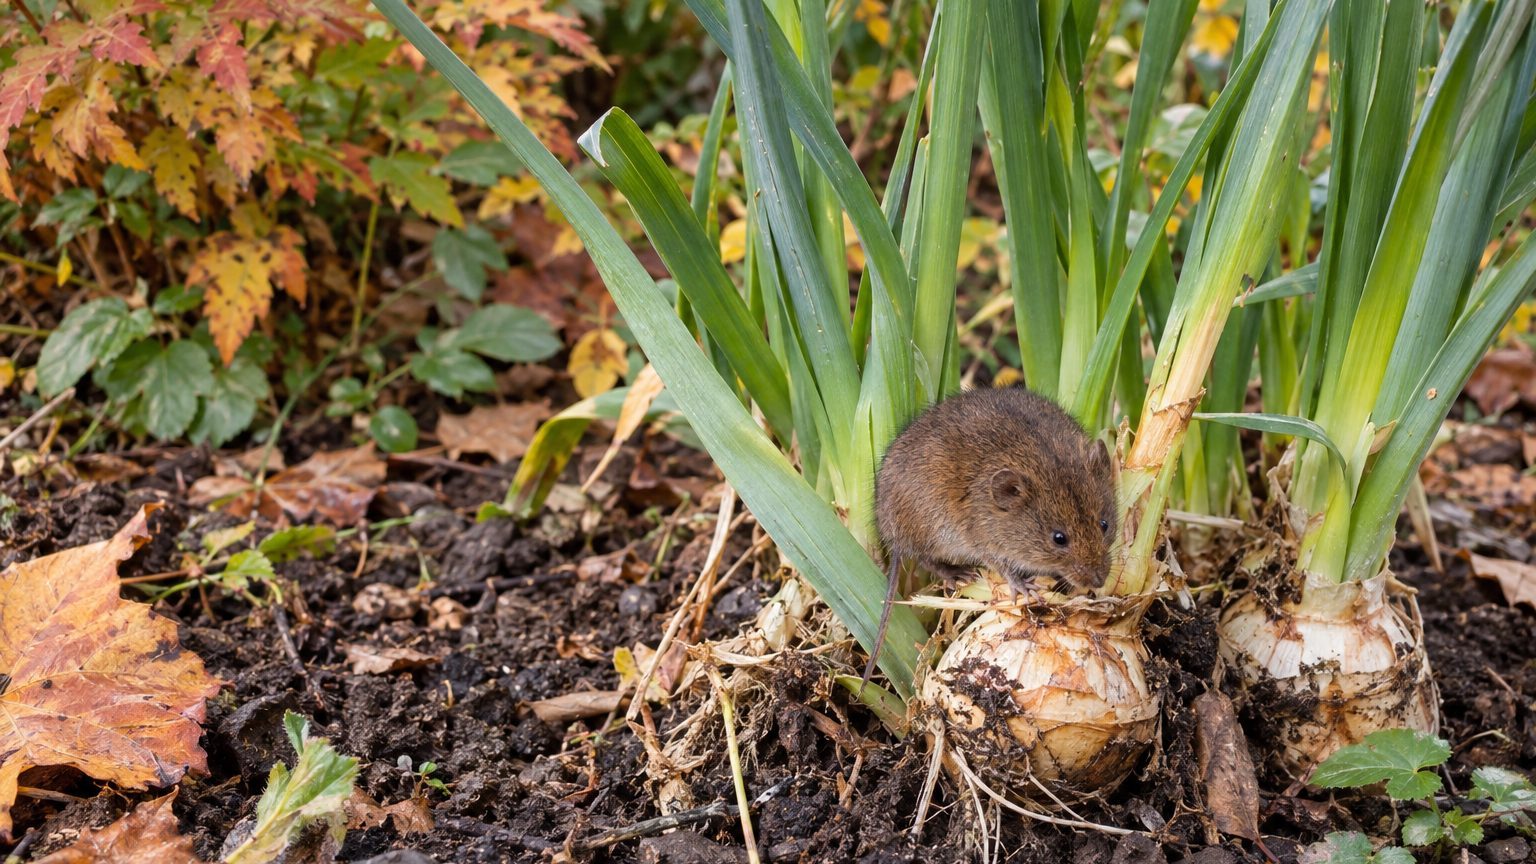
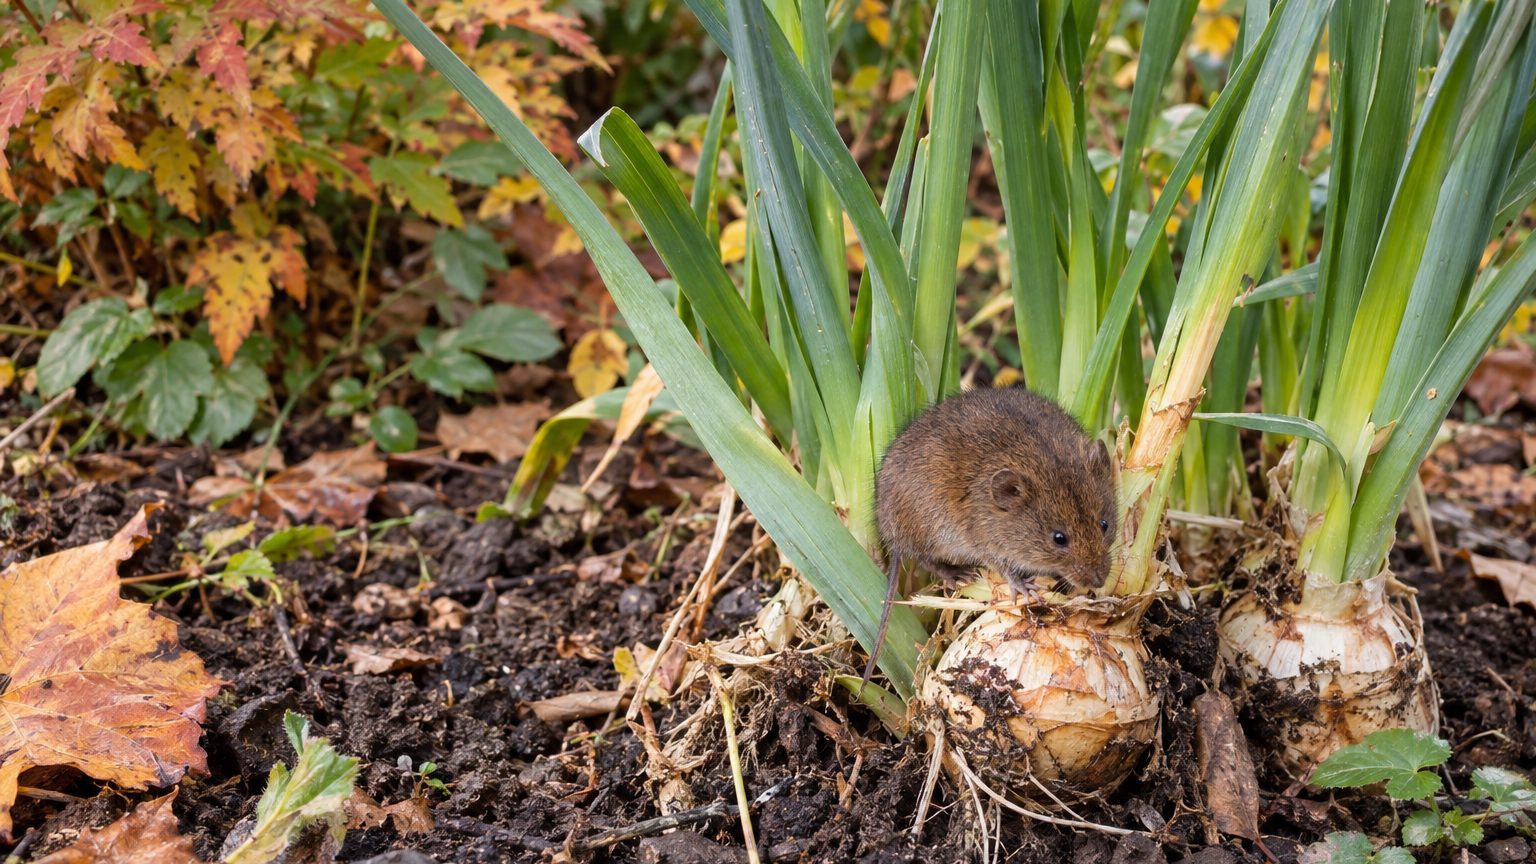
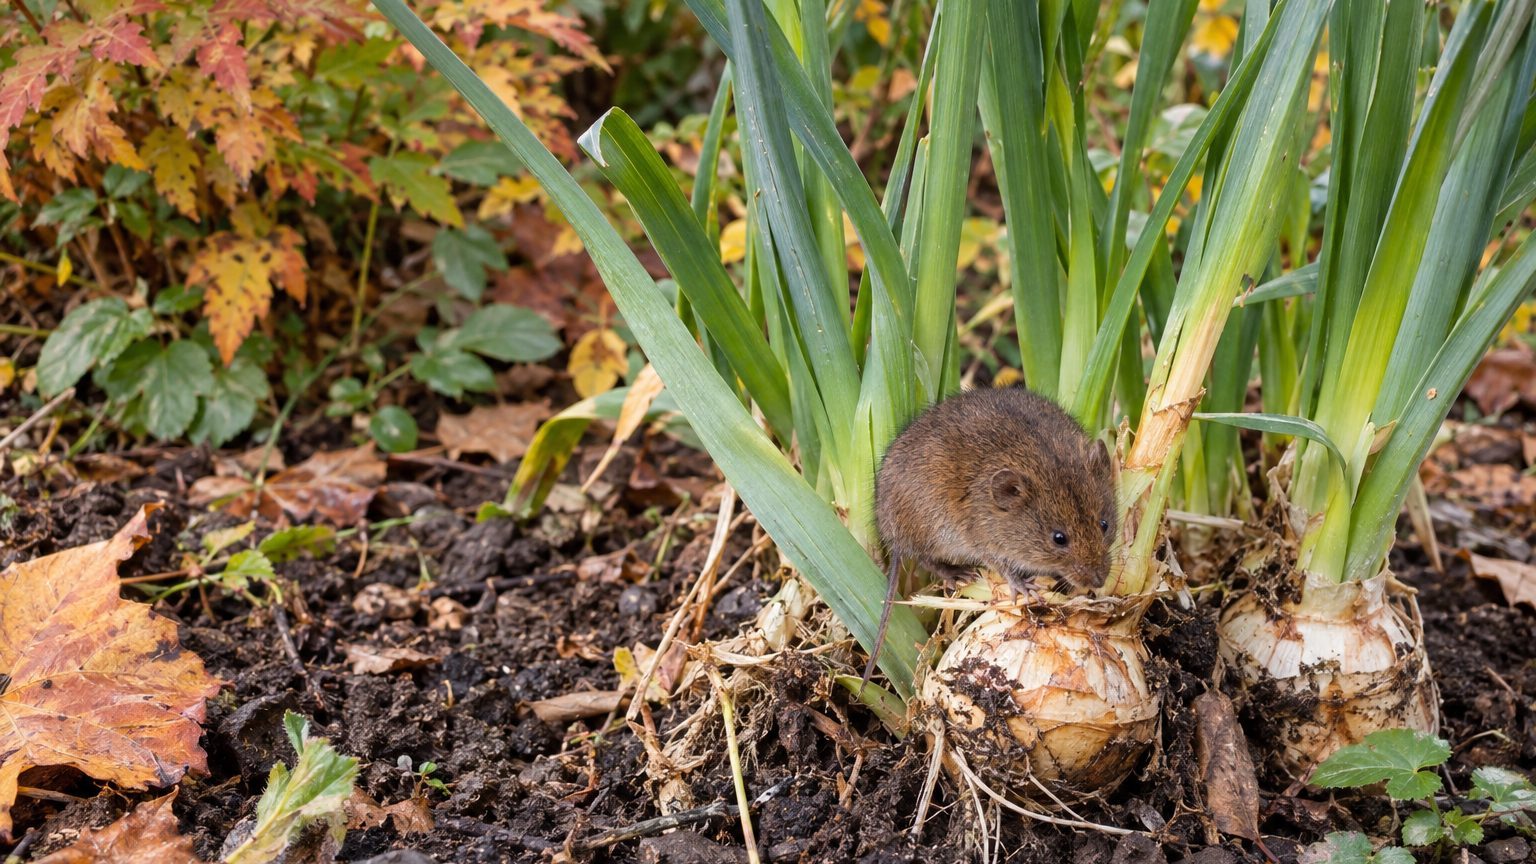
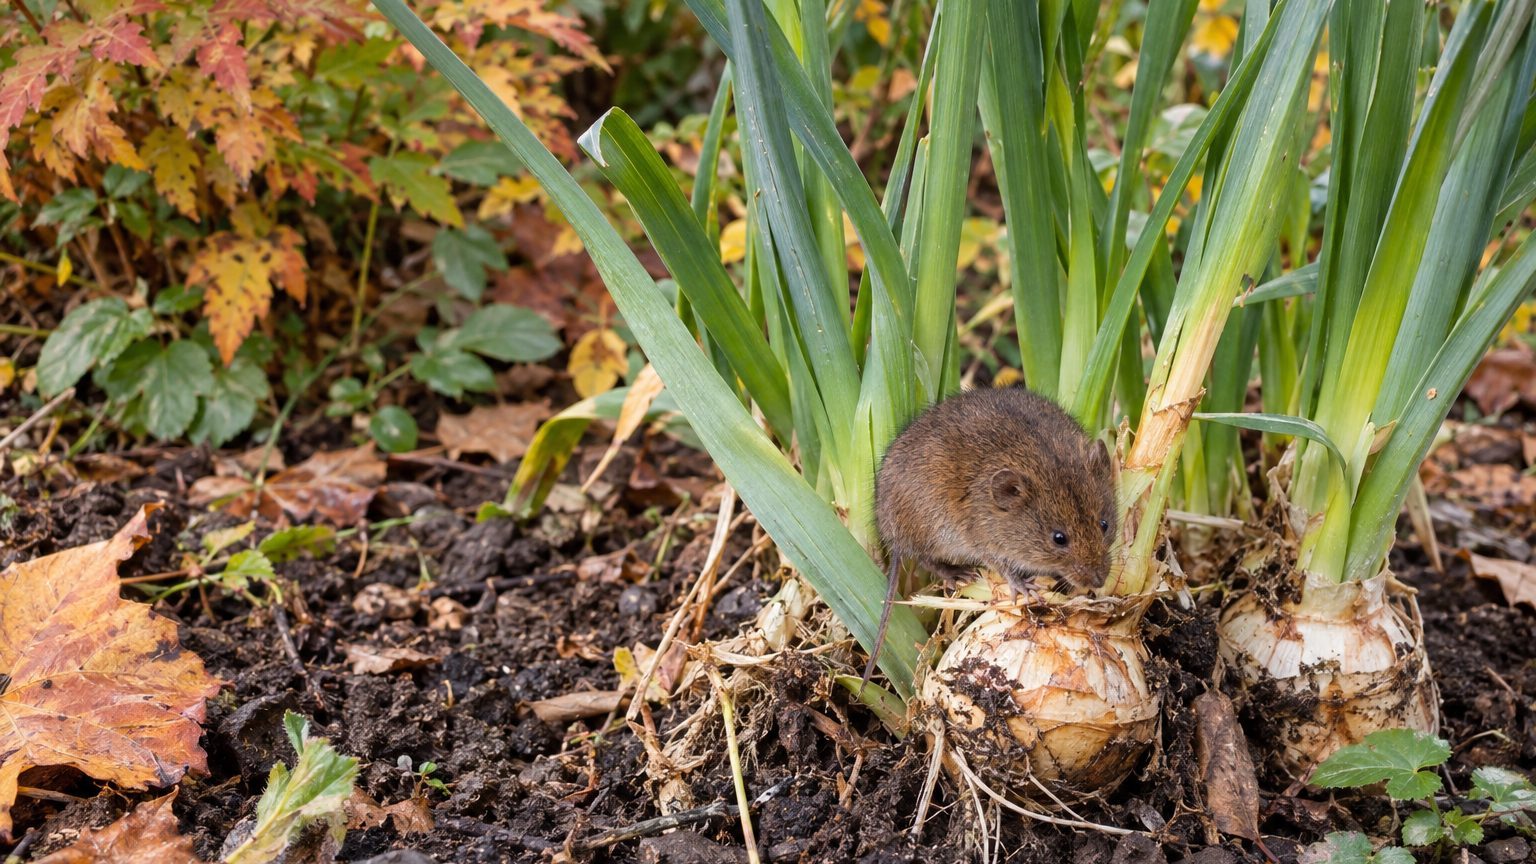
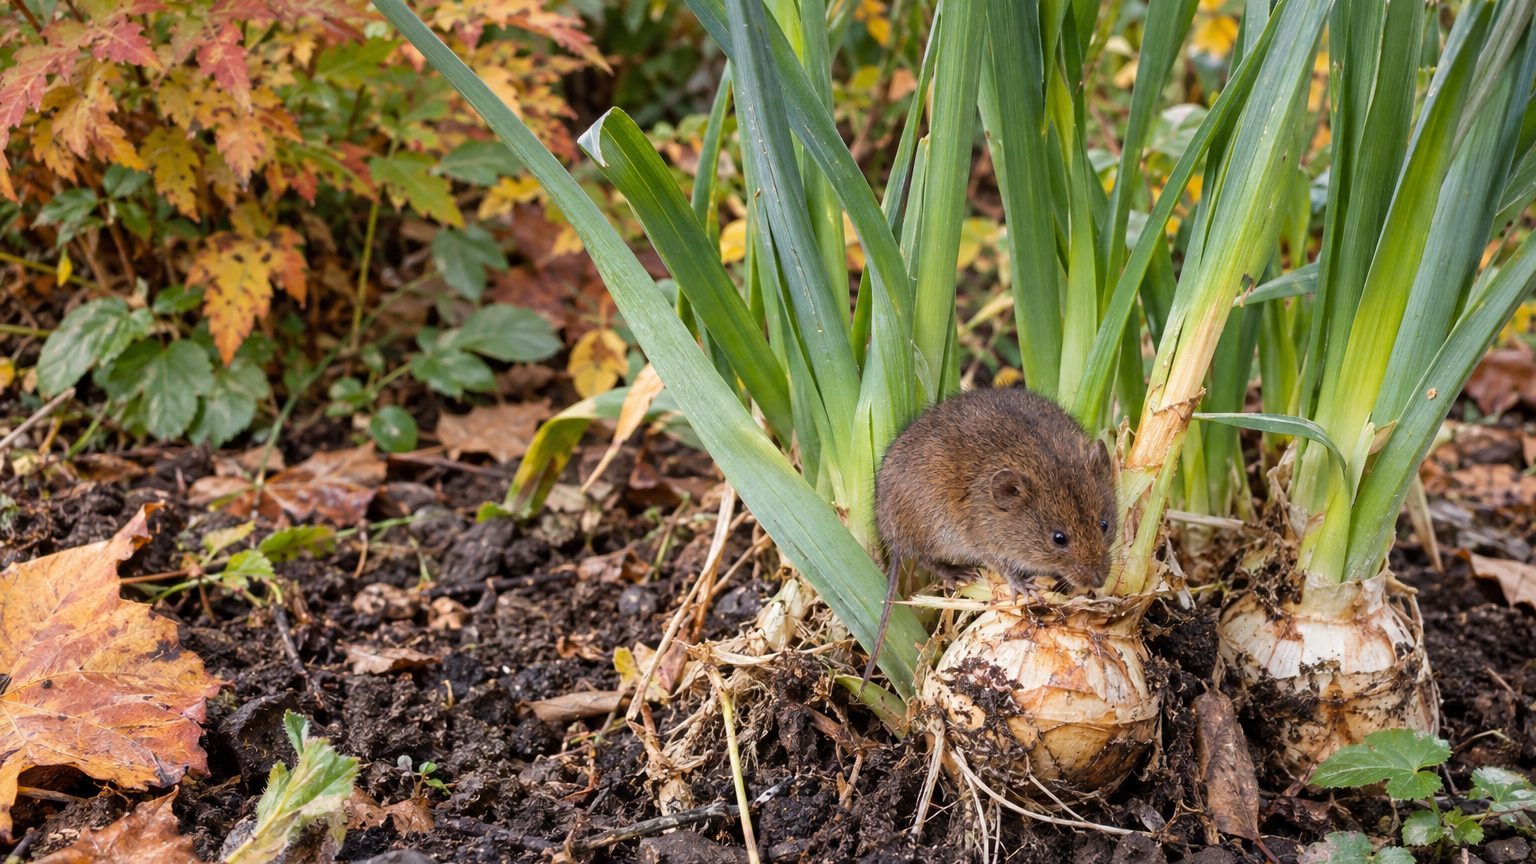
Tulip shoots that look clipped off overnight, with the stems left standing and the buds gone, usually point to a rabbit feeding in the yard. Spring bulb beds draw them because the young growth is tender. The answer is to confirm the signs first, then cover some of the areas with chicken wire when planting.

Rabbits: What You See

Rabbit damage shows up on the plant and on the ground around it, and the cut on the stem is the clearest sign.

  • Stems about the size of a pencil are nipped off cleanly at a 45-degree angle, with no ragged or torn edge.
  • Young, growing tulip shoots are eaten in spring, often alongside clover and other tender plants growing nearby.
  • Pea-sized individual pellets, the droppings, lie scattered on the soil or mulch around the bed.
  • Gnaw marks sit irregularly on the trunks of trees and shrubs a few inches aboveground, and sometimes on exposed roots.
  • Each cottontail incisor mark is about 1/4 to 3/8 inches wide.

Seeing the angled cut together with the pellets is what lets you name the culprit with confidence.

Rabbits or Something Else?

Deer and squirrels also go after spring bulbs, and the damage can look similar from a distance. Check the cut on the stem and the state of the soil before you decide.

A close look at one damaged stem and the ground around it usually settles the question.

Looks like How to tell them apart
Deer browsing The stem is torn with a jagged edge, and this holds on stems pencil-sized or larger, where a rabbit leaves a clean angled cut.
Squirrels digging Bulbs are dug up and missing, with holes in the soil, whereas rabbits nip the shoots above ground and leave pea-sized pellets.

Squirrels and rabbits respond to the same kind of protection, so a bed fenced against one often helps against the other.

What Causes Rabbits, and Where It Is Worst

Rabbits come to the bed because spring offers them soft, fresh food. In Nebraska, rabbits prefer young, growing vegetation in spring, including tulips. A yard with all of those side by side is an easy meal.

Nothing in the sourced material ties the problem to one region, so treat it as a risk anywhere cottontails live near a lawn or garden. The beds with the most tender new growth and the least protection take the damage first.

How to Treat Rabbits

Work from the barrier outward, starting with the plants most often eaten.

  1. Confirm the culprit by checking for angled stem cuts and pea-sized pellets, so that you protect against rabbits and not against the wrong animal.
  2. Cage the tulips in hardware cloth if they have been eaten before, so that the shoots cannot be reached.
  3. Plant tulips in clusters, so that one cage can cover a whole group instead of single bulbs.
  4. Lay chicken wire over the planting area, so that rabbits and squirrels cannot dig the bulbs up.
  5. Sprinkle red pepper around the plants as a deterrent, and repeat the application after every rainfall, since rain washes it away.

For anything stronger, such as repellents or other controls, your state’s cooperative extension service can tell you what is approved where you live.

How to Prevent Rabbits Coming Back

Prevention starts at planting and carries through the growing season, so the timing matters more than any single product.

  • At planting time, cover some of the areas with chicken wire so that rabbits and squirrels cannot dig up the bulbs.
  • When planting, set tulips in clusters, which makes it easy to cage them later with hardware cloth.
  • When choosing bulbs, look for varieties sold as deer and rabbit resistant, which also attract pollinators and butterflies.
  • In spring, as the young shoots push up, keep the cages in place and renew any pepper deterrent after each rainfall.

Leave the foliage alone until it turns yellow.

Where This Comes From

The signs and steps here draw on university extension guidance for spring bulbs and wildlife. Rules and approved controls differ by state, so confirm the details with your state’s cooperative extension service before you buy or apply anything.

Common Questions

Do Rabbits Eat Daffodils?

The sourced guidance does not say that daffodils are or are not eaten. It does say that some bulb selections include varieties that are deer and rabbit resistant, so check the label when you buy.

Will Chicken Wire Stop Rabbits from Digging Up Bulbs?

Covering part of the planting area with chicken wire at planting time helps keep rabbits and squirrels from digging bulbs up. Hardware cloth cages protect tulips that have been eaten before.

Does Red Pepper Keep Rabbits Away from Bulbs?

It sometimes deters squirrels and rabbits, but it does not last. Reapply it after every rainfall, and pair it with a physical barrier for better results.
Bulb and Stem Nematodes: How to Spot Them and Get Rid of Them

Bulb and Stem Nematodes: How to Spot Them and Get Rid of Them

Twisted, stunted shoots in a spring bulb bed are often the first sign of trouble, and tulips, narcissus and hyacinths can all be affected. The cause is a microscopic worm that lives inside the plant. Getting rid of it means removing infested bulbs and changing how the bed drains, since no quick fix exists for a bulb already infested.

Bulb and Stem Nematodes: What You See

The most telling sign is inside the bulb, so a trowel and a sharp knife help as much as your eyes.

  • Cut a suspect bulb crosswise and look for darkened scales that form rings in the cut face.
  • Shoots come up twisted, stunted and oddly shaped, often early in the season.
  • Leaves look distorted, and the outer scales of the bulb turn brown.
  • Bulbs fail to grow or never flower.
  • Rot begins in single scales rather than across the whole bulb.

Phlox in the same bed can show similar distortion, which is a useful hint that the problem is spreading beyond the bulbs.

Bulb and Stem Nematodes or Something Else?

Several bulb problems produce poor, misshapen growth. The difference usually lies in what you find when you dig the bulb up and cut it open.

Looking at the plant above ground is rarely enough, so pair the leaf symptoms with a look at the bulb itself.

Looks like How to tell them apart
Basal rot on narcissus (bulb rots, plant fails to grow) Nematode rot starts in individual scales, and the cut bulb shows dark rings, with twisted shoots above ground
Viruses on tulips (distorted, poor leaves) Browned scales and ringed cross sections inside the bulb point to nematodes instead

Narcissus can also suffer from scorch and lesion nematodes, and tulips from fire and root rot.

What Causes Bulb and Stem Nematodes, and Where It Is Worst

The cause is a nematode in the Ditylenchus genus, a worm too small to see that lives mostly inside the plant, feeding on cells in stems, leaves and bulbs. It infects tulip, narcissus, hyacinth and phlox, and many other crops and weeds can host it, so a weedy bed keeps it going.

It moves in moist, mild weather. In California, young and adult worms travel in a thin film of water on the plant surface, entering through leaf pores when temperatures sit between 59° and 68°F. Egg development is best between 59° and 70°F.

Numbers build fast. In Maryland, symptoms often show early in the season. Rich, wet soil high in humus favors the problem, and no region is singled out beyond that.

How to Treat Bulb and Stem Nematodes

Treatment means removal and a change of conditions, done in this order.

  1. Dig up a suspect clump carefully, so that you see the bulb and do not scatter infested pieces through the bed.
  2. Cut a bulb crosswise and look for ringed, darkened scales, so that you know the cause before you pull healthy neighbors.
  3. Remove every infested plant, because the worms live inside the tissue and will move on to nearby bulbs.
  4. Bag the bulbs and soil clinging to them and send them out with household trash, so that infested tissue does not return to the garden.
  5. Rework the bed to drain well, since rich, wet soil with a lot of humus favors the nematodes.
  6. Call your state extension office if the diagnosis is unclear, so that a lab can confirm what is in the bulb.

Treatment choices and any registered products depend on your state, so that office is the place to ask. Leave healthy plants alone and let their leaves yellow naturally, since green foliage is still feeding next year’s bulb.

How to Prevent Bulb and Stem Nematodes Coming Back

Prevention follows the bulb year, with a few checks timed to the season.

  • In early spring, watch shoots as they emerge and pull any that look twisted or stunted before the worms spread.
  • As the weather turns mild and damp in spring, keep the bed from staying soggy, since moisture on leaves lets nematodes travel.
  • After flowering, pull weeds and nearby phlox that look distorted, because they can carry the nematode between seasons.
  • When you dig or divide bulbs in summer, discard any with browned scales or rot confined to single scales.
  • Before planting in fall, choose a spot with well-drained soil and avoid rich, wet ground with a high humus content.

Bulbs that are still unplanted go into the ground as soon as the soil can be dug, in a bed that has passed these checks.

Where This Comes From

The facts here come from university extension and government plant health pages, including notes written for Maryland and California. Timing and temperature details hold where they were written, so check them with your state’s extension service before you act.

Common Questions

Can You See Bulb and Stem Nematodes Without a Microscope?

No. The worms are too small to see, and what you notice is the damage: twisted shoots, browned scales and ringed cross sections inside the bulb. A lab can confirm the cause if the signs are unclear.

Can a Bulb Look Healthy and Still Be Infested?

It can. Rot starts confined to individual scales, so the outside may look sound while the inside is already darkened. Cutting a doubtful bulb open tells you far more than its outer skin.

Should You Replant Bulbs in the Same Spot?

Remove all infested plants first, and avoid planting again in rich, wet soil with high humus. Whether to wait or switch plants depends on local conditions, so ask your state’s extension service.

Narcissus Bulb Flies: How to Spot Them and Get Rid of Them

Narcissus Bulb Flies: How to Spot Them and Get Rid of Them

A fat, hairy fly resting on daffodil leaves in spring, banded like a small bumble bee, is worth a second look. Narcissus bulb flies lay eggs near the base of the plant, and their maggots hollow out the bulb underground. The damage stays hidden until the leaves come up weak and the bulb turns soft.

Narcissus Bulb Flies: What You See

The adult is the easiest stage to spot, while the larva stays out of sight inside the bulb.

  • The adult looks like a small bumble bee, hairy and heavy-bodied, with bands of yellow or orange brown over black.
  • It is a small fly, usually seen resting on leaves and other vegetation.
  • In California, adults often hover around blooming plants on warm sunny days, feeding on pollen and nectar.
  • The maggot inside the bulb is plump, wrinkled and dirty white to yellow, growing from 1/16 inch when newly hatched to ¾ inch when mature.
  • A damaged bulb feels soft and spongy, and the inside may be hollowed out or reduced to a brown mass.
  • In Washington, a bulb that is not too badly damaged may send up a few grassy-looking leaves.

Adults can show up in Colorado from late April or early May and stay through June.

Narcissus Bulb Flies or Something Else?

The adult fly is a mimic, so it is easy to mistake for a harmless visitor. A soft bulb has several possible causes too, which is why a single clue is never enough.

Look at the insect and its location together, then cut open a doubtful bulb to settle it.

Looks like How to tell them apart
A real bumble bee or another helpful fly, hairy and banded yellow and black The bulb fly is heavy-bodied and often sits on leaves near the base of the plants, and digging there turns up a soft bulb with a maggot at its base.
Maggots from other bulb flies, found in daffodil, iris, lily and tulip The narcissus bulb fly maggot is plump and wrinkled, ½ to ¾ of an inch long, with a short brown or blackish breathing tube at the rear, and it lives in the base of a narcissus bulb.
A bulb that rotted for another reason, soft and brown A leaf-weak clump alone proves nothing, but a plump yellowish white larva inside the soft bulb confirms the fly.

Bumble bees and other beneficial species deserve to be left alone, so confirm the maggot before you act against anything flying in the bed.

What Causes Narcissus Bulb Flies, and Where It Is Worst

The cause is the adult female. She lays eggs on the leaves near the soil surface or on the crowns, and when the eggs hatch the maggots tunnel into the bulb and feed on the soft tissue. They often burrow in near the basal plate, destroying bulb scales and flower parts.

Timing depends on where you garden. In Washington, the female lays eggs near the bulbs in early summer. In California, eggs go on exposed bulbs or stems at the base of plants in spring or summer. Colorado adults normally emerge in late April or early May and are present through June.

One generation is produced each year. In Colorado, winter is spent as a full-grown larva in a cavity in the base of the bulb. In South Carolina, the larvae overwinter in the bulb and move into the soil in spring to finish their life cycle. The pest can turn up where narcissus grow, so check your local county or provincial extension office for guidance.

How to Treat Narcissus Bulb Flies

No cure brings a hollowed bulb back, so treatment means finding the infested bulbs and removing the maggots before they spread the problem.

  1. Squeeze suspect bulbs when you dig or handle them, so that soft, spongy ones are separated from firm ones.
  2. Cut open any soft bulb and look at the base, so that you can confirm a plump larva rather than guess from the rot.
  3. Discard infested bulbs in the trash instead of the compost pile, so that the maggots cannot finish developing in your yard.
  4. Leave the leaves on healthy plants until they turn yellow, so that the remaining bulbs keep feeding for next year.
  5. Replant only firm, clean bulbs, so that you are not putting a maggot back into the ground.
  6. Ask your county extension office which treatments are approved in your state, so that you use only what is legal and suited to your yard.

Dig carefully, because the bulbs are easy to nick and a damaged bulb invites rot.

How to Prevent Narcissus Bulb Flies Coming Back

Prevention follows the fly’s calendar, so check your local county or provincial extension office for guidance.

  • In fall, when you plant new bulbs, check each one and set aside any that feel soft, so that you never bring the pest in with the stock.
  • In spring, as adults begin to fly (late April or early May in Colorado), watch the bed on sunny days for the bumble-bee-like fly resting on the leaves.
  • In early summer, when females are laying eggs near the bulbs in Washington, keep an eye on the base of the plants where the eggs go.
  • After the leaves have turned yellow, tidy the bed and note any clumps that came up with small, weak leaves, because those bulbs are the ones to dig and check.

A clump that has weakened once is a good candidate for a spot check the following year.

Where This Comes From

The details here come from university extension and government pages written for South Carolina, Washington, California and Colorado. Timing and local advice differ from state to state, so check with your own state’s extension service before you act.

Common Questions

How Many Maggots Live in One Bulb?

Usually only one larva develops in each bulb. That single maggot is still enough to hollow it out.

Where Do the Maggots Go in Spring?

In Colorado, the larvae leave the plant in early spring, often exiting through the neck, and pupate in the soil about an inch below the surface. In South Carolina, they also move from the bulb into the soil in spring.

Can an Infested Bulb Recover?

Once infested, bulbs often rot. Some survive but generally produce small, weak leaf blades the following year.

Gophers on Spring Bulbs: How to Spot Them and Get Rid of Them

Gophers on Spring Bulbs: How to Spot Them and Get Rid of Them

Fan-shaped mounds of loose soil showing up in a bed of tulips, along with shoots that vanish overnight, point to a pocket gopher at work beneath the surface. Spring and fall bring the most digging. The animal is after bulbs and roots, so a planted bed makes an easy meal, and the steps for your yard stop the loss and keep it from happening again.

Gophers: What You See

The clearest sign is the mound, and the rest of the evidence follows from it.

  • Mounds are flatter on top and fan-shaped, with the hole sitting off to one side instead of in the middle.
  • The hole is plugged with dirt, which marks the tunnel entrance and exit.
  • Tulip stems and those of other plants are severed below ground, and sometimes the entire plant gets pulled down into the burrow.
  • Bulbs and roots go missing from the bed, since gophers favor them.
  • New mounds appear in quick succession, one to three a day, which can add up to as many as 70 in a month.

The animal itself is about the size of a ground squirrel, though you will rarely see it, because it stays in its tunnels.

Gophers or Something Else?

Other tunneling animals leave soil piles too, and bulbs disappear for more than one reason. Treating the wrong culprit wastes a season, so match the mound shape with a second clue before you act.

A trap set in the wrong tunnel catches nothing, and the damage keeps going.

Looks like How to tell them apart
Mole mounds Moles leave round, volcano-like piles, while gopher mounds are flatter and fan-shaped with the hole off to the side.
Missing daffodil or onion-family bulbs Gophers leave daffodils and onion relatives alone, so losses there point to another animal, while missing tulips fit gophers.
Plants cut off at the soil line Gophers do their damage underground, cutting stems and dragging plants into the burrow, often right beside a plugged hole.

Moles also turn up in beds, and the same barrier ideas apply to both animals.

What Causes Gophers, and Where It Is Worst

Pocket gophers dig for roots and bulbs. During warmer months they frequently eat whatever they meet while tunneling, then pull more of the plant down into the tunnel and eat that too. A bed of tulips gives them roots, bulbs and tender stems in one place.

Tunneling can happen at nearly any time of year. In Iowa, spring and fall are the prime seasons.

One animal can dig a long network, up to 200 yards of tunnels in Iowa. Females there reach breeding age at the end of their first year and give birth to a litter of 3-4 young (sometimes up to ten) from April-June. A small problem in one season can turn into a larger one the next.

How to Treat Gophers

Work in this order, and check with your state’s extension service about which controls are allowed where you live.

  1. Find the fresh mounds and the plugged holes, so that you know where the active tunnels run before you do anything else.
  2. Cultivate the area, because turning the soil destroys burrows and forces the animal to rebuild or leave.
  3. Set two-pronged pincher traps in the active tunnels, since they are effective against gophers when placed where the animal travels.
  4. Mow or trim the surrounding area to remove the plants gophers find attractive, so that the bed is less appealing.
  5. Line the bed with gopher mesh, so that the roots and bulbs sit out of reach.
  6. Check the bed regularly for new mounds, so that any returning animal is caught early.

Rebuilding a tunnel takes the animal time, which is why fresh mounds after cultivating tell you the burrow is still in use.

How to Prevent Gophers Coming Back

Prevention works best when it follows the calendar, because spring and fall bring the most tunneling.

  • Line the bed with gopher mesh so the bulbs go into protected ground.
  • At planting time, choose daffodils and onion-family bulbs for exposed spots, since gophers do not eat them, while tulips go inside the lined area.
  • In spring, keep the area around the bed mowed or trimmed so that plants attractive to gophers do not build up.
  • In raised beds, put welded-wire barriers on the bottom, which keep moles and gophers from coming up from underneath.
  • In fall, cultivate the surrounding ground to destroy any burrows that formed over the season.

Where This Comes From

The details here come from university extension and government pages on gophers and spring bulbs, and the timing figures were written for Iowa. Your state’s extension service can confirm what works and what is allowed in your area.

Common Questions

Do Gophers Eat Daffodils?

No. Daffodils and members of the onion family are safe from them, while tulips are on the menu.

Can Gophers Pull a Whole Plant Underground?

Yes. They cut stems below ground and pull the plant into the burrow, so a plant can disappear and leave nothing behind on the surface.

Will Mowing Alone Keep Gophers Away from a Bulb Bed?

Mowing removes plants that attract them, which helps. It works best alongside mesh under the bed and trapping where tunnels are active.

Deer on Spring Bulbs: How to Spot Them and Get Rid of Them

Deer on Spring Bulbs: How to Spot Them and Get Rid of Them

Tulip shoots that were green and plump one day and are chopped off the next point to a hungry deer. Spring bulbs sit right at the height deer browse, and a few nibbling visits can strip a bed of its buds. Knowing the damage and the plants deer pass over lets you protect a planting before the flowers open.

Deer: What You See

Deer damage shows up on the parts above the soil, and the pattern gives it away.

  • Shoots and leaf tops are torn off ragged, leaving short stubs rather than a neat, clean cut.
  • Flower buds disappear before they open, as mule deer have been seen eating sprouting plants and flower buds.
  • Tulips are stripped while daffodils growing a few feet away stand untouched.
  • Damage lands in early spring, when the first shoots are among the few green things in reach.
  • Split hoofprints and scattered droppings sit in the soft ground beside the bed.

The bulb itself is usually still in the ground, just robbed of the leaves that would feed it.

Deer or Something Else?

Rabbits, digging animals and a late cold snap can all leave a bed looking chewed. The difference lies in the height of the damage and in what is left behind, so check the stem and the soil together.

Looks like How to tell them apart
Rabbits Stems are cut low and clean at a slant, and the damage stays close to the ground, unlike the ragged, higher tearing deer leave.
Squirrels or voles The bulb is gone from the soil, and there is a hole or tunnel nearby, while the shoots of neighboring plants are left alone.
Frost damage Leaves turn limp or blackened but stay attached, and the whole planting is hit after a cold night rather than single plants being eaten.

Hoofprints beside the bed settle the question when the stubs are ambiguous.

What Causes Deer, and Where It Is Worst

Hunger drives it. Deer eat whatever is green and tender, and in early spring there is little else. In Utah, the first plants to sprout take the heaviest browsing because deer have few alternatives at that time of year.

The same squeeze happens farther east. In Arkansas, deer find themselves in a similar spot in early March, when the first spring ephemerals push up through the fallen leaves.

Beds that border woods, fields or open land get visited most, since deer travel those edges. Taste matters too. Tulips were browsed heavily in one planting study, which suggests deer find them palatable.

How to Treat Deer

Work from confirming the culprit to keeping the next flush of shoots safe.

  1. Confirm the animal by checking the stem tops and the tracks, so that you do not build a deer fence against a rabbit.
  2. Cover or fence the bed as soon as shoots appear, because sprouts are what deer eat and a barrier up before the first browsing keeps buds intact.
  3. Leave the surviving leaves alone until they turn yellow, since even chewed foliage keeps feeding the bulb for next year.
  4. Ring the tastier bulbs with daffodils, which deer tend to avoid, so that a foraging deer meets them first.
  5. Ask your state’s extension service which deer repellents are registered where you live, so that you use only something approved for your yard.

Netting or fencing works at any bed size. A small patch can be enclosed in a minute, while a long border may need a taller fence or the daffodil edge.

How to Prevent Deer Coming Back

Prevention follows the bulb year, starting in the fall when the planting plan is made.

  • Plant daffodils as a border around tulips and other favorites, and add Dutch iris, scilla and puschkinia, which deer favor less.
  • In woodland beds, use winter aconite, snowdrops and daffodils, which Indiana gardeners find are rarely damaged by deer.
  • In late winter, before the first shoots show, put the fence or netting in place so it is up before browsing starts.
  • After the flowers fade, leave the leaves until they yellow, and keep the barrier up so the bulbs can recharge.
  • By late spring, note which bulbs were browsed and replace them with less favored kinds at the next planting.

Moving a few tulips into pots near the house also keeps them out of the deer’s usual route.

Where This Comes From

These notes draw on university extension and government publications, all listed in the Sources box. Deer pressure and the plants they pick differ from place to place, so check with your state’s extension service for what holds in your area.

Common Questions

Do Deer Eat Crocus?

Crocus were rarely eaten in one planting study. Damage to them seems to come from their early sprouting rather than from their taste, so they get hit when little else is green.

Do Deer Go After Woodland Wildflowers Too?

Yes. Trilliums, bellworts and ladyslipper orchids are favorite early spring browse in Arkansas, and studies in the northern states and Canada found deer love trilliums. Fencing small patches showed that browsing reduced blooming by as much as 90 percent over a few years, and given enough time it could kill out a stand.

Is a Bulb Dead After Deer Eat the Shoots?

The bulb is still in the soil. Any leaves left on the plant keep feeding it, so protect new growth and leave the foliage to yellow.

Chipmunks on Spring Bulbs: How to Spot Them and Get Rid of Them

Chipmunks on Spring Bulbs: How to Spot Them and Get Rid of Them

Tulip bulbs planted in fall can vanish from a bed by spring, leaving small holes and loose soil where the shoots should be. Chipmunks are a common cause, since they dig up and eat spring bulbs. Telling their work from other diggers and protecting the bed comes down to a few steady habits.

Chipmunks: What You See

Chipmunks are easiest to recognize by the animal itself, and then by what it leaves in the bed.

  • A small, quick rodent with pale stripes down its back, far smaller than a tree squirrel, often darting along walls, steps and shrubs.
  • Small holes in the planting bed, with loose, freshly turned soil around them.
  • Bulbs gone altogether, sometimes with scraps of papery skin left on the surface.
  • Freshly planted tulips as the main target, so the damage often shows up as shoots that never appear in spring.
  • Cheeks puffed out with food as the animal runs off, since chipmunks carry what they dig up.
  • More activity once they leave hibernation in early March.

One sighting is not proof, but a striped visitor near a bed with missing bulbs makes a strong case.

Chipmunks or Something Else?

Several animals dig in bulb beds, and the fix differs a little for each. Look at the animal’s size and at the shape of the damage together before you decide.

Looks like How to tell them apart
Tree squirrels: bulbs dug up and eaten, soil scattered Squirrels are larger, gray or brown with no back stripes, and often disturb mulch and pots as well as the bed.
Voles: freshly planted tulips devoured Voles work out of sight, so you find bulbs gone with few open holes, and the animal itself is rarely seen in daylight.

Deer also eat tulips, but they take the foliage and buds above ground and leave ragged, torn stems at browsing height. Chipmunks go for the bulb below ground, so a dug hole points to them rather than to deer.

What Causes Chipmunks, and Where It Is Worst

Food and shelter bring chipmunks in. Shrubbery, flower beds and gardens give them cover, and they eat nuts, seeds, grain, fruits, fungi, insects, roots, leaves and bird eggs along with bulbs. Spilled bird seed and pet food kept in containers that are not rodent-proof add to the draw.

Bulbs themselves send a signal. The scent of bulbs, or even the disturbed soil from planting, can attract diggers. That is why a bed that was untouched for years can suddenly lose bulbs after a new planting.

No single region owns the problem. Wherever chipmunks live, as in Pennsylvania and Indiana, where they are known to eat bulbs, seeds and seedlings, yards with shrubs, walls and feeders are the likeliest to be visited. Tulips planted in fall take the brunt.

How to Treat Chipmunks

Start with the bulbs that are already in the ground, then work toward barriers and repellents.

  1. Replant any dug-up bulbs at the proper depth, 6-8 inches for tulips, and water them in, so that the settled soil discourages further digging.
  2. Lay quarter-inch hardware cloth over the bed and cover the cloth with soil, so that the animals cannot reach the bulbs and the metal stays out of sight.
  3. Extend the cloth at least 1 foot past each margin of the planting, so that chipmunks cannot dig in from the edge.
  4. Build cages from ½-inch galvanized hardware cloth for new plantings, set the bulbs inside root end down, and bury the whole cage at planting depth, which keeps rodents from getting to them when done properly.
  5. Place a wire cloche over a small planting, since a cover is simpler than a buried cage for a few bulbs.
  6. Apply a taste repellent to the soil at the planting site only as a backup, and reapply it after every rain, because multiple applications are needed to keep it working.

Repellent products and what is approved for use vary by state, so your state’s cooperative extension service is the place to confirm what is allowed where you live.

How to Prevent Chipmunks Coming Back

Prevention follows the year, starting with how you plant in fall and ending with how you store food through spring.

  • In fall, as you plant, mix tulips in among daffodils, which squirrels find less attractive, a trick that works in Vermont and is worth trying elsewhere.
  • Right after planting, spread a layer of mulch over the bed, which in Vermont helps disguise the scent of the bulbs and keeps soil moisture and temperature more even.
  • Through winter, check that the soil still covers any hardware cloth, since exposed edges give chipmunks something to push under.
  • Before chipmunks emerge in early March, move bird seed and pet food into rodent-proof containers.
  • Through spring and summer, sweep up spilled seed under feeders so the yard stops advertising a free meal.

Thinning the cover near the bed, such as dense shrubbery or woodpiles, also takes away shelter that makes a yard attractive.

Where This Comes From

These notes draw on university extension and government pages written for Pennsylvania, Indiana, Kansas and Vermont, along with general guidance on chipmunks and bulbs.

Rules on repellents and trapping differ from state to state, so confirm them with your state’s extension service.

Common Questions

Do Chipmunks Eat Crocus Bulbs?

They do, though less often than tulips. Freshly planted tulips are the usual favorite, and crocus is taken to a lesser extent, so a crocus bed near a tulip planting still deserves the same protection.

Do Chipmunks Eat Anything Besides Bulbs?

Yes. They also take seeds, seedlings, garden fruits, insects and bird eggs. In Indiana they are noted for attacking garden fruits as well as digging up bulbs and seeds, so damage elsewhere in the yard is a clue to the same visitor.

Can Chipmunks Get Through Hardware Cloth?

Not when the cloth is set up properly. Caged or covered bulbs stay out of reach, but gaps at the edge or cloth left uncovered by soil give them a way in, so check the margins of the bed.

Bulb Mites on Spring Bulbs: How to Spot Them and Get Rid of Them

Bulb Mites on Spring Bulbs: How to Spot Them and Get Rid of Them

Tulip or narcissus bulbs may emerge stunted or twisted, or fail to emerge at all. When you dig one up and find it soft and crumbling, bulb mites are a common reason.

Bulb Mites: What You See

Most of the signs show up on the bulb and the growth above it, so you often need to dig one up to be sure.

  • Shiny, creamy white bodies with short legs, often described as pearls with legs, cluster under the scales and at the base of the roots.
  • Each mite measures only 0.02 to 0.04 inches and moves very slowly, so a hand lens helps.
  • The bulb is soft, brown, or turning to pulp, because mites open the outer skin and let rot in.
  • New growth comes up stunted and distorted.
  • Tiny white oval eggs sit alone or in clusters near damaged, decaying tissue on the bulb surface.

On lilies, the stems can be dwarfed and distorted too, and the plant may not survive.

Bulb Mites or Something Else?

Stunted shoots and mushy bulbs have more than one cause, so a single clue is not enough. Check the plant above ground and the bulb below it before you decide anything.

Looks like How to tell them apart
Root rot from fungus Root-rotting fungi can be present with bulb mites, so finding one does not rule out the other.
Fungus gnat larvae Fungus gnat larvae can injure bulbs that bulb mites later infest, so both pests may be present.

The catch is that these problems often travel together. Bulb mites are secondary pests that tend to move into bulbs already hurt by fungus gnat larvae or root rot, so finding mites does not rule out the others.

What Causes Bulb Mites, and Where It Is Worst

Bulb mites live on decaying vegetation such as weeds and old plant debris, and they have a wide host range. Several generations overlap each year, so a small population can build quickly. They also ride in on infested bulbs, which can carry them into your beds from the start.

Weather plays a part. Injury is worst when cool, wet weather slows plant growth, and mites tend to do more damage in years with cool, wet springs. In Oregon, the highest numbers were present in April and May.

Warmth speeds them up. In Kansas, the life cycle from egg to adult may take about 40 days, but at 77°F (25°C) it can finish in 12 days. In North Carolina, warm conditions bring the full cycle down to about 2 weeks. In Kansas, mites are less active in winter, but they do not rest, and every life stage may be present throughout the growing season.

Bulb mites can show up in any yard that grows bulbs, and they affect amaryllis, crocus, freesia, gladiolus, hyacinth, lily, Dutch iris, narcissus, and tulip.

How to Treat Bulb Mites

Treatment starts with finding out what is happening at the bulb, then removing the source and protecting what is left.

  1. Dig a few suspect bulbs and look closely at the area where the roots meet the bulb, because that is where mites gather and where they are easiest to confirm.
  2. Discard soft, rotting bulbs in the trash rather than the compost, so that mites and the fungi they carry do not spread.
  3. Clear weeds and old plant debris from the bed, since mites overwinter there and move back onto new bulbs.
  4. Keep sound bulbs away from infested ones, because mites carry pathogens on their bodies and can crawl from one bulb to a healthy neighbor.
  5. Before planting, soak bulbs in a registered miticide for 30 minutes.

Leave the leaves of healthy bulbs in place until they turn yellow, since they feed the bulb for next year. The aim is to protect sound bulbs from infested ones.

How to Prevent Bulb Mites Coming Back

Prevention focuses on bulb inspection, bed cleanup, and watching early growth.

  • Inspect stored bulbs and discard any with soft spots, since infestations affect bulbs in storage as well as in the field.
  • Clean out weeds and plant debris from the bed so mites have nowhere to overwinter.
  • At planting, choose firm, undamaged bulbs and set them in well-drained soil, so roots are not sitting in the wet conditions that favor rot.
  • In early spring, watch for slow or distorted shoots, because damage usually appears early in the growing season and is worse when cool, wet weather slows growth.
  • In April and May, check bulbs that look weak, as mite numbers in Oregon were highest in those months.

Keep beds free of weeds and old plant debris, which give mites a place to overwinter.

Where This Comes From

Bulb mites overwinter on decaying vegetation and can infest bulbs in storage as well as in the field.

Common Questions

Can Bulb Mites Hurt Garlic and Onions Too?

Yes. Bulb mites are a problem of garlic that easily goes unrecognized, and they can stunt plant growth and reduce the onion stand.

How Many Eggs Does a Bulb Mite Lay?

In Utah, females lay 50 to 100 eggs in a lifetime, and eggs hatch in 2 to 7 days. Elsewhere, a female is reported to lay up to 100.

Can Bulb Mites Cause Rot on Their Own?

Not usually. By themselves they are not particularly damaging, but if root-rotting fungi are present, the mites injure the roots further and make the rot worse.

Aphids on Spring Bulbs: How to Spot Them and Get Rid of Them

Aphids on Spring Bulbs: How to Spot Them and Get Rid of Them

Sticky leaves and crumpled new shoots on tulips in spring usually point to clusters of tiny insects feeding on the fresh growth. Aphids go after spring bulbs both in the ground and in storage, and cool spring weather suits them. Knowing what they look like, what they leave behind and how to move them off the plants keeps the bulbs healthy for next year.

Aphids: What You See

Look first at the newest growth, because that is where the colonies settle.

  • Small clusters of soft-bodied, pear-shaped insects sit packed together on emerging leaves, shoots and buds.
  • Leaves and flowers come out curled, twisted or deformed where the insects have been sucking sap.
  • The foliage turns sticky and shiny from honeydew, a sugary liquid the insects excrete as they feed.
  • Dark, sooty splotches appear on that sticky surface when a fungus grows on the honeydew.
  • Some adults have wings and some do not, and young nymphs of every size share the same cluster.

Heavy colonies that stay for a long stretch can leave shoots and buds wilted, and sometimes the tips die back.

Aphids or Something Else?

Several other problems leave sticky, distorted or speckled growth on bulbs. The insect itself, and where it sits on the plant, settles the question quickly.

Check the undersides of leaves and the tips of shoots with a close look, or a hand lens if the insects are hard to see.

Looks like How to tell them apart
Thrips damage Thrips are slender insects that rasp the surface, so you see streaked, silvery or distorted petals, but the insects are not pear-shaped and the foliage is not coated in a sticky film.
Mite damage Mites are far smaller than aphids and cause stunted, deformed growth, yet you do not find clusters of visible, soft-bodied insects sitting on new shoots.

Sooty mold alone can also fool you, since it looks like a dark dusting on leaves. It only forms on honeydew, so look for the sticky surface and the insects that made it.

What Causes Aphids, and Where It Is Worst

Aphids feed by sucking plant sap, and they multiply fast because for much of the year they give birth to live nymphs that mature into wingless or winged adults. Essentially all of them are females. In Colorado, males appear only in late summer or early autumn, during the last outdoor generation.

Bulbs can carry the problem in before you plant them. Tulip bulb aphids feed on tulip bulbs and other bulbs and corms in storage as well as in the field, and they also infest leaves, shoots, buds and flowers once the plants are growing. In North Carolina, planting infested bulbs can lead to distorted, stunted new growth.

Spring is the busy season, because aphids are typically more of a problem during cool weather. The pest is not tied to one region. It can turn up anywhere spring bulbs grow.

How to Treat Aphids

Start with the gentlest methods, since natural enemies are already working in your favor.

  1. Inspect new spring growth regularly, so that you catch small colonies before they spread.
  2. Spray the clusters with a hard stream of water, which knocks the insects off the plant and leaves leaves and buds intact. In Utah, this is the suggested first move.
  3. Switch to insecticidal soap if the insects keep returning, because it is another soft option that works on contact with the pests.
  4. Leave ladybugs, lacewings, syrphid flies, damsel bugs and wasps alone, since these feed on or parasitize aphids and generally keep them under control.

For anything stronger, ask your state’s cooperative extension office what is approved where you live, since registrations differ from state to state.

How to Prevent Aphids Coming Back

Prevention follows the bulb year, starting before the bulbs ever go in the ground.

  • In fall, before planting, look over each bulb and set aside any that look infested, because stored bulbs can carry aphids into the bed.
  • In early spring, begin looking at emerging shoots, since cool weather favors the insects and colonies start on new growth.
  • As leaves open, rinse any small clusters with a hard stream of water before they build up and curl the foliage.
  • Through bloom and after, leave the beneficial insects in place and avoid anything that would clear them out.
  • After flowering, let the leaves yellow naturally, then clear the bed of debris.

Healthy, undisturbed beds give the natural enemies of aphids a steady place to work.

Where This Comes From

This information draws on university extension guidance on bulb pests. Your own state’s cooperative extension office can confirm timing and approved treatments for your area.

Common Questions

Can Aphids Travel on Stored Bulbs?

Yes. Tulip bulb aphids infest tulip bulbs and other bulbs and corms during storage, so inspect them before you plant.

Why Are My Tulip Leaves Sticky?

Sticky leaves usually come from honeydew excreted by feeding aphids. Look for clusters on new growth to confirm.

Do Aphids Kill Bulbs?

Their feeding mainly distorts leaves and flowers. Very high numbers over an extended period can cause wilting and sometimes dieback of shoots and buds.

White Rot on Spring Bulbs: Signs, Treatment and Prevention

White Rot on Spring Bulbs: Signs, Treatment and Prevention

Bulbs that pull out of the soil with no resistance, their roots gone and their base wrapped in fuzzy white growth, are the classic picture of white rot in a spring bed. The disease lives in the soil, not the air, and once it settles in, it stays. Catching it early and keeping it from moving around the yard decides how much of the bed you save.

White Rot: What You See

Start at the base of the bulb, because that is where the disease announces itself, and work up to the leaves.

  • Bulbs are covered in black sclerotia (tiny fungal resting bodies) about the size of poppy seeds.
  • Early on, fluffy white growth wraps around the base of the bulb, and large dark brown spots can mark the bulb itself.
  • Roots rot away, so the plant lifts out of the ground with almost no effort.
  • The bulb scales turn semi-watery and soft, and white or pink fungal growth can show on them.
  • Leaves yellow and wilt, and the decay begins at the base, with the oldest leaves collapsing first.

Any of these on a bulb you dig up means it should not go back into the ground.

White Rot or Something Else?

Bulbs have plenty of ways to rot, and several of them look alike from the garden path. Yellow leaves and a soft bulb fit more than one problem, so look at where the damage sits and what the surface looks like.

Looks like How to tell them apart
A gray mold disease on leaves and petals Brown decay spreads over leaves and petals, and a brownish-gray powdery mold covers the surface. White rot starts at the base and roots instead, with fluffy white growth.
Nematode or bacterial rot Discolored patches and a soft, spongy bulb decay, but no black poppy-seed sclerotia and no fluffy white collar at the base.

Tulip and daffodil bulbs also suffer from basal rot, black slime, blue mold and crown rot (southern wilt). If the bulb shows none of the black sclerotia and no white growth at the base, one of these is the more likely cause, and your state extension office can help sort them out.

What Causes White Rot, and Where It Is Worst

A fungus called Sclerotium cepivorum causes it, a relative of the white mold fungi. It does not drift on the wind as airborne spores. It moves as threads of mycelium and as sclerotia, in soil carried on tools, boots and bulbs.

Those sclerotia can sit dormant in the soil until an allium grows nearby. The roots give off sulfur compounds, the fungus detects them, and it wakes up. That is why a bed can look healthy for seasons before trouble starts.

Moisture that suits good bulb growth suits the fungus too, so there is no dry or wet extreme to dodge. Excess nitrogen, phosphorous or organic matter in the bed also works against you. Wherever the fungus has been introduced, it is a problem.

How to Treat White Rot

Treatment is about removing what is infected and stopping the soil from traveling, because chemical controls have not been shown to work.

  1. Lift any plant that yellows early or wilts at the base, so that you can check the roots and bulb for black sclerotia and white growth.
  2. Remove and destroy infected plants, bulbs and the soil clinging to them, so that the fungus does not return to the bed or the compost pile.
  3. Handle remaining bulbs gently, because bruises give rot an easy way in.
  4. Wash tools, boots and wheelbarrow wheels after working in the affected spot, so that sclerotia are not carried to clean beds.
  5. Leave healthy neighbors in the ground, and let their leaves stay until they turn yellow, so that the bulbs can still feed themselves for next year.
  6. Ask your state extension office what, if anything, is approved locally before buying any treatment, because products and rules vary by state.

Be realistic about the timeline. The pathogen can persist in the soil for up to 40 years, so the aim is to keep it from spreading and to plant clean bulbs elsewhere or in rotated beds.

How to Prevent White Rot Coming Back

Prevention follows the gardening year, from the day you buy bulbs to the day the leaves fade.

  • In early fall, buy clean, disease-free bulbs and look each one over, because planting clean stock is a key step against this disease.
  • At planting time in fall, reject any bulb with white or pink fungus on it, and handle the rest carefully to avoid bruising.
  • When you prepare a bed in fall, go easy on nitrogen, phosphorous and organic matter, since heavy amounts favor the fungus.
  • Each year when you choose a spot, rotate the flower beds so that soil pathogens do not build up to high levels.
  • In late spring, leave the foliage until it turns yellow, and watch for early yellowing or wilting at the base while you do.

Keep a note of where affected plants stood, since that is the bed to rest from bulbs the following fall.

Where This Comes From

The details here come from university extension and government plant disease pages. Before you act on a rule or a product, confirm it with your state’s cooperative extension service, since soils and approvals differ from one place to the next.

Common Questions

When Do White Rot Symptoms Usually Show Up?

Plants can be infected at any stage of growth. In California, symptoms usually appear from mid-season to harvest, so the damage often shows after the bulbs have been growing for a while.

Why Did My Tulips Not Come Up, or Come Up Yellow or Reddish?

In Texas, tulips may fail to come up, or their leaves may turn yellow or reddish, stunt and die because the bulb has rotted. Dig one up and check the base and roots, since the same symptoms can come from other bulb rots.

How Much Infested Soil Does It Take to Cause a Problem?

Very little. Only 1 sclerotium per 10 liters of soil is enough to cause disease, and 10 to 20 sclerotia will cause upwards of 90% infestation. Flowers from infected bulbs also come up deformed, and the foliage dies early.

Tulip Fire on Spring Bulbs: Signs, Treatment and Prevention

Tulip Fire on Spring Bulbs: Signs, Treatment and Prevention

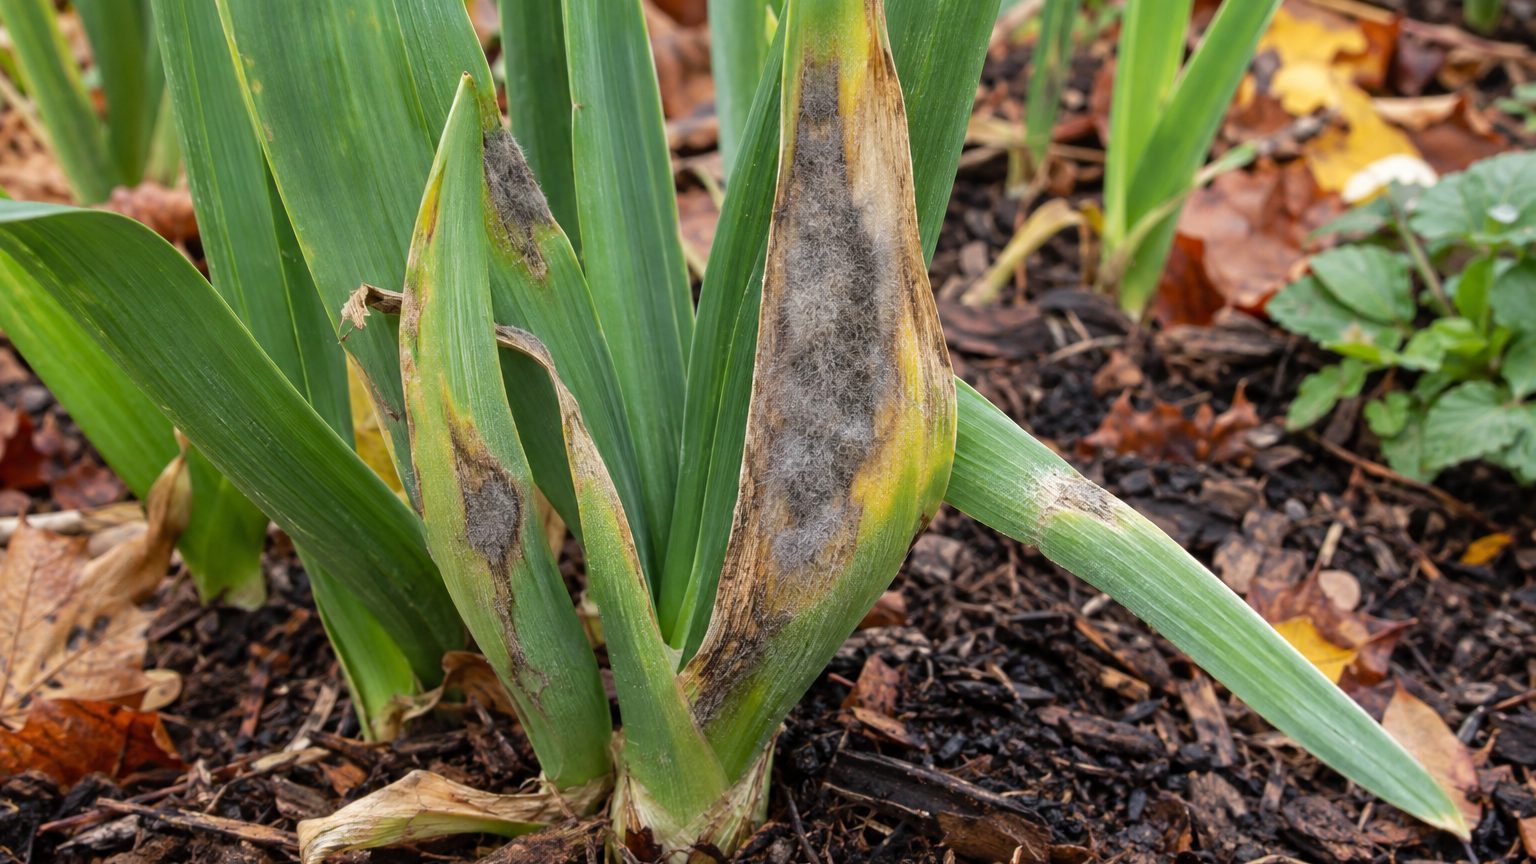
Tulip leaves that emerge twisted, or petals dotted with spots after a damp spell, are easy to spot when you walk the bed in spring. The usual cause is tulip fire, a fungal disease of tulips that attacks leaves, stems and flowers. A bed that has had it can be managed with a few steady habits, and most of them cost nothing.

Tulip Fire: What You See

Look first for burned-looking spots on leaves and flowers, then check the rest of the plant for these signs.

  • Spots on leaves and flowers often have dark borders that resemble burn injury.
  • On leaves, the patches are slightly sunken, yellow to light tan and ringed by a water-soaked area, which shows most on light-colored varieties.
  • Spots on colored petals look white, while spots on white petals look brown.
  • In Arkansas, leaves just emerging from the soil may be distorted and twisted, and they often wither.
  • In damp, overcast weather, damaged leaves, stems and flowers become covered with a fuzzy grey mat.

In Washington, severe infections can blight entire buds and blossoms.

Tulip Fire or Something Else?

Several ordinary problems leave brown or pale marks on tulips, so one odd spot proves little. Pair what you see with where it sits and what the weather has been doing.

Looks like How to tell them apart
Frost or hail injury: torn, blackened or scorched edges on leaves and petals Injury alone leaves clean damage. Tulip fire adds water-soaked rings around sunken spots and a grey fuzzy mat in damp weather. In Illinois, the disease commonly follows frost or hail damage.
Gray mold on another plant: fuzzy grey growth on soft tissue This fungus is specific to tulips and lilies, so grey mold on a shrub or perennial is a separate matter. Check whether the spotted plant is a tulip or lily and whether its leaves show spots.
Normal petal fading: browning petals at the end of bloom Fading petals are dead tissue. Tulip fire shows on young leaves and fresh petals that are still colored, with spots that have darker borders.

Because the fungus feeds first on dead or declining tissue, fading petals are often where trouble starts, even though the browning itself is normal.

What Causes Tulip Fire, and Where It Is Worst

A fungus called Botrytis tulipae causes the disease. It overwinters in soil, in affected bulbs and in diseased plant debris. Each spring, the usual starting point is a stunted, blighted plant grown from a diseased bulb that was planted by accident. In damp, overcast weather, a dense grayish mold forms on it and spreads to neighbors.

Cool, damp spring or summer weather favors the disease in Washington. In Illinois, cool, wet spring weather can lead to an almost complete loss of flowers if the disease is not controlled. It is also a common fungal disease of bulbs in the Northeast. The disease is the most common and serious one wherever tulips are grown, so no region is exempt.

Poor air movement helps it along, whether from crowded plantings, excessive weeds or a stagnant spot. In Illinois, spores have survived on the surface of moist soil at 50°F (10°C). They can stay there for up to six weeks. Petals that drop onto leaves can carry the infection further.

How to Treat Tulip Fire

Start with the plants themselves, then clean up the bed and change its conditions.

  1. Dig out stunted, twisted or blighted shoots, bulb included, so that the plants feeding the first spores are gone before the mold spreads.
  2. Pick off fallen petals lying on leaves, because decaying petals give the fungus a place to feed and spread.
  3. Bag diseased debris and put it in the trash instead of the compost pile, since the fungus overwinters in plant debris.
  4. Pull weeds and thin crowded clumps so air moves through the bed and foliage dries faster.
  5. Water at the soil rather than over the leaves, which keeps leaves from staying wet in cool weather.
  6. Ask your state’s cooperative extension office which fungicides are approved where you live, since labels and rules differ from state to state.

Leaves that still look healthy stay on the plant until they turn yellow, because they are feeding the bulb for next year.

How to Prevent Tulip Fire Coming Back

Prevention follows the year, from the planting bed in fall to the cleanup after the leaves fade.

  • In fall, plant in an open spot with good airflow, clear of weeds, and discard any bulb that looks diseased before it goes in the ground.
  • In early spring, check emerging shoots for twisted or stunted growth and pull them at once, since these plants spread the fungus to the rest.
  • During bloom, snip off spent flower heads before petals drop onto the leaves, and leave the foliage alone.
  • In cool, damp stretches of spring, keep weeds down regularly so air keeps moving around the plants.
  • Once the leaves have turned yellow, clear away the dead foliage and any debris so the fungus has nowhere to overwinter.

Doing this each year matters more than any single treatment, because the fungus lives on in the bed between seasons.

Where This Comes From

The details here come from university extension and government pages written for Washington, Illinois, Arkansas and the Northeast. Timing and weather patterns vary, so check with your state’s cooperative extension service for what applies in your yard.

Common Questions

Can Tulip Fire Spread to Other Plants in the Bed?

The fungus is specific to tulips and lilies, so other bulbs growing nearby are not its target.

Does Frost or Hail Make Tulip Fire Worse?

In Illinois, the disease commonly follows frost or hail injury, because damaged tissue gives the fungus an easy way in. After a late cold snap or a storm, look over the leaves closely for spots.

Can You Replant Tulips Where Tulip Fire Struck?

Tulips planted in contaminated soil within two years face considerable risk of infection. Move them to a fresh bed, and throw out any diseased bulbs instead of replanting them.

The almanac, state by state. Every date on this site comes from a state’s own frost facts and its extension service’s calendar — and says where it comes from.