Skip to content

Chipmunks on Spring Bulbs: How to Spot Them and Get Rid of Them

Chipmunks on Spring Bulbs: How to Spot Them and Get Rid of Them

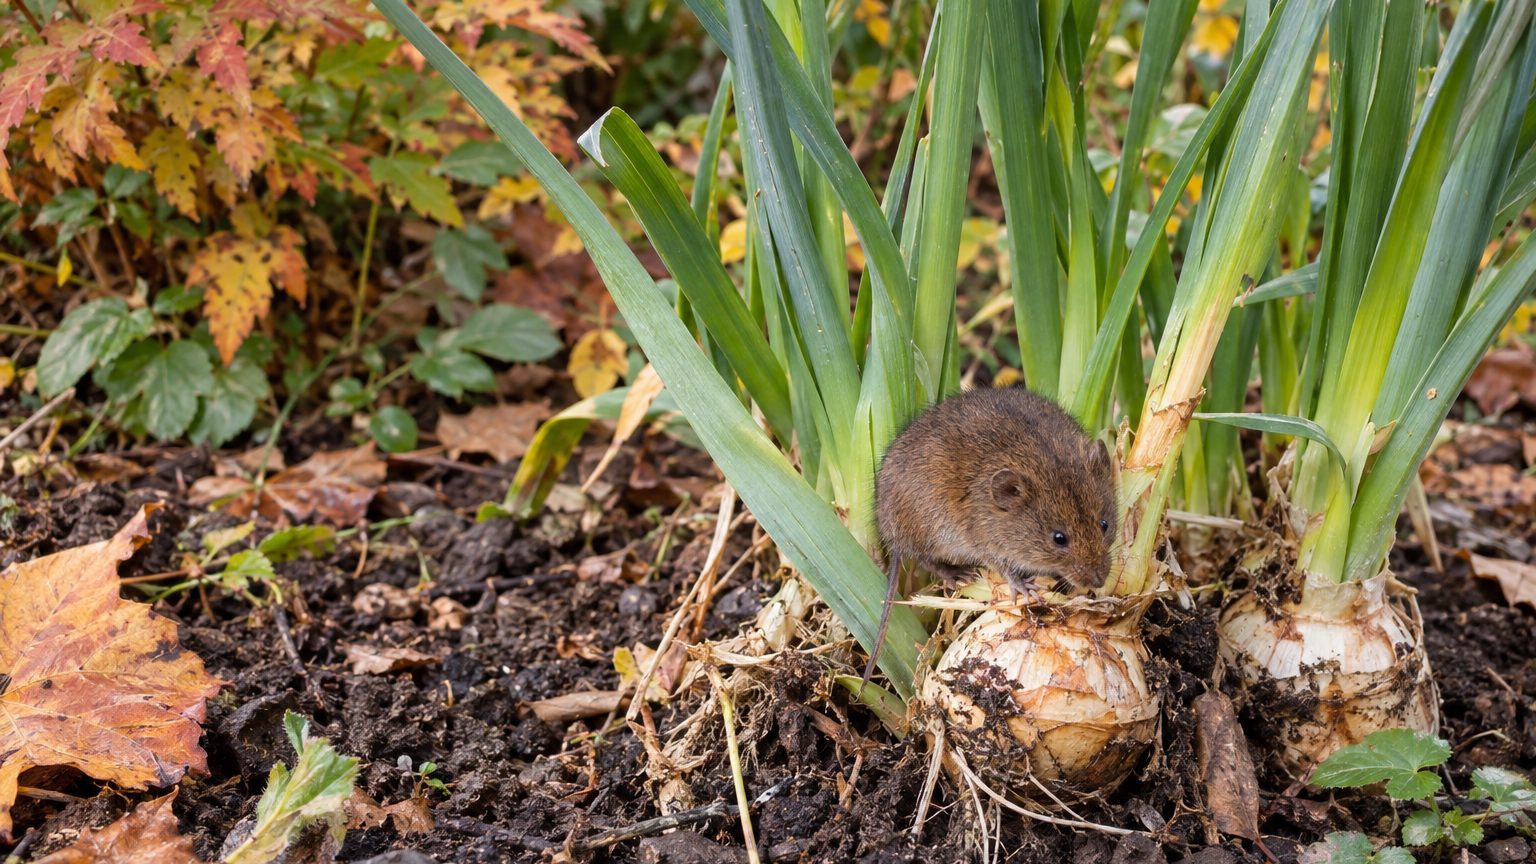
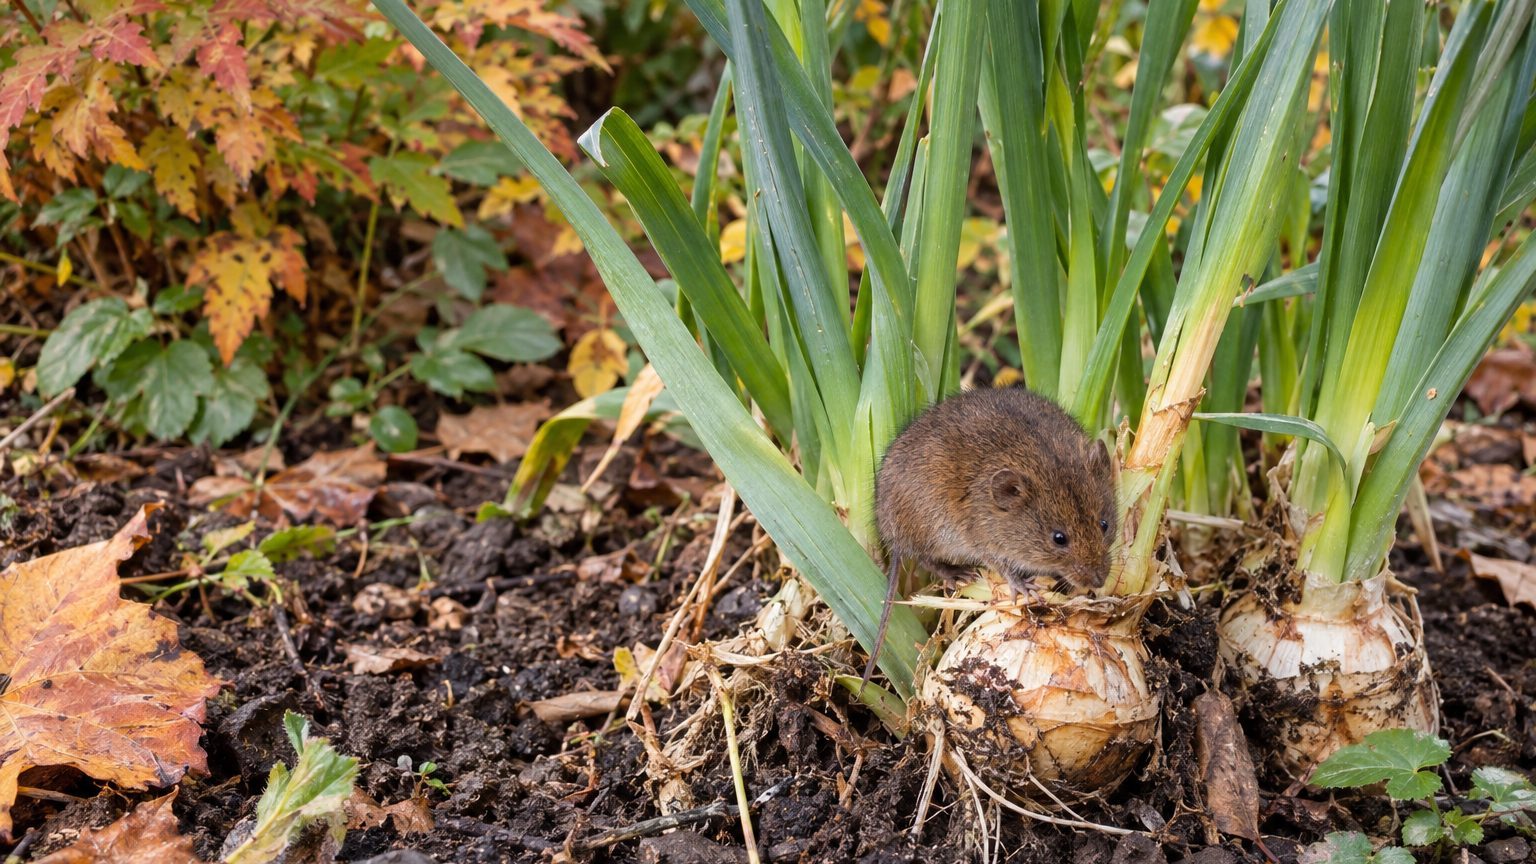
Tulip bulbs planted in fall can vanish from a bed by spring, leaving small holes and loose soil where the shoots should be. Chipmunks are a common cause, since they dig up and eat spring bulbs. Telling their work from other diggers and protecting the bed comes down to a few steady habits.

Chipmunks: What You See

Chipmunks are easiest to recognize by the animal itself, and then by what it leaves in the bed.

  • A small, quick rodent with pale stripes down its back, far smaller than a tree squirrel, often darting along walls, steps and shrubs.
  • Small holes in the planting bed, with loose, freshly turned soil around them.
  • Bulbs gone altogether, sometimes with scraps of papery skin left on the surface.
  • Freshly planted tulips as the main target, so the damage often shows up as shoots that never appear in spring.
  • Cheeks puffed out with food as the animal runs off, since chipmunks carry what they dig up.
  • More activity once they leave hibernation in early March.

One sighting is not proof, but a striped visitor near a bed with missing bulbs makes a strong case.

Chipmunks or Something Else?

Several animals dig in bulb beds, and the fix differs a little for each. Look at the animal’s size and at the shape of the damage together before you decide.

Looks like How to tell them apart
Tree squirrels: bulbs dug up and eaten, soil scattered Squirrels are larger, gray or brown with no back stripes, and often disturb mulch and pots as well as the bed.
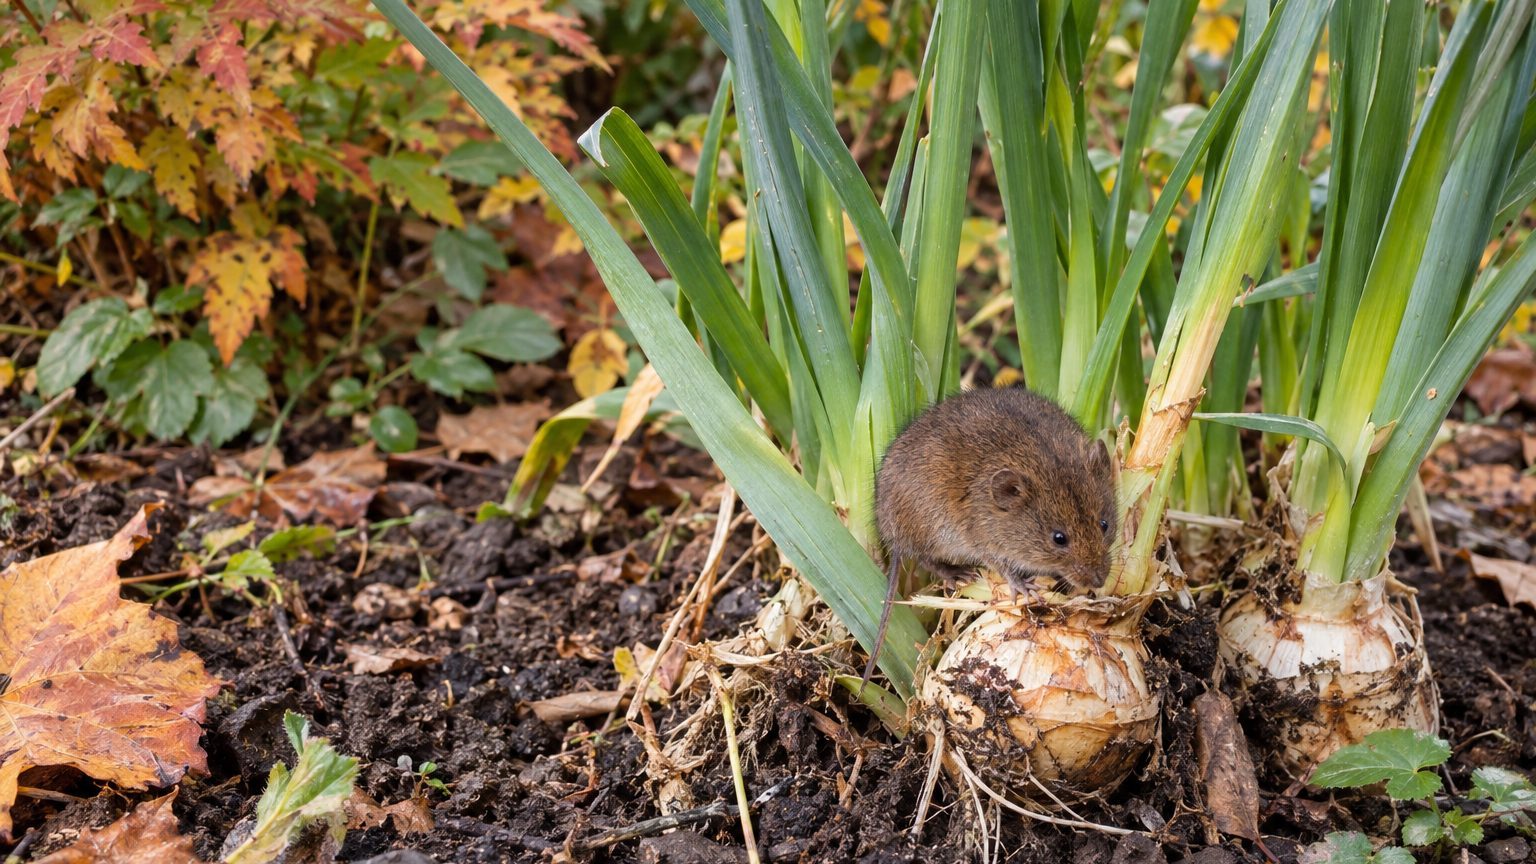
Voles: freshly planted tulips devoured Voles work out of sight, so you find bulbs gone with few open holes, and the animal itself is rarely seen in daylight.

Deer also eat tulips, but they take the foliage and buds above ground and leave ragged, torn stems at browsing height. Chipmunks go for the bulb below ground, so a dug hole points to them rather than to deer.

What Causes Chipmunks, and Where It Is Worst

Food and shelter bring chipmunks in. Shrubbery, flower beds and gardens give them cover, and they eat nuts, seeds, grain, fruits, fungi, insects, roots, leaves and bird eggs along with bulbs. Spilled bird seed and pet food kept in containers that are not rodent-proof add to the draw.

Bulbs themselves send a signal. The scent of bulbs, or even the disturbed soil from planting, can attract diggers. That is why a bed that was untouched for years can suddenly lose bulbs after a new planting.

No single region owns the problem. Wherever chipmunks live, as in Pennsylvania and Indiana, where they are known to eat bulbs, seeds and seedlings, yards with shrubs, walls and feeders are the likeliest to be visited. Tulips planted in fall take the brunt.

How to Treat Chipmunks

Start with the bulbs that are already in the ground, then work toward barriers and repellents.

  1. Replant any dug-up bulbs at the proper depth, 6-8 inches for tulips, and water them in, so that the settled soil discourages further digging.
  2. Lay quarter-inch hardware cloth over the bed and cover the cloth with soil, so that the animals cannot reach the bulbs and the metal stays out of sight.
  3. Extend the cloth at least 1 foot past each margin of the planting, so that chipmunks cannot dig in from the edge.
  4. Build cages from ½-inch galvanized hardware cloth for new plantings, set the bulbs inside root end down, and bury the whole cage at planting depth, which keeps rodents from getting to them when done properly.
  5. Place a wire cloche over a small planting, since a cover is simpler than a buried cage for a few bulbs.
  6. Apply a taste repellent to the soil at the planting site only as a backup, and reapply it after every rain, because multiple applications are needed to keep it working.

Repellent products and what is approved for use vary by state, so your state’s cooperative extension service is the place to confirm what is allowed where you live.

How to Prevent Chipmunks Coming Back

Prevention follows the year, starting with how you plant in fall and ending with how you store food through spring.

  • In fall, as you plant, mix tulips in among daffodils, which squirrels find less attractive, a trick that works in Vermont and is worth trying elsewhere.
  • Right after planting, spread a layer of mulch over the bed, which in Vermont helps disguise the scent of the bulbs and keeps soil moisture and temperature more even.
  • Through winter, check that the soil still covers any hardware cloth, since exposed edges give chipmunks something to push under.
  • Before chipmunks emerge in early March, move bird seed and pet food into rodent-proof containers.
  • Through spring and summer, sweep up spilled seed under feeders so the yard stops advertising a free meal.

Thinning the cover near the bed, such as dense shrubbery or woodpiles, also takes away shelter that makes a yard attractive.

Where This Comes From

These notes draw on university extension and government pages written for Pennsylvania, Indiana, Kansas and Vermont, along with general guidance on chipmunks and bulbs.

Rules on repellents and trapping differ from state to state, so confirm them with your state’s extension service.

Common Questions

Do Chipmunks Eat Crocus Bulbs?

They do, though less often than tulips. Freshly planted tulips are the usual favorite, and crocus is taken to a lesser extent, so a crocus bed near a tulip planting still deserves the same protection.

Do Chipmunks Eat Anything Besides Bulbs?

Yes. They also take seeds, seedlings, garden fruits, insects and bird eggs. In Indiana they are noted for attacking garden fruits as well as digging up bulbs and seeds, so damage elsewhere in the yard is a clue to the same visitor.

Can Chipmunks Get Through Hardware Cloth?

Not when the cloth is set up properly. Caged or covered bulbs stay out of reach, but gaps at the edge or cloth left uncovered by soil give them a way in, so check the margins of the bed.
Bulb Mites on Spring Bulbs: How to Spot Them and Get Rid of Them

Bulb Mites on Spring Bulbs: How to Spot Them and Get Rid of Them

Tulip or narcissus bulbs may emerge stunted or twisted, or fail to emerge at all. When you dig one up and find it soft and crumbling, bulb mites are a common reason.

Bulb Mites: What You See

Most of the signs show up on the bulb and the growth above it, so you often need to dig one up to be sure.

  • Shiny, creamy white bodies with short legs, often described as pearls with legs, cluster under the scales and at the base of the roots.
  • Each mite measures only 0.02 to 0.04 inches and moves very slowly, so a hand lens helps.
  • The bulb is soft, brown, or turning to pulp, because mites open the outer skin and let rot in.
  • New growth comes up stunted and distorted.
  • Tiny white oval eggs sit alone or in clusters near damaged, decaying tissue on the bulb surface.

On lilies, the stems can be dwarfed and distorted too, and the plant may not survive.

Bulb Mites or Something Else?

Stunted shoots and mushy bulbs have more than one cause, so a single clue is not enough. Check the plant above ground and the bulb below it before you decide anything.

Looks like How to tell them apart
Root rot from fungus Root-rotting fungi can be present with bulb mites, so finding one does not rule out the other.
Fungus gnat larvae Fungus gnat larvae can injure bulbs that bulb mites later infest, so both pests may be present.

The catch is that these problems often travel together. Bulb mites are secondary pests that tend to move into bulbs already hurt by fungus gnat larvae or root rot, so finding mites does not rule out the others.

What Causes Bulb Mites, and Where It Is Worst

Bulb mites live on decaying vegetation such as weeds and old plant debris, and they have a wide host range. Several generations overlap each year, so a small population can build quickly. They also ride in on infested bulbs, which can carry them into your beds from the start.

Weather plays a part. Injury is worst when cool, wet weather slows plant growth, and mites tend to do more damage in years with cool, wet springs. In Oregon, the highest numbers were present in April and May.

Warmth speeds them up. In Kansas, the life cycle from egg to adult may take about 40 days, but at 77°F (25°C) it can finish in 12 days. In North Carolina, warm conditions bring the full cycle down to about 2 weeks. In Kansas, mites are less active in winter, but they do not rest, and every life stage may be present throughout the growing season.

Bulb mites can show up in any yard that grows bulbs, and they affect amaryllis, crocus, freesia, gladiolus, hyacinth, lily, Dutch iris, narcissus, and tulip.

How to Treat Bulb Mites

Treatment starts with finding out what is happening at the bulb, then removing the source and protecting what is left.

  1. Dig a few suspect bulbs and look closely at the area where the roots meet the bulb, because that is where mites gather and where they are easiest to confirm.
  2. Discard soft, rotting bulbs in the trash rather than the compost, so that mites and the fungi they carry do not spread.
  3. Clear weeds and old plant debris from the bed, since mites overwinter there and move back onto new bulbs.
  4. Keep sound bulbs away from infested ones, because mites carry pathogens on their bodies and can crawl from one bulb to a healthy neighbor.
  5. Before planting, soak bulbs in a registered miticide for 30 minutes.

Leave the leaves of healthy bulbs in place until they turn yellow, since they feed the bulb for next year. The aim is to protect sound bulbs from infested ones.

How to Prevent Bulb Mites Coming Back

Prevention focuses on bulb inspection, bed cleanup, and watching early growth.

  • Inspect stored bulbs and discard any with soft spots, since infestations affect bulbs in storage as well as in the field.
  • Clean out weeds and plant debris from the bed so mites have nowhere to overwinter.
  • At planting, choose firm, undamaged bulbs and set them in well-drained soil, so roots are not sitting in the wet conditions that favor rot.
  • In early spring, watch for slow or distorted shoots, because damage usually appears early in the growing season and is worse when cool, wet weather slows growth.
  • In April and May, check bulbs that look weak, as mite numbers in Oregon were highest in those months.

Keep beds free of weeds and old plant debris, which give mites a place to overwinter.

Where This Comes From

Bulb mites overwinter on decaying vegetation and can infest bulbs in storage as well as in the field.

Common Questions

Can Bulb Mites Hurt Garlic and Onions Too?

Yes. Bulb mites are a problem of garlic that easily goes unrecognized, and they can stunt plant growth and reduce the onion stand.

How Many Eggs Does a Bulb Mite Lay?

In Utah, females lay 50 to 100 eggs in a lifetime, and eggs hatch in 2 to 7 days. Elsewhere, a female is reported to lay up to 100.

Can Bulb Mites Cause Rot on Their Own?

Not usually. By themselves they are not particularly damaging, but if root-rotting fungi are present, the mites injure the roots further and make the rot worse.

Aphids on Spring Bulbs: How to Spot Them and Get Rid of Them

Aphids on Spring Bulbs: How to Spot Them and Get Rid of Them

Sticky leaves and crumpled new shoots on tulips in spring usually point to clusters of tiny insects feeding on the fresh growth. Aphids go after spring bulbs both in the ground and in storage, and cool spring weather suits them. Knowing what they look like, what they leave behind and how to move them off the plants keeps the bulbs healthy for next year.

Aphids: What You See

Look first at the newest growth, because that is where the colonies settle.

  • Small clusters of soft-bodied, pear-shaped insects sit packed together on emerging leaves, shoots and buds.
  • Leaves and flowers come out curled, twisted or deformed where the insects have been sucking sap.
  • The foliage turns sticky and shiny from honeydew, a sugary liquid the insects excrete as they feed.
  • Dark, sooty splotches appear on that sticky surface when a fungus grows on the honeydew.
  • Some adults have wings and some do not, and young nymphs of every size share the same cluster.

Heavy colonies that stay for a long stretch can leave shoots and buds wilted, and sometimes the tips die back.

Aphids or Something Else?

Several other problems leave sticky, distorted or speckled growth on bulbs. The insect itself, and where it sits on the plant, settles the question quickly.

Check the undersides of leaves and the tips of shoots with a close look, or a hand lens if the insects are hard to see.

Looks like How to tell them apart
Thrips damage Thrips are slender insects that rasp the surface, so you see streaked, silvery or distorted petals, but the insects are not pear-shaped and the foliage is not coated in a sticky film.
Mite damage Mites are far smaller than aphids and cause stunted, deformed growth, yet you do not find clusters of visible, soft-bodied insects sitting on new shoots.

Sooty mold alone can also fool you, since it looks like a dark dusting on leaves. It only forms on honeydew, so look for the sticky surface and the insects that made it.

What Causes Aphids, and Where It Is Worst

Aphids feed by sucking plant sap, and they multiply fast because for much of the year they give birth to live nymphs that mature into wingless or winged adults. Essentially all of them are females. In Colorado, males appear only in late summer or early autumn, during the last outdoor generation.

Bulbs can carry the problem in before you plant them. Tulip bulb aphids feed on tulip bulbs and other bulbs and corms in storage as well as in the field, and they also infest leaves, shoots, buds and flowers once the plants are growing. In North Carolina, planting infested bulbs can lead to distorted, stunted new growth.

Spring is the busy season, because aphids are typically more of a problem during cool weather. The pest is not tied to one region. It can turn up anywhere spring bulbs grow.

How to Treat Aphids

Start with the gentlest methods, since natural enemies are already working in your favor.

  1. Inspect new spring growth regularly, so that you catch small colonies before they spread.
  2. Spray the clusters with a hard stream of water, which knocks the insects off the plant and leaves leaves and buds intact. In Utah, this is the suggested first move.
  3. Switch to insecticidal soap if the insects keep returning, because it is another soft option that works on contact with the pests.
  4. Leave ladybugs, lacewings, syrphid flies, damsel bugs and wasps alone, since these feed on or parasitize aphids and generally keep them under control.

For anything stronger, ask your state’s cooperative extension office what is approved where you live, since registrations differ from state to state.

How to Prevent Aphids Coming Back

Prevention follows the bulb year, starting before the bulbs ever go in the ground.

  • In fall, before planting, look over each bulb and set aside any that look infested, because stored bulbs can carry aphids into the bed.
  • In early spring, begin looking at emerging shoots, since cool weather favors the insects and colonies start on new growth.
  • As leaves open, rinse any small clusters with a hard stream of water before they build up and curl the foliage.
  • Through bloom and after, leave the beneficial insects in place and avoid anything that would clear them out.
  • After flowering, let the leaves yellow naturally, then clear the bed of debris.

Healthy, undisturbed beds give the natural enemies of aphids a steady place to work.

Where This Comes From

This information draws on university extension guidance on bulb pests. Your own state’s cooperative extension office can confirm timing and approved treatments for your area.

Common Questions

Can Aphids Travel on Stored Bulbs?

Yes. Tulip bulb aphids infest tulip bulbs and other bulbs and corms during storage, so inspect them before you plant.

Why Are My Tulip Leaves Sticky?

Sticky leaves usually come from honeydew excreted by feeding aphids. Look for clusters on new growth to confirm.

Do Aphids Kill Bulbs?

Their feeding mainly distorts leaves and flowers. Very high numbers over an extended period can cause wilting and sometimes dieback of shoots and buds.

White Grubs in Lawns: How to Spot Them and Get Rid of Them

White Grubs in Lawns: How to Spot Them and Get Rid of Them

A patch of turf that goes limp and brown even after a good soaking, then lifts like a loose rug, is the classic mark of white grubs feeding on the roots. Recognizing the damage, separating it from look-alikes, and counting the grubs helps you decide whether to act.

Signs of White Grubs in a Lawn

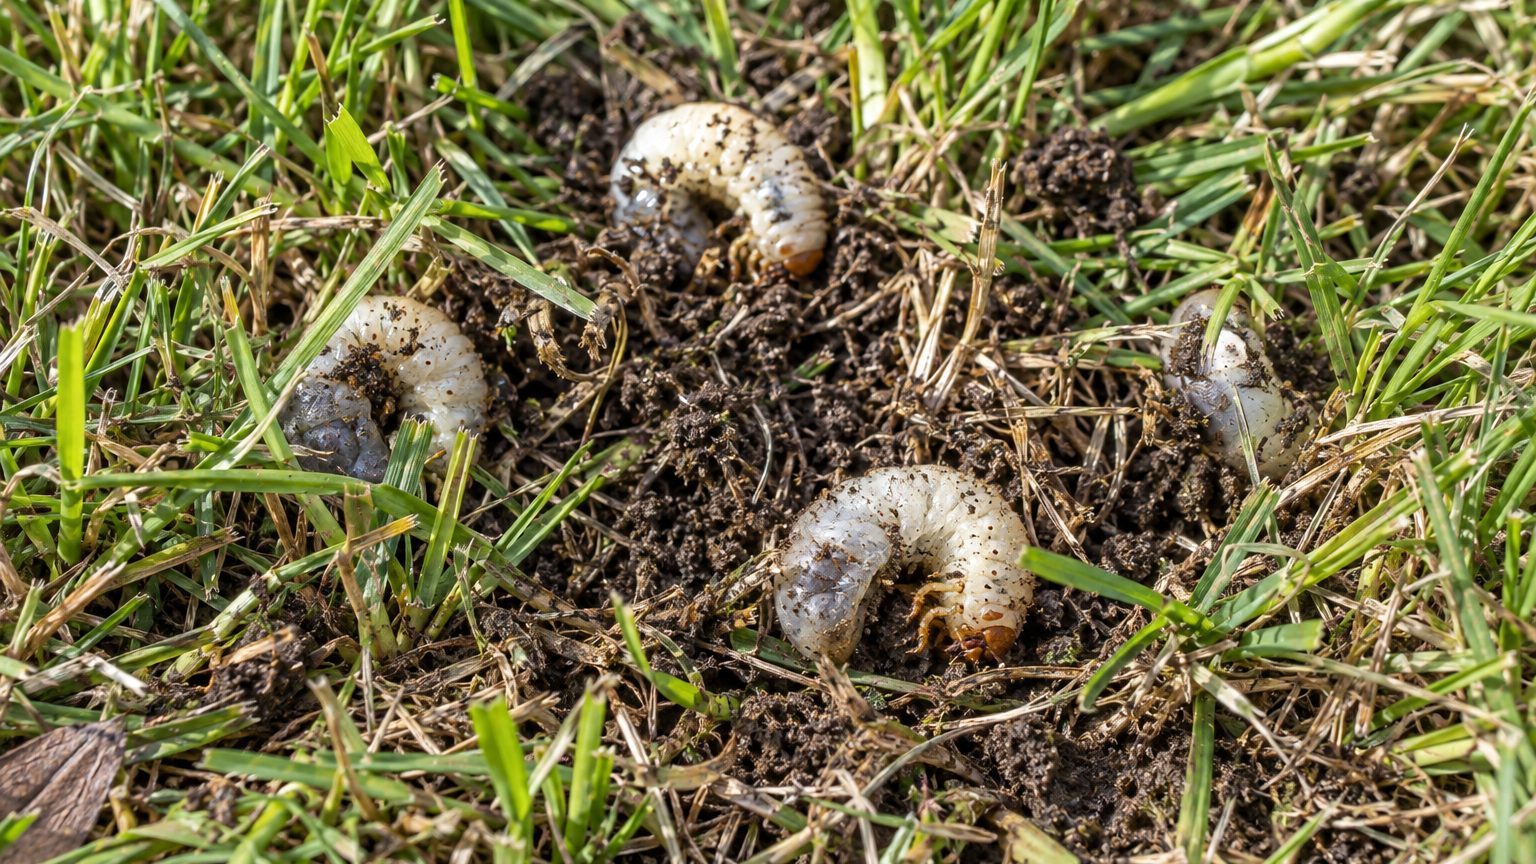
White Grubs on a lawn

The grub itself is easy to recognize when you lift turf at the edge of a damaged patch.

  • Pull back a loose piece of sod and you find plump, off-white, C-shaped larvae with a brown head and 3 pairs of legs, sitting in the root zone.
  • Older larvae reach up to 1-1/2 inches long and are wrinkled and whitish to yellow, which makes them hard to miss once exposed.
  • Grass in scattered patches wilts and stays stressed even after you irrigate, because the roots that carry water are gone.
  • Wilting turf may take on a blue or purple cast before it collapses into dead or very thin patches.
  • The sod lifts or pulls up with little effort, and the white grubs show up underneath.

In Indiana and adjacent states, large larvae are present by September, when damage may become easier to spot.

Lawn Damage Mistaken for White Grubs

Dry, brown turf is not always a grub problem. Drought and several other root problems also leave patches that look much the same from the sidewalk.

A quick dig and a tug on the grass settles most cases. Check the roots and the soil, not just the color of the blades.

Looks like How to tell them apart
Drought stress: grayish, wilted patches The sod stays rooted when you tug it, unlike grub-damaged turf, which lifts easily. With grubs, turf does not respond to irrigation and the sod lifts easily.
Dead patches from thatch or compaction Roots are present but shallow in hard or spongy soil, and no grubs turn up when you dig. With grubs, roots are chewed off and C-shaped larvae sit beneath the surface.

Some fungal diseases can also leave brown patches, so confirm grub damage by lifting the turf and checking for larvae. If the roots hold firm and no larvae appear, look away from grubs.

When White Grubs Damage Shows Up

The cause is the larval stage of scarab beetles feeding on grass roots, thatch and organic matter in the soil. They damage both warm-season and cool-season grasses, and they favor bluegrass and ryegrass in particular.

Timing follows the life cycle. In Indiana and adjacent states, annual white grubs overwinter as larvae, pupate in late spring or early summer, and adults fly in early to mid-summer. Eggs hatch by the end of July, and large larvae are present by September, which is when patches usually show.

According to Iowa State University Extension, eggs hatch in 2 to 3 weeks after they are laid, and the tiny larvae begin eating roots right away. Damage often appears well after the feeding started, since the lawn holds on until the roots are mostly gone.

How to Get Rid of White Grubs

Start with a count, because many lawns carry grubs without needing any treatment at all.

  1. Cut a square foot of sod in a few places along the edge of a damaged patch, so you know how many grubs live in each square foot.
  2. Compare the count with the local threshold: in Indiana and adjacent states, populations below 5 grubs per square foot rarely require treatment, while 5 to 10 grubs per square foot are usually needed for significant damage.
  3. Leave the lawn alone if the count is low, because in Indiana and adjacent states most turfgrass tolerates up to 5 grubs per square foot without visible damage.
  4. Act when counts run high, since in Iowa 10 or more annual white grubs per square foot will kill the grass.
  5. Ask your state extension office which treatments are approved where you live and when to apply them, since registrations differ by state.
  6. According to Cornell Cooperative Extension, fall fertilization with 0.25-5 lb. of N per 1,000 square feet enhances turf recovery from grub damage.

Reseed or sod any bare patches after the grubs are dealt with, so weeds do not move into the gaps.

How to Prevent White Grubs

A thick, deep-rooted lawn shrugs off moderate grub numbers, so prevention mostly means good routine care through the year.

  • In Indiana and adjacent states, choose grass species and cultivars suited to the site and its use when you reseed.
  • In early summer, when adult beetles begin to fly in Indiana and adjacent states, keep mowing at the proper height so the turf stays dense.
  • Use proper irrigation and thatch management to keep turf healthy and vigorous.
  • By late July in Indiana and adjacent states, when eggs are hatching, scout a few spots so you catch a rising count early.
  • In New York, fall fertilization can help turf recover from grub damage.

Appropriate cultivation also helps keep turf healthy and vigorous.

Common Questions

Do a Few Grubs in the Lawn Mean You Need to Treat?

Usually not. According to Purdue Extension, a few scattered grubs are not a cause for concern, and densities as high as 20 per square foot may not cause noticeable damage.

How Can You Tell If Grubs Are Eating Your Lawn or It Is Just Dry?

Tug the turf. Grass damaged by grubs lifts like a loose mat and shows larvae below, while dry grass stays rooted and perks up after a deep watering.

What Do White Grubs Look Like?

They are pudgy, off-white, C-shaped larvae with a brown head and 6 legs, and older ones can reach 1-1/2 inches in length.

Sod Webworms in Lawns: How to Spot Them and Get Rid of Them

Sod Webworms in Lawns: How to Spot Them and Get Rid of Them

Small yellow-brown patches that spread across a lawn in midsummer, especially on hot slopes and banks, often point to sod webworms feeding at the thatch line. The caterpillars hide by day and chew grass blades at night, so the damage shows before the pest does. A simple soap test confirms them.

Signs of Sod Webworms in a Lawn

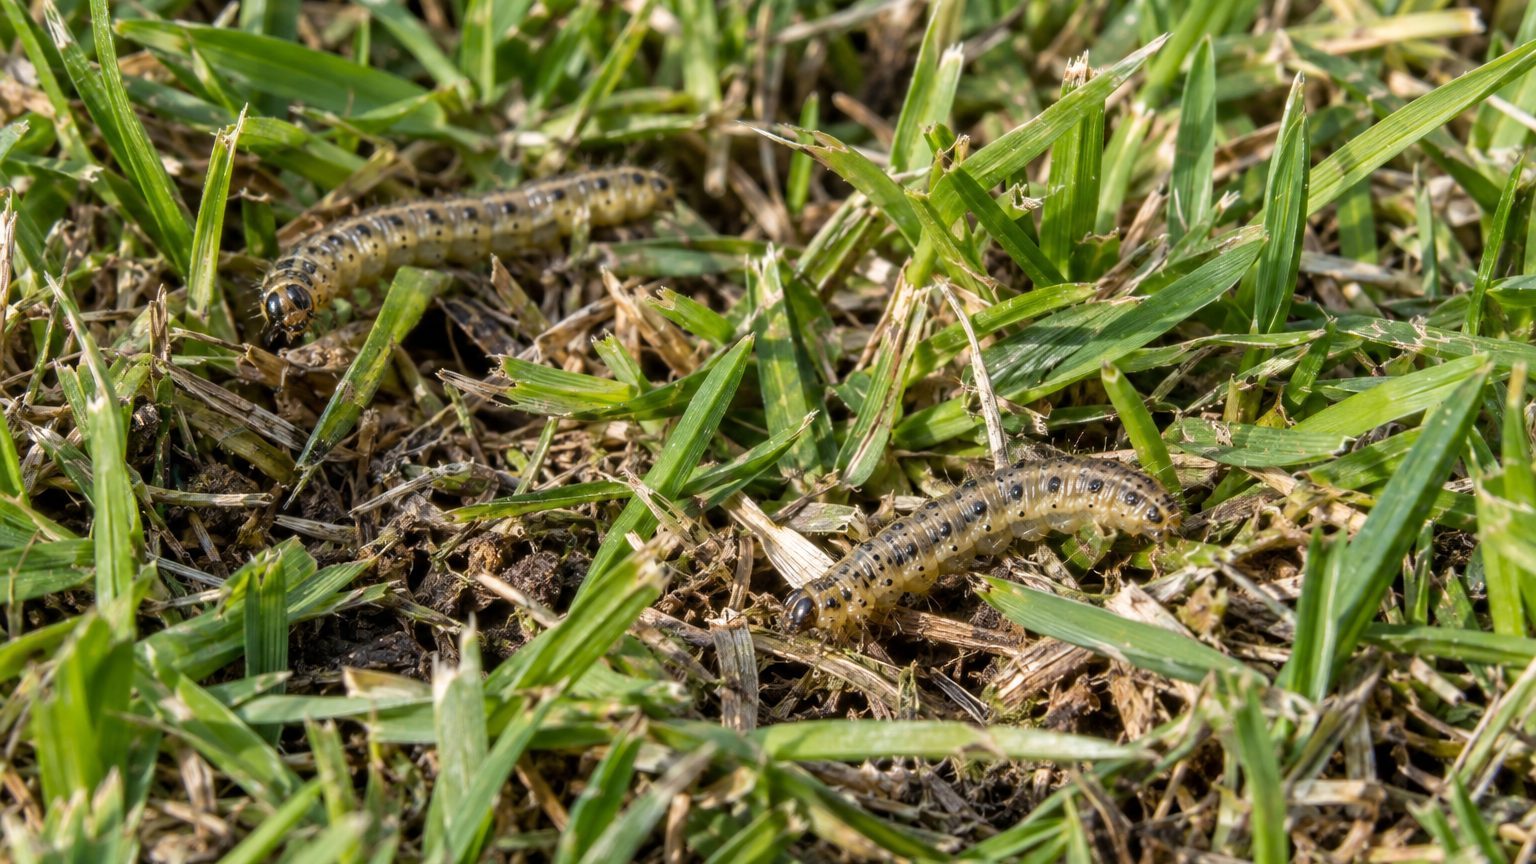
Sod Webworms on a lawn

Look for the signs that set sod webworms apart from other lawn trouble.

  • Larvae surface from the thatch when you pour soapy water over a patch, and they are slender, tan to light brown, and often marked with small darker spots.
  • Small yellow spots or patches appear first, much like the yellowing left by dog urine.
  • Patches turn yellow-brown in midsummer and quickly merge into large dry areas in dry weather.
  • Grass blades look chewed or scraped on the upper surface, an injury that is easy to overlook in the early stages.
  • Small brownish or dull grey moths, up to 3/4 inch long, flutter low over the grass when you walk across it.

Fully grown larvae reach about 1 inch long, which helps identify them when they surface.

Lawn Damage Mistaken for Sod Webworms

Early webworm injury is a small yellow spot, and plenty of other things leave the same mark. Judge by the spot’s location and by what turns up when you test the thatch.

Drought and pet urine can leave similar marks, and neither involves an insect.

Looks like How to tell them apart
Dog urine spots Scattered yellow spots in spots where the dog goes, and no larvae surface when you pour soapy water over the spot.
Drought stress Browning on banks, slopes and sunny edges, with no chewed blades or larvae in the thatch.

Moths flying over the lawn do not prove the patches are webworm damage, since adults are harmless. The caterpillars are what count, so check the thatch before you treat anything.

When Sod Webworms Damage Shows Up

Moths lay eggs on the lawn, and the caterpillars that hatch do the feeding. In Pennsylvania and Wisconsin, eggs hatch in 7 to 10 days. The larvae then feed and grow for 6 to 10 weeks in Wisconsin, depending on temperature and other conditions.

The early stages chew only the upper surface of the blades, so the lawn looks fine for a while. Damage becomes obvious in midsummer, when the patches turn yellow-brown and merge quickly in dry weather.

Some lawns are hit harder than others:

  • Hot, dry banks and steep slopes, where drought stress runs higher.
  • Bermudagrass and St. Augustinegrass, the warm-season grasses tropical sod webworm favors, as it infests all warm-season turfgrasses.
  • St. Augustinegrass varieties sold in Georgia, such as Palmetto and Raleigh, which are susceptible.
  • Lawns heavily fed with nitrogen, which can build thatch and invite attack.

How to Get Rid of Sod Webworms

Confirm the pest first, then decide whether the numbers justify treating.

  1. Mix 2 tablespoons of liquid dish detergent into 2 gallons of water and pour it over a 1 ft2 area of turf, so larvae hiding in the thatch come to the surface.
  2. Repeat the test across the damaged area because the larvae may be unevenly distributed.
  3. Compare your count with the threshold. In Pennsylvania and Utah, treatment may be warranted at 10 to 15 larvae per square yard of turf.
  4. Contact your state’s cooperative extension office for the products approved where you live, and follow the label exactly.
  5. Hold off on heavy irrigation and mowing for 3 days after application, as Wisconsin advises, so the treatment stays where the larvae feed.
  6. Keep watering the damaged patches normally so surviving grass can fill in, and reseed only bare spots that do not recover.

Below the threshold, a lawn in good health usually outgrows the feeding without help, so skipping treatment is often the right call.

How to Prevent Sod Webworms

Prevention comes down to keeping the turf from becoming the hot, thick, stressed lawn that moths prefer.

  • In Georgia, avoid over-fertilizing with nitrogen, since it can build thatch and increase sod webworm attack.
  • Through the growing season, mow regularly with the mower set at the height recommended for your grass species, as Georgia advises.
  • During dry spells, keep slopes and banks from becoming drought-stressed, since sod webworms prefer hot, dry grassy areas.
  • In midsummer, scout hot, dry areas with the soapy water test before yellow patches have time to spread.
  • Dethatch only when the layer has grown thick, and time the work for your grass species.

Catching a problem while the larvae are still small saves far more grass than treating a lawn that has already gone brown.

Common Questions

Can a Lawn Recover from Sod Webworm Damage?

Often yes, if the crowns and roots survive. The caterpillars feed on the blades, so grass usually regrows once feeding stops and the lawn gets normal watering.

Do Sod Webworm Moths Hurt the Grass?

No. The moths are whitish or brownish, up to 3/4 inch long, and only the larvae feed on the turf.

Which Lawns Are Most at Risk?

Bermudagrass and St. Augustinegrass lawns top the list, along with any lawn that has hot, dry slopes. Cool-season lawns are not immune, particularly under drought stress.

Moles in Lawns: How to Spot Them and Get Rid of Them

Moles in Lawns: How to Spot Them and Get Rid of Them

Raised, winding ridges and small cones of loose soil showing up across the grass point to a mole tunneling underneath. The animal rarely appears, but its work is easy to read once you know the signs. Spotting the right tunnel and acting on it soon keeps a small problem from spreading across the whole front yard.

Signs of Moles in a Lawn

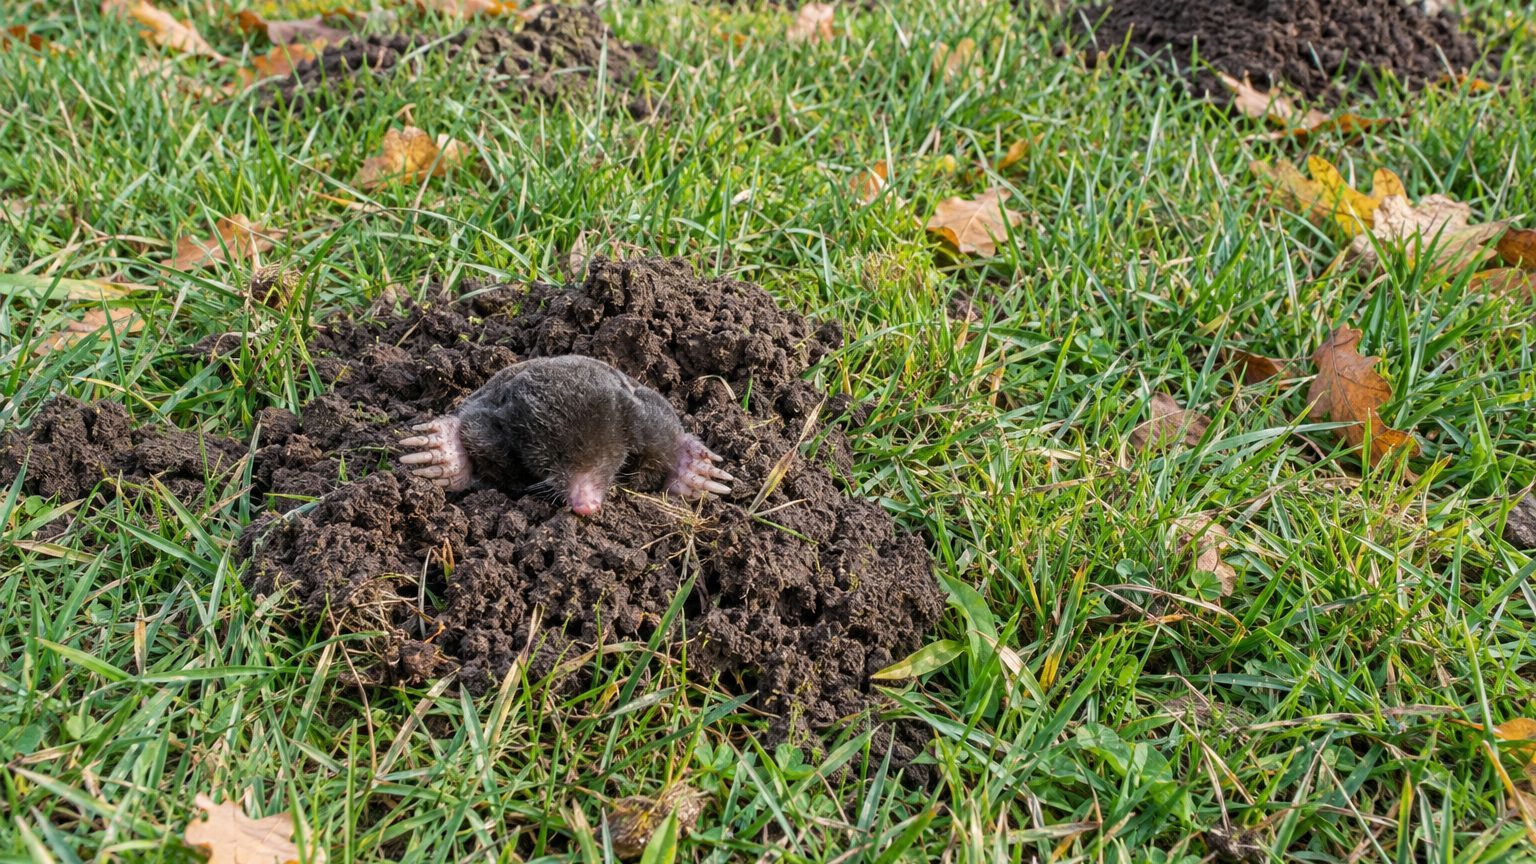
Moles on a lawn

Look for the surface signs that set moles apart from other lawn pests.

  • Volcano-shaped mounds of loose, crumbly soil pushed up from deep tunnels are a sign of a mole.
  • Raised ridges wander across the grass, soft underfoot, where a mole is feeding just below the surface.
  • Tunnels grow fast, at a rate of 18 feet per hour, so a ridge that was not there yesterday is a fresh one.
  • Ridges may be scalped by the mower, which tears the turf and can damage the blade.
  • Paddle-shaped feet with prominent digging claws mark the animal itself if you ever see one, which is 4 to 7 inches long.

Mounds and ridges together, in a lawn with soft soil, leave little doubt about who is digging.

Lawn Damage Mistaken for Moles

Not every disturbed patch of grass comes from a mole. Other causes leave different patterns once you look at the soil and the shape of the damage.

A quick look at the mound shape, plus where the damage sits, usually settles it.

Looks like How to tell them apart
Raised ridges from voles Voles leave open surface runways and small entry holes in the grass, while mole ridges are closed and come with soil mounds.
Mounds from earthworms or ants Their piles are small and scattered, often with castings or a visible hole, while a mole mound is a larger cone fed by a ridge nearby.

Gopher mounds are also sometimes confused with mole mounds, but a mole mound is a rounded volcano shape and gophers are rarely a lawn problem in the eastern half of the country.

When Moles Damage Shows Up

The cause is food. Moles tunnel through the soil hunting for the creatures living in it, and they dig wherever that hunting is easy. Well-drained, loamy soils are their favorite haunts, so lawns with that soft, easily dug ground see the most trouble.

In Iowa, fresh surface activity shows up in early morning and late afternoon in spring and fall, and on cloudy, damp days of summer. The rest of the year, they stay in deep tunnels 6 to 24 inches under the surface, which is why ridges seem to vanish in the coldest and driest stretches.

Numbers are small even when the damage looks huge. In Iowa, moles are mostly solitary, with about 3 moles per 1 acre of land. One animal can add 150 feet of new tunnels in the lawn each day, which explains why a single mole can seem like an invasion. In New Jersey, a single litter of 3 to 5 hairless young is born in the nest chamber.

How to Get Rid of Moles

Trapping is the most dependable way to remove a mole, and a few steps in the right order make it work. Your state extension office can tell you which products and rules apply locally.

  1. Flatten a short stretch of ridge with your foot, so you can see which tunnels the mole repairs and which it abandons.
  2. Watch for the repair. In New Jersey, if the damage in a given location is repaired within 1 or 2 days, place a trap near that spot.
  3. Choose a permanent runway for the trap. In Iowa, traps belong on permanent runways, not the temporary, meandering feeding tunnels.
  4. Set more than one trap when activity is heavy. In New Jersey, 3 to 5 traps per acre give faster control, unless mole activity is very light.
  5. Check the traps regularly and move any that sit unused, since a mole that avoids a tunnel will not return to it.
  6. Press the mounds flat and roll the ridges back down once the digging stops, so the grass can knit together again.

For a small, prized lawn, a barrier is another route, described in the next section.

How to Prevent Moles

Prevention is mostly about keeping them out of the spots you care about most, and about reading the season so you act before a litter or a feeding surge.

  • In Iowa, walk the lawn in early spring and flatten any ridges, so fresh digging stands out clearly when it appears.
  • Roll or tamp raised ridges before mowing so the mower does not scalp the turf.
  • When you build a barrier around a garden bed or small lawn, use a 3′ (91.5 cm) width of galvanized hardware cloth or aluminum sheathing. In New Jersey, the advice is to bury it 2′ (61 cm) deep (1.5′ in hard ground).
  • Leave 6″ (15 cm) of the barrier above the ground, and bend the bottom 3″ (7.5 cm) outward so moles cannot dig under.
  • In Iowa, check ridges often in spring and fall, when moles are close to the surface, and set traps promptly.

Lawns on loose, well-drained loam stay the most inviting to moles, so expect to repeat the checks there.

Common Questions

How Big Is a Mole?

A fully grown eastern mole measures 5″ to 8″ (13 to 20 cm) in length, with paddle-shaped feet and strong claws. The eastern mole, Scalopus aquaticus, is the one most often found in Iowa lawns.

Why Do Mole Ridges Seem to Disappear in Some Months?

Moles do not leave. They move deeper and dig less near the top, so the soft ridges fade until surface feeding picks up again with cooler, damp weather.

Can a Mower Damage a Mole Ridge?

Yes. Mowing over a raised ridge can scalp the turfgrass and harm the mower, so flatten ridges before you cut.

Nematodes in Lawns: How to Spot Them and Get Rid of Them

Nematodes in Lawns: How to Spot Them and Get Rid of Them

Irregular, thinning patches that widen slowly through summer, with no insects under the turf and no spots on the blades, often trace back to nematodes feeding on the roots. These microscopic roundworms live in the soil of lawns across the country. Pinning them down takes a close look at the roots and a soil sample, and managing them is mostly a matter of helping the grass root deeper.

Signs of Nematodes in a Lawn

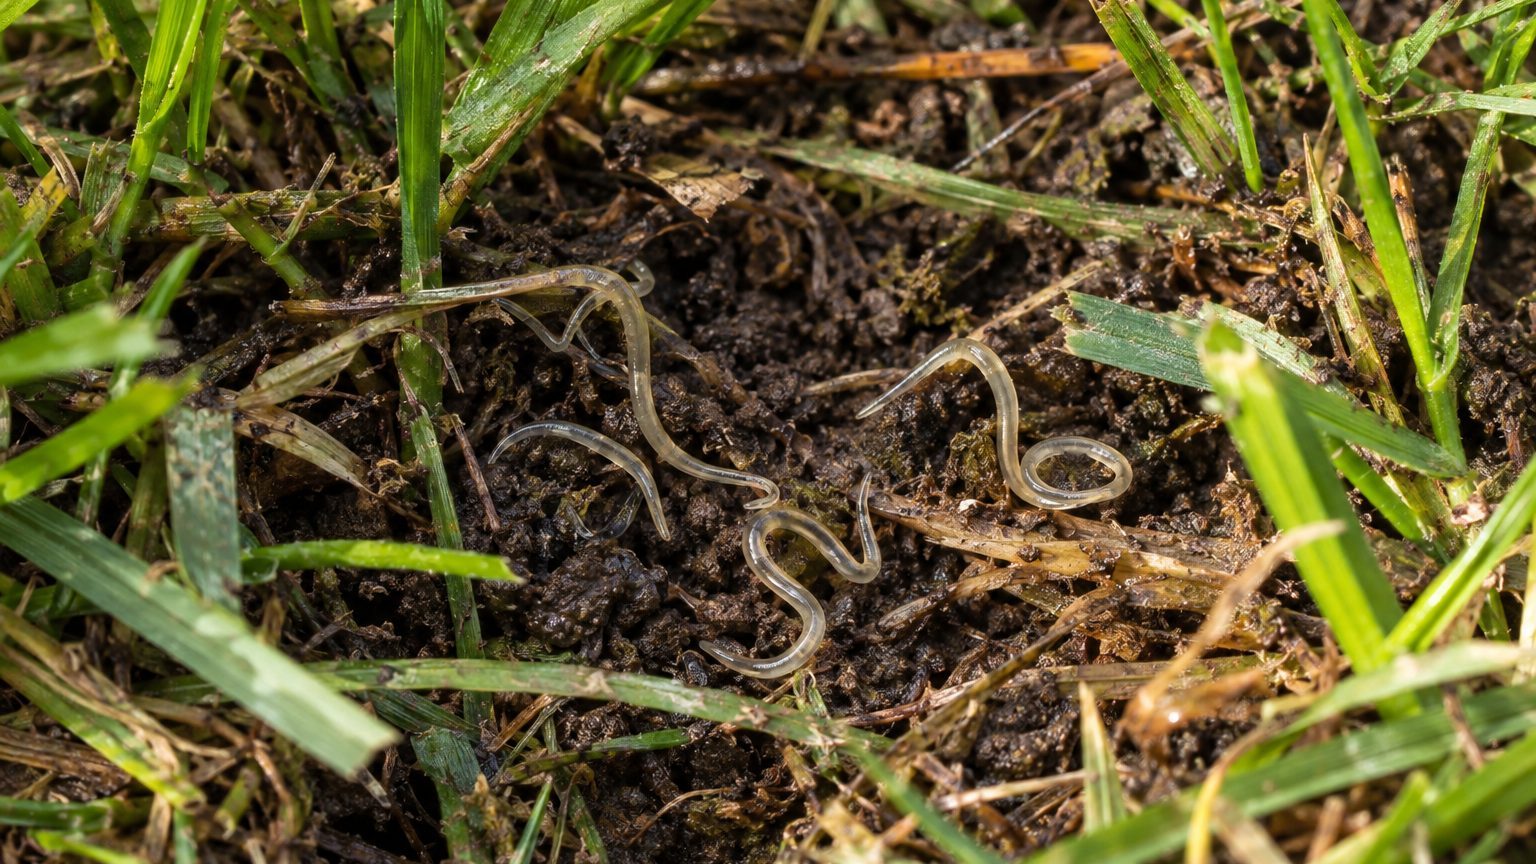
Nematodes in Lawns on a lawn

Nematodes work underground, so the clues are on the roots first and the grass second.

  • Pull up a clump from the edge of a patch and the roots often look cropped off an inch or less below the soil surface.
  • The turf thins, wilts or dies in irregular patches rather than neat circles.
  • Those patches spread outward slowly if left alone, so the lawn declines over seasons rather than overnight.
  • Root-knot nematodes can leave pale, yellowish (chlorotic) patches in the stand.
  • In North Carolina, root-knot populations climb from late April to early May and stay high through summer, so the worst thinning shows in the heat.

One sign alone proves little, but short, stubby roots under a slowly widening patch make a strong case for a soil test.

Lawn Damage Mistaken for Nematodes

Root-knot damage in particular can pass for a fungal disease, and a dry, stressed lawn can look nearly the same from the sidewalk. The difference shows up when you kneel down and look at the roots.

Looks like How to tell them apart
Fungal disease, with yellow or off-color patches Fungal problems tend to mark the blades, while nematode roots look cropped off an inch or less below the surface. A lab soil sample settles it.
Drought stress, with wilted, thinning turf in summer Dry-spot grass has long, intact roots and perks up after a deep soaking. Nematode patches keep spreading outward and the roots stay short.

Grub damage can also leave thin, weak patches, but the turf then lifts like a loose carpet and white grubs sit in the soil beneath it. Nematode-damaged turf stays rooted, only poorly.

When Nematodes Damage Shows Up

The cause is a tiny roundworm that lives on plant roots and pierces cells with a spear-like mouthpart called a stylet. Feeding wears down the root system, so the grass can no longer take up water and nutrients, and the top growth suffers.

Timing follows soil warmth. In North Carolina, sting nematodes begin feeding when spring soil temperatures reach 50-60 degrees F, and root-knot numbers build from late April to early May. Damage becomes visible once summer heat puts demand on those weakened roots.

According to NC State Extension, nematode activity subsides as temperatures rise above 90 degrees F, but heat can still expose damage to a weakened root system. Centipedegrass, zoysiagrass, and bermudagrass can be damaged by sting, root-knot, stubby-root, and lance nematodes.

How to Get Rid of Nematodes

Nematodes cannot be wiped out of a lawn, so the realistic goal is to confirm which ones you have and keep the grass growing a strong root system despite them.

  1. Collect soil cores from the problem area and the edge where healthy grass meets it, because the lab needs a sample that represents the lawn. In Florida, 12–16 cores per lawn is a good rule of thumb.
  2. In Florida, the count of each nematode type in 100 cc of soil sets the risk level for the turf species indicated. According to NC State Extension, labs ask for approximately 10-20 cores.
  3. Top dress with compost to raise soil organic matter. According to Clemson Cooperative Extension, 1/4 to 1/2 inch is the suggested layer.
  4. Water deeply and infrequently so roots chase moisture downward, which North Carolina turf advice recommends for the entire year.
  5. Feed with light, frequent nitrogen applications, which in North Carolina are recommended to build root growth and carry the lawn through stressful summer periods.

If the lab report shows a high risk level, your state’s extension office can tell you which treatments are legal and labeled where you live. Skip any shelf product that promises a quick nematode kill until you have that answer.

How to Prevent Nematodes

Prevention centers on choosing suitable turf and keeping its roots vigorous as nematode activity changes with soil temperature.

  • In late winter, ask the lab or extension office which nematodes tested high before you sod, plug or reseed, so you can choose a grass that tolerates them.
  • In North Carolina, note thin spots as spring soil temperatures approach 50-60 degrees F, when sting nematodes begin feeding.
  • Around late April to early May, start checking patch edges, since root-knot numbers begin to rise then in North Carolina.
  • In North Carolina, continue deep, infrequent watering through summer and use light, frequent nitrogen applications during stressful periods.
  • In fall, mow healthy areas before affected ones and rinse soil off the mower deck afterward, so you do not carry infested soil across the yard.

A lawn that never gets the chance to stress out in midsummer tolerates nematode feeding far better than one that starts the season already thin.

Common Questions

Which Lawn Grasses Get Nematode Damage?

Centipedegrass is the most susceptible to ring nematode, and it is also commonly damaged by sting, root-knot, stubby-root and lance nematodes. Zoysiagrass and bermudagrass are commonly damaged by sting, root-knot, stubby-root and lance nematodes.

Can You See Nematodes Without a Microscope?

No. Plant-parasitic nematodes are microscopic, and identification relies on features such as the juvenile stage, the stylet, and the male spicule or female ovary. The ring nematode is named for the concentric rings around its body.

What Types of Nematodes Attack Turfgrass?

Common turf genera include ring, stunt, lance, spiral, root-knot, needle, cyst, pin, lesion, sheath, stubby root, dagger and sting. A lab sample tells you which of them are present, and that decides how the lawn should be managed.

Fiery Skipper in Lawns: How to Spot Them and Get Rid of Them

Fiery Skipper in Lawns: How to Spot Them and Get Rid of Them

Small, round brown spots that appear in the lawn through summer are often the work of a single caterpillar. Fiery skipper larvae chew grass blades down to nothing in a tight circle, then hide in rolled leaves. Knowing what the larva looks like, and when the damage shows, tells you quickly whether you have a problem worth treating.

Signs of Fiery Skipper in a Lawn

Fiery Skipper in Lawns: How to Spot Them and Get Rid of Them

Look low in the turf, where the larva feeds and hides, and you will see a few clear clues.

  • The larva has reddish markings on the front of a black head that looks too big for its body, with a narrow neck behind it.
  • Behind the neck sits a dark shield, followed by a greenish-pink body with a granulated texture.
  • Full-grown larvae reach up to 1 inch long, so they are easy to spot once you part the blades.
  • The first damage is a round brown spot, 1 to 2 inches across, where one larva has eaten all the grass.
  • Leaves in and around the spot are rolled into small shelters, and the larva feeds on the blades right beside them.
  • Damage is usually seen from May through September.

Rolled leaves with a larva inside are the confirmation, because other causes of brown spots leave no caterpillar behind.

Lawn Damage Mistaken for Fiery Skipper

Brown spots have many causes, and a few look close enough to send you after the wrong fix. Treating for a caterpillar that is not there wastes effort and leaves the real problem alone.

A quick look at the edge of the spot and at the grass blades usually settles it.

Looks like How to tell them apart
Pet urine spots Spots often have a darker green ring and sit where pets go. Fiery skipper spots have bare, eaten-out centers with rolled leaves nearby.
Grub damage Turf lifts like loose carpet because the roots are chewed. Fiery skipper larvae eat the leaves and leave the roots in place.
Drought stress Dry areas are large, irregular and often follow sun or slope. Skipper damage starts as separate round spots with grass eaten away.

Whichever one you suspect, part the grass at the edge of a fresh spot and look for the black-headed larva before you decide on anything.

When Fiery Skipper Damage Shows Up

The cause is the larva’s appetite. It feeds on grass leaves, rolls them into a shelter, and each one clears its own small circle, which is why the damage starts as scattered spots rather than one big patch.

Fiery skippers live year-round around the Gulf of Mexico, in the desert Southwest, in most of low-elevation California and in Hawaii. In those places, lawns can see repeated rounds of larvae because the insect never has to start over from a winter die-off.

In Florida, larvae pupate after 16 days and emerge as adults seven to ten days later. That quick turnaround explains how a few spots can multiply across the lawn before you expect it.

Elsewhere, damage still tends to appear from May through September, which is the stretch to watch closely.

How to Get Rid of Fiery Skipper

Start with confirming the larvae and judging how many there are, then move to cleaning up the places they hide.

  1. Part the grass at the edge of a fresh spot and look for the black-headed larva, so you know you are dealing with a skipper and not a look-alike.
  2. Count larvae in a square yard of damaged lawn, because in California the suggested point at which treatment may be needed is more than 15 larvae per square yard.
  3. Dethatch the turf if larvae are damaging it, since in California this removes the layer of debris where they shelter.
  4. Rake up and remove clippings only if you believe the infestation needs treatment, because in Florida this limits larval habitat and works as a control.
  5. Check back on the damaged spots soon after, so you can tell whether larvae are still feeding or the grass has begun to recover.

If your count is high or the spots keep spreading, your state’s cooperative extension office can tell you which treatments are labeled for lawns where you live. In California, counts below that threshold usually call for cleanup and patience rather than treatment.

How to Prevent Fiery Skipper

Prevention comes down to keeping the lawn from becoming a comfortable hiding place and catching the first spots early.

  • Dethatch the turf if skipper larvae are damaging it, which eliminates larval habitat.
  • In late spring, walk the lawn before the damage season opens in May and part the grass in any spots that look thin.
  • Through summer, mow regularly and watch for round brown spots, since the damage can continue through September.
  • Remove lawn clippings and other debris only if you believe the infestation requires treatment.
  • Along the Gulf Coast, in the desert Southwest, in low-elevation California and in Hawaii, keep scouting through winter, since the insect lives there all year.

Lawns farther north can ease up in cold months, because skippers that wander in during summer do not make it through winter there.

Common Questions

What Does a Fiery Skipper Egg Look Like?

Eggs are white and pearlescent when first laid, then turn blue after a couple of days. They are tiny, with an average diameter of 0.75 mm, so you are unlikely to find them without a hand lens.

What Does an Adult Fiery Skipper Look Like?

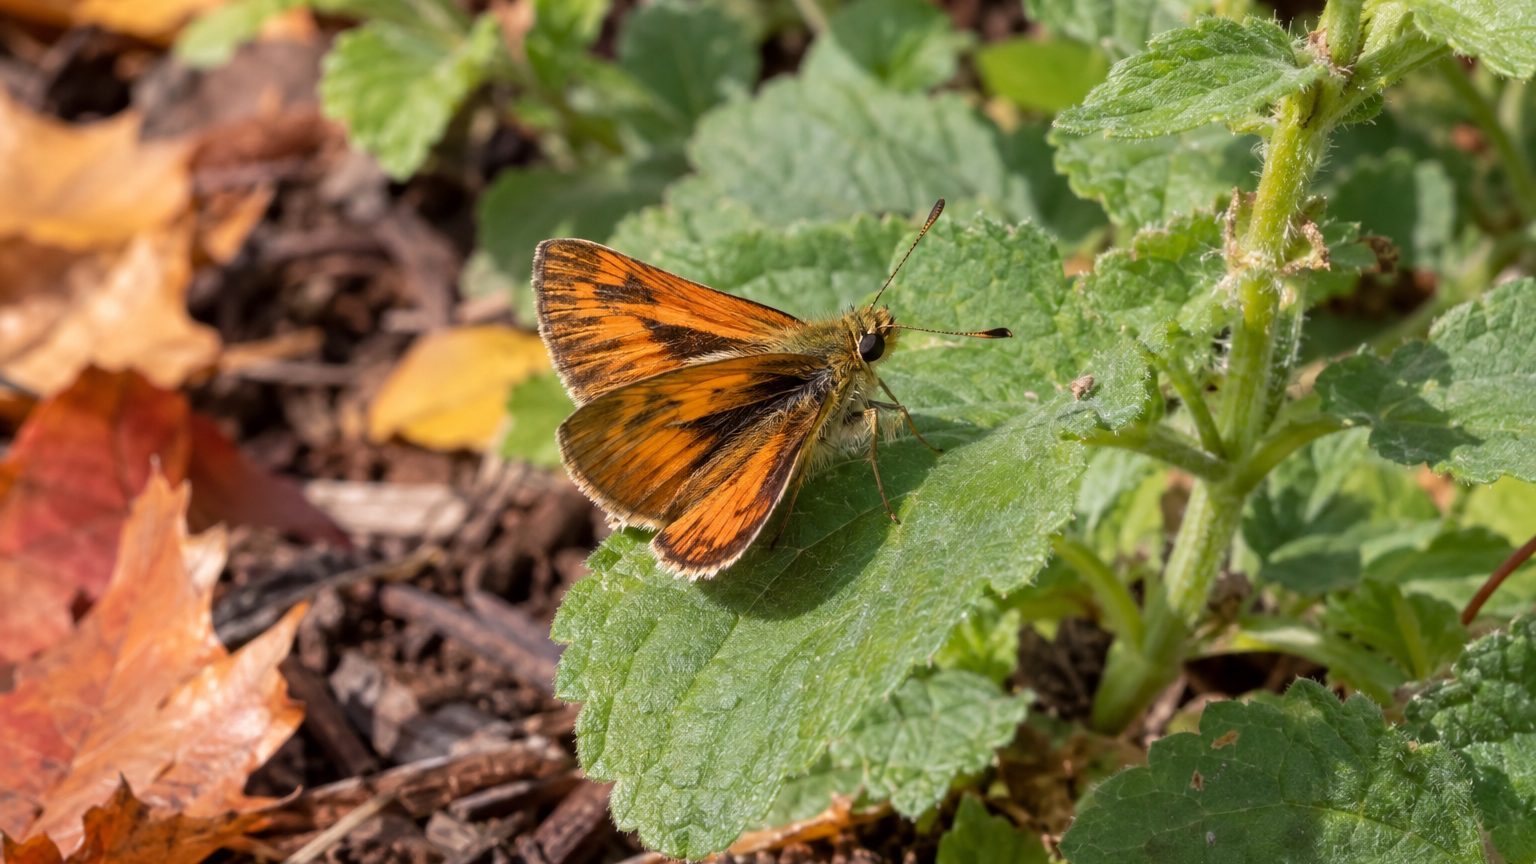
Adults resemble butterflies and measure about 1 inch long. A hooked knob at the end of each antenna is a useful identification clue.

Do Fiery Skippers Survive Winter in Northern States?

Those that stray north in summer do not survive the winter there. Lawns in those areas may see them arrive again in a later summer, but they will not carry over in the grass.

Cutworms in Lawns: How to Spot Them and Get Rid of Them

Cutworms in Lawns: How to Spot Them and Get Rid of Them

Small brown patches that appear overnight, with grass sheared off right at the soil line, usually point to caterpillars feeding in the dark. Cutworms chew stems and blades near the ground at night and hide by day, so you rarely catch them in the act. A few simple checks will tell you whether they are the cause and what to do next.

Signs of Cutworms in a Lawn

Cutworms on a lawn

Start with the damage itself, then look for the insect and the moth that starts it all.

  • Irregular pockmarked spots show up in the turf, and they grow more ragged as the caterpillar keeps feeding.
  • Blades and stems are chewed off near the soil, so the patch looks clipped rather than yellowed or wilted.
  • Larvae burrow through the thatch or into the ground by day, then come up to feed after dark.
  • Larger areas can be stripped to ground level when the caterpillars are numerous.
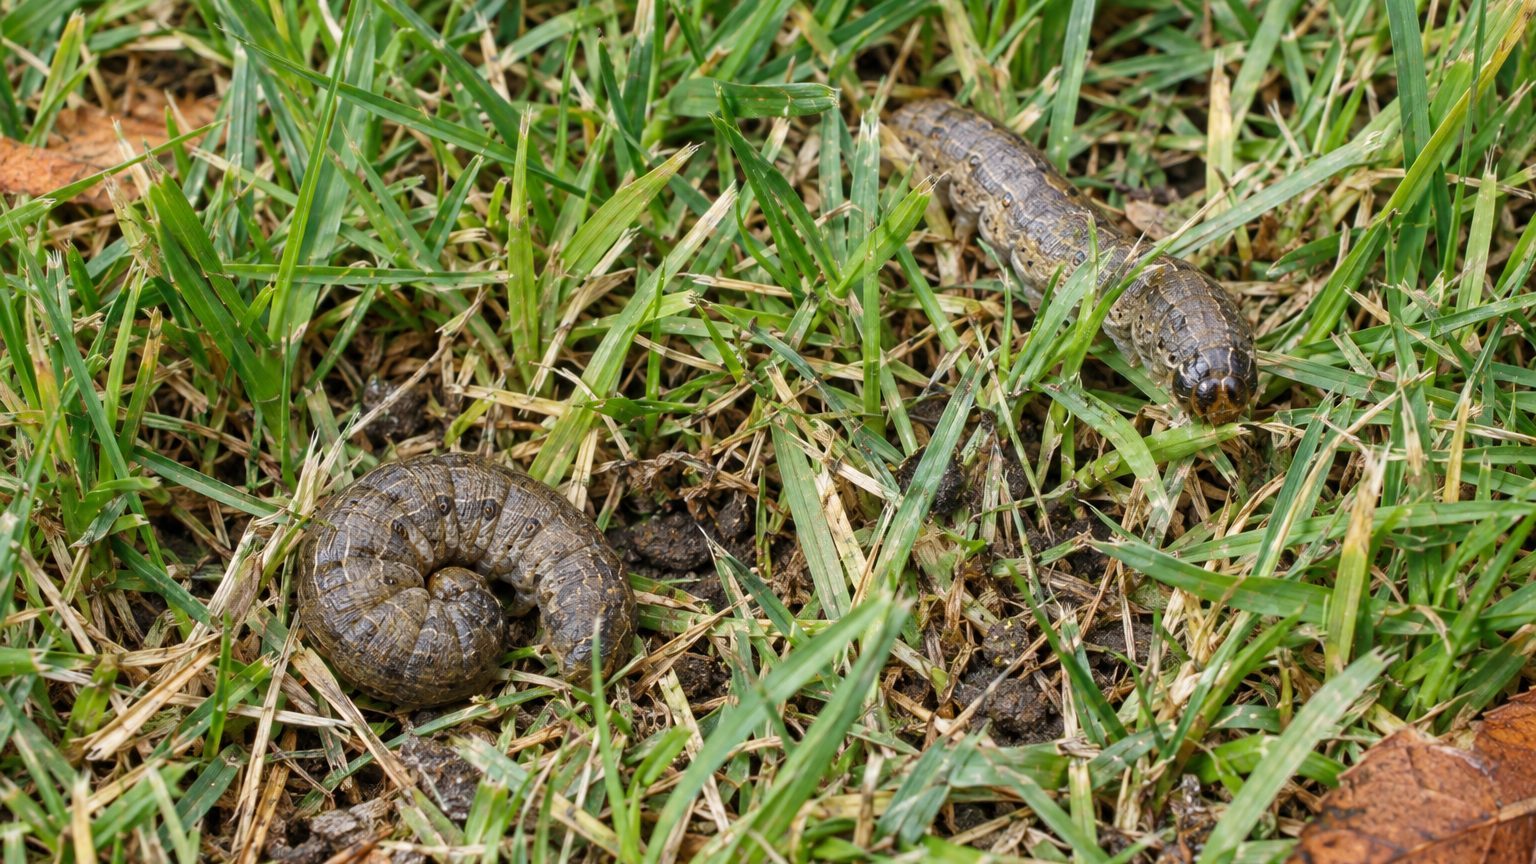
  • The moths are mottled brown or gray-brown, with a dagger-shaped marking on the wings of the black cutworm, and their eggs are smooth and yellow-cream, stuck singly to the tip of a grass blade.

Seeing the chewed stems and the burrowing larvae together is what settles the diagnosis.

Lawn Damage Mistaken for Cutworms

Early cutworm damage on a closely mown lawn looks a lot like ball marks or small dents, which is why it gets missed. On a putting-green-style yard, those little pockmarks can be the first warning.

Other problems also leave brown patches, so pair what you see with a simple test before treating anything.

Looks like How to tell them apart
Ball marks or dents in manicured turf A dent that stays the same size is just a mark. Cutworm pockmarks turn more irregular over time, and grass near the soil is chewed.
Armyworm feeding Armyworms are also listed as pests of all grasses, so the patch looks similar. Flush the spot with soapy water and compare the larvae that rise, since cutworms burrow and feed at night.

Dry-weather browning can look similar, but drought-stressed grass has intact stems rather than chewed edges at the soil line.

When Cutworms Damage Shows Up

The cause is the caterpillar stage of a night-flying moth. The moth lays eggs on grass blades, the eggs hatch, and the larvae feed on the turf until they finish growing. According to NC State Extension, eggs hatch within 3-10 days and the larvae finish development within 20-45 days, so a patch can appear quickly once the eggs are down.

How often this repeats depends on where you live. The black cutworm has four to five generations in the southern-most states, three to four in the transition zone, and 2 to 3 generations in the most northern parts of its range. A Gulf Coast lawn can face repeated waves through a long season, while an Upper Midwest lawn sees fewer.

No grass is off the list. Other cutworm species are occasional pests of home lawns of all kinds of turfgrass species. Endophyte-enhanced (E+) cultivars of perennial ryegrass, tall fescue, and creeping red fescue provide some resistance to black cutworms, which helps when you are choosing seed.

How to Get Rid of Cutworms

Confirm the pest first, then decide how far to go. Work in this order.

  1. Mix two tablespoons of liquid detergent into two gallons of water and pour it over one square yard of the damaged edge, because irritated larvae rise to the surface and show you what you are dealing with (this method comes from Indiana and the Midwest).
  2. In Indiana and throughout the Midwest, collect the larvae that surface a few minutes after the soap flush; they rise from largest to smallest and can be identified before you choose a treatment.
  3. Count them against the local threshold. According to NC State Extension, 2-6 larvae per square yard may indicate a need for an insecticide application, though that number can change with the site.
  4. Mow the damaged area and rake out the clippings, because in North Carolina, removing clippings from a recently mowed spot may help take eggs out of the turf.
  5. Contact your state cooperative extension office if the count is over the threshold, since it can tell you which products are approved where you live and how to apply them.

Below the threshold, healthy turf usually outgrows the loss, so patience and good care are often enough.

How to Prevent Cutworms

Prevention is mostly about keeping the turf vigorous and giving moths fewer places to settle through the year.

  • Choose endophyte-enhanced cultivars of perennial ryegrass, tall fescue, or creeping red fescue where they fit your site; in Indiana and throughout the Midwest, broader turfgrass selection should match the site and use.
  • Proper mowing, irrigation, fertilization, thatch management, and cultivation help keep turf healthy and vigorous.
  • In Indiana and throughout the Midwest, manage thatch buildup, since cutworm larvae shelter and burrow there during the day.
  • After aerating, fill the holes soon with sand or other top-dressing, because larvae readily move into aerification holes (this advice is from Indiana and the Midwest).
  • After mowing in areas where you have seen moths or damage, collect the clippings, which in North Carolina may help remove eggs.

Check the lawn edges on a regular schedule in warm weather, because early detection keeps a small patch from turning into a stripped area.

Common Questions

Do Cutworms Kill Grass Roots?

They feed on stems and blades near the soil rather than the roots, so grass often recovers if the feeding stops and the lawn is cared for properly.

Why Do I Only Find Damage in the Morning?

Cutworms chew at night and burrow into thatch or soil by day, so the damage is visible while the caterpillars are hidden.

Can Moths in the Yard Mean Cutworms Are Coming?

Mottled brown or gray-brown moths near the lawn may be the adults that lay eggs on grass blades. Spotting them is a cue to scout the turf for chewed patches.

Crane Fly Larvae in Lawn: How to Spot Them and Get Rid of Them

Crane Fly Larvae in Lawn: How to Spot Them and Get Rid of Them

Pull back a patch of thin, yellowing turf in early spring and you may find gray-brown, legless grubs curled in the thatch and near the soil surface. Those are crane fly larvae, and they feed on grass roots and crowns. Telling them apart from other grubs, and knowing when they are worth treating, saves you from needless work.

Signs of Crane Fly Larvae in a Lawn

Crane Fly Larvae in Lawn on a lawn

Larvae hide below the surface, so the lawn offers a clue and the soil confirms it.

  • Dig into a thinning patch and you may find a tough, gray to brown, legless grub, 1-1.25 inches long once mature, with no obvious head.
  • Dying patches of turf are most noticeable in March and April, right when the lawn should be greening up.
  • The thinning tends to show up in damp spots, since larvae do very well in wet soil.
  • Weeds move into the dead patches as the grass gives way.
  • Gray to brown pupae, about 1 inch long, may turn up in the soil, and they do not feed.

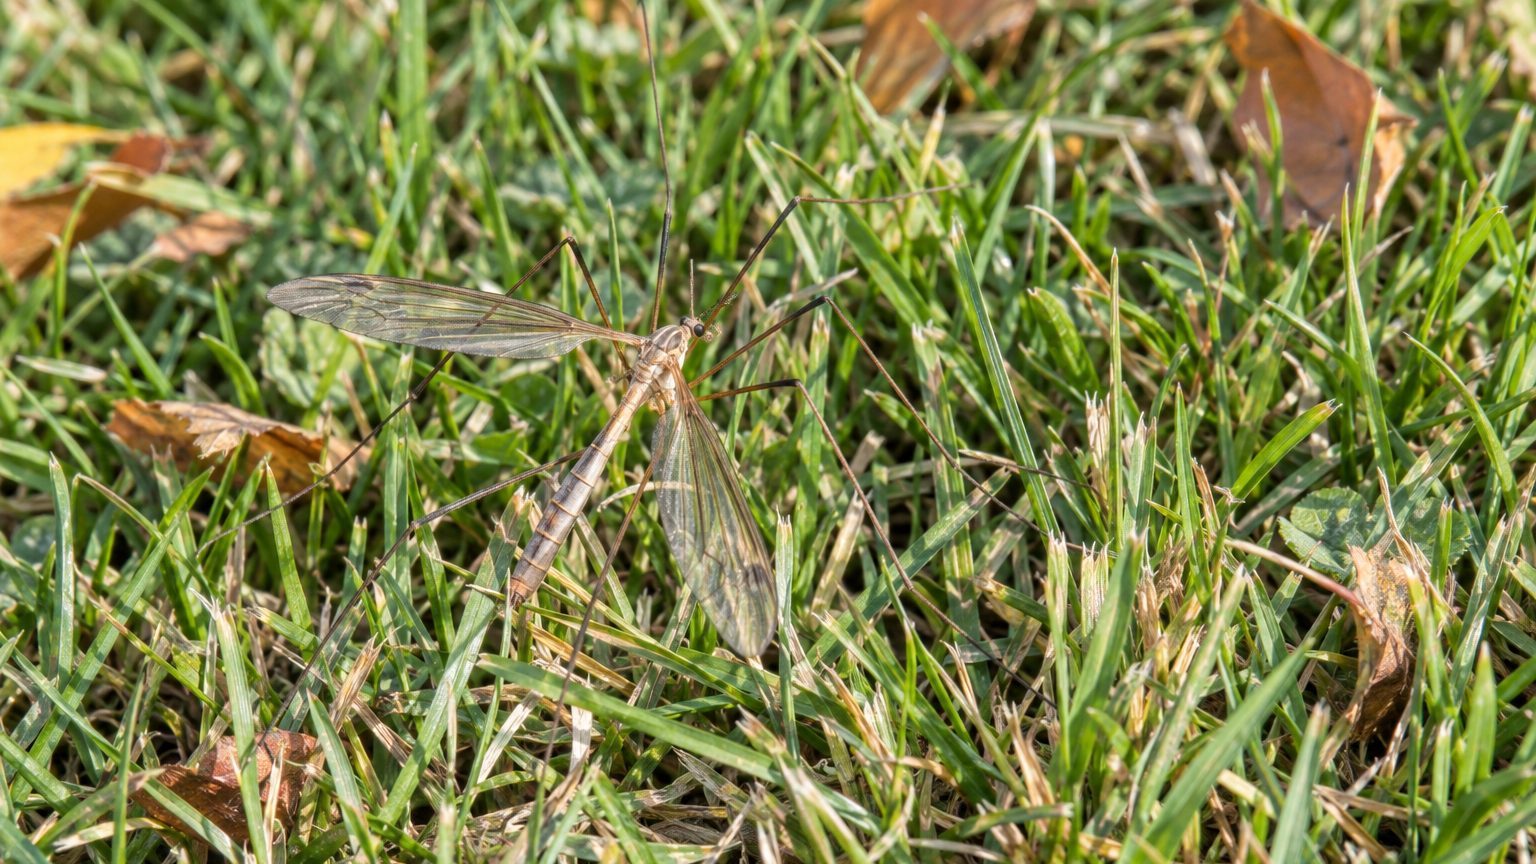
Adults look like oversized mosquitoes at roughly 0.5 inches long, but they do not bite and do not harm the grass.

Lawn Damage Mistaken for Crane Fly Larvae

Several other problems leave tan, thin turf in spring. Confirm what you see aboveground with what you find when you dig.

Digging a small square of sod helps settle these questions.

Looks like How to tell them apart
Winter dieback or snow mold Matted, straw-colored or grayish patches right after the snow melts, and the soil below holds no grubs when you turn it over.
White grub damage Turf that peels back like a loose carpet, and the grubs underneath are C-shaped with visible legs, unlike the legless gray crane fly larva.
Drought or compaction stress Dry, hard ground in the sunniest or most trampled spots, while crane fly thinning favors the wet areas.

Dog urine spots can also pass for crane fly damage, though they usually show a dark green ring around a dead center and no grubs in the soil.

When Crane Fly Larvae Damage Shows Up

The cause is the larval stage of the insect, which feeds on grass while it lives underground. In the Pacific Northwest, larvae are in the soil from early October until the following September, which is 11 months of the year, so the feeding is long even if the damage stays hidden for much of it.

Life-cycle timing varies by region. In Illinois, adults appear during summer, eggs hatch in the fall, and the insect overwinters as a larva. In Colorado, adults mate and lay eggs in turfgrass soon after emerging in late summer and fall, so the next generation starts feeding before winter.

Moisture decides where the trouble lands. Eggs and larvae need high moisture to survive, and most species breed in aquatic or semi-aquatic habitats. Low spots and lawns that stay soggy are favorable habitat, while improving drainage makes consistently wet areas less favorable to crane flies. Large populations combined with wet conditions are what turn a nuisance into thinning and bare patches.

How to Get Rid of Crane Fly Larvae

Start by confirming the problem and counting, since light feeding often needs no treatment at all.

  1. Dig a section of sod 1 foot long, 1 foot wide and 1 inch deep with a square-end shovel, as is advised in the Pacific Northwest, so you see what is living in the root zone.
  2. Count the larvae in that square foot, because in healthy, well maintained turf in Colorado the treatment threshold is 20 larvae per square foot.
  3. Skip treatment if the count is below your local threshold, since larval feeding is usually a nuisance with no significant injury.
  4. In Illinois, reduce moisture by avoiding watering when the lawn is already damp, because eggs and larvae need high moisture to survive.
  5. Improve drainage in areas that stay wet, as crane flies thrive in wet soils and drier ground discourages them.
  6. Reseed the bare patches once the larvae are under control, so weeds do not take over the dead spots.

If the count is high, your state extension office can tell you which treatments are approved where you live and what timing suits your local cycle.

How to Prevent Crane Fly Larvae

Prevention is mostly about keeping the top layer of soil on the dry side during the season when adults are laying eggs.

  • Check low spots and downspout outlets for standing water, and improve drainage where the ground stays soggy.
  • From Memorial Day to Labor Day, water in the Pacific Northwest with 0.25 inch four times per week, a total of 1 inch, rather than frequent light sprinkling.
  • In the Pacific Northwest, mow once a week to a height of 2 to 3 inches to keep the turf dense.
  • In Colorado, hold back extra irrigation in late summer and fall, when adults emerge and lay eggs in turfgrass.
  • In early spring, walk the lawn and look for thin, damp patches so you can dig and count before the damage spreads.

Healthy, dense turf tolerates the larvae that do show up far better than a thin, stressed lawn.

Common Questions

Are Crane Flies Harmful to People or Pets?

No. The adults look like large mosquitoes but do not bite, and the larvae stay in the soil. The only damage is to the turf.

Will Crane Fly Larvae Kill a Healthy Lawn?

Usually not. Feeding is generally a nuisance, though large populations combined with wet conditions can cause thinning and larger bare patches.

Do Adult Crane Flies in the House Mean the Lawn Has Larvae?

Not by itself. Adults near lights do not by themselves confirm a lawn infestation. Check a thin patch by turning over the sod and counting what you find before deciding anything.

The almanac, state by state. Every date on this site comes from a state’s own frost facts and its extension service’s calendar — and says where it comes from.